 International
 Singapore
 Malaysia
 Thailand
 Vietnam
Your shopping cart is empty!
")
IRIV PiControl hands-on using Node-RED in Industry 4.0 (13 tutorials)
- Abdulrahman Alhamed
- 23 Mar 2024
- Tutorial
- 1859
This concise guide covers powering up, connecting to the demo network, and navigating the monitoring dashboard.
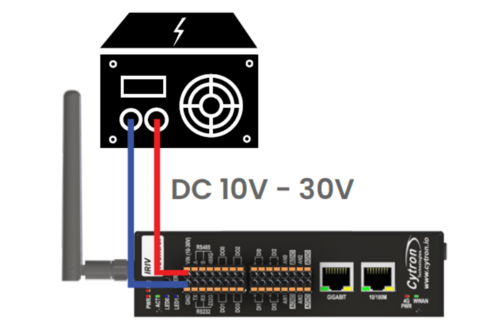
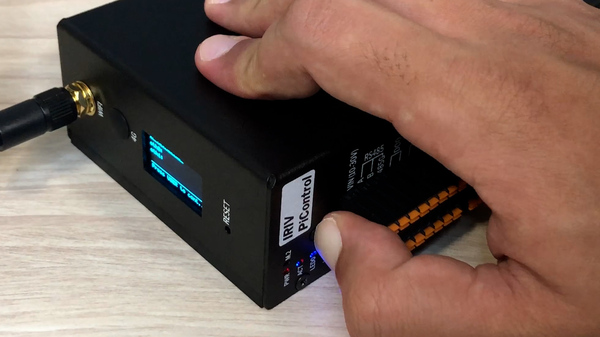
1# Powering Up
To power up IRIV PiControl you have two options. The first method involves using a power supply with a voltage range of DC 10V-30V and a current of 0.3A, connected to terminal 1. Alternatively, you can power it up through a USB-C power supply with a minimum output of DC 5V and 1.5A.
a) Terminal 1 (DC 10V - 30V, 0.3A).
b) USB-C (DC 5V, 1.5A minimum).
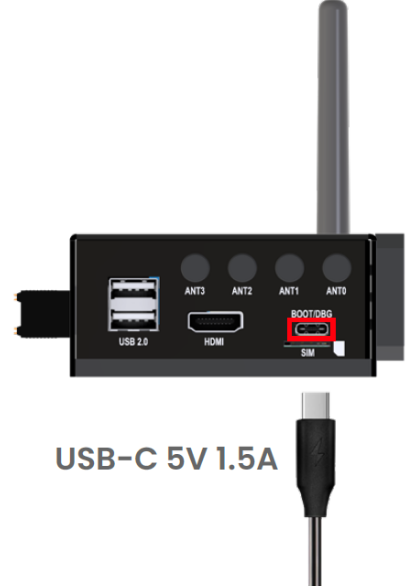
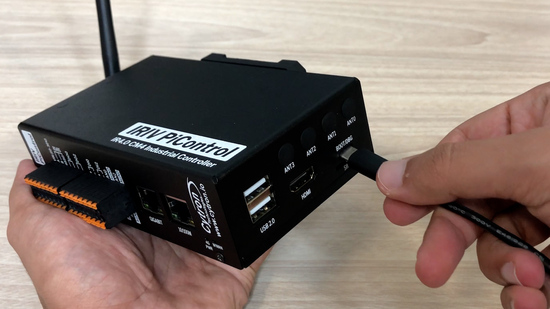
In this guide, we'll utilize a USB-C power supply. Connect the cable to the USB-C port, and the IRIV PiControl will initiate. Allow a few seconds for the OLED display to activate.

2# OLED Display
The first screen on the OLED display provides important information about the model and variant, shown like this:
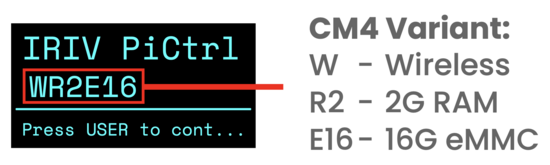
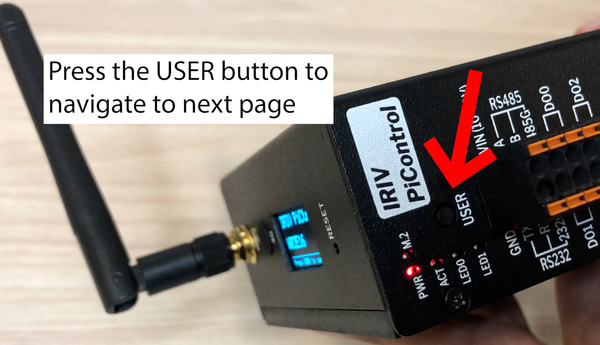
Press the user button to navigate to the next page.
3# Access Dashboard
IRIV will boot into ‘Access Point Mode’. This means that IRIV will act as an access point. You can connect to its local network using any computer or smartphone.
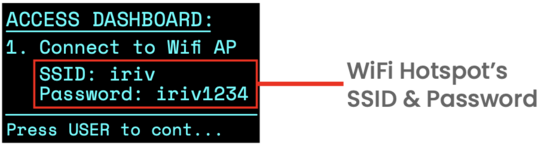
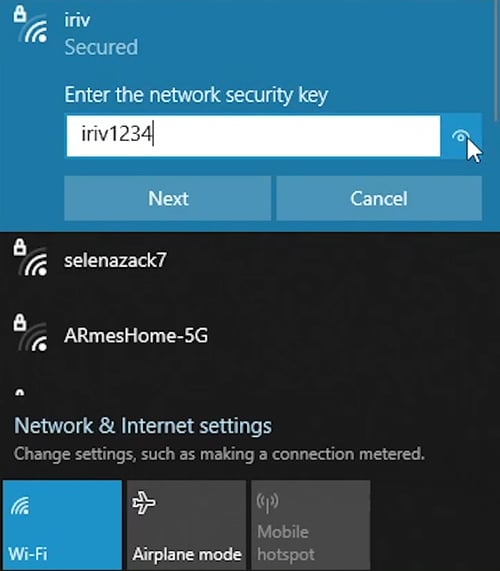
Connect to the ‘iriv’ network. The ‘iriv’ network will prompt you to enter 8 digits pin by default. Click ‘Connect using a security key instead’. Now, enter the password for the 'iriv' network, which is 'iriv1234.'
Note: ‘IRIV Demo’ network is a local area network created by a normal access point device. Thus, it does not have an internet connection.
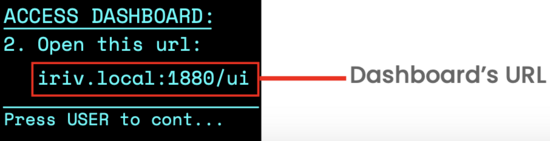
Open an internet browser on your device and type: iriv.local:1880/ui
You should be able to see the IRIV PiControl Monitoring Dashboard.
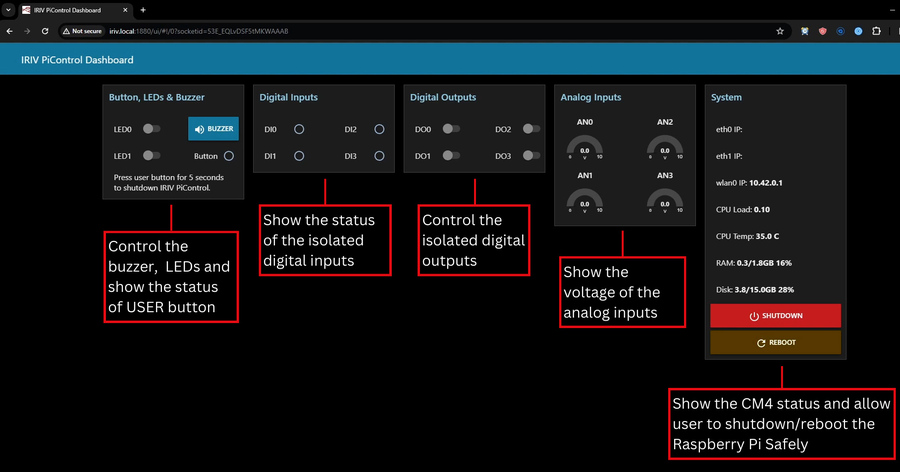
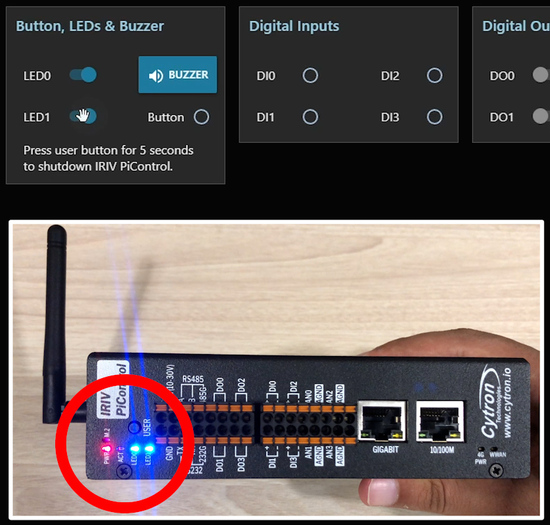
Feel free to play around with control panel of the button, LEDs and buzzer etc.
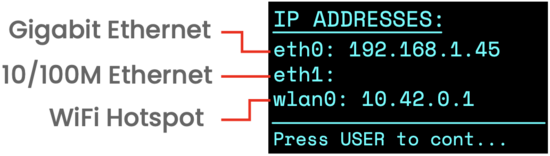
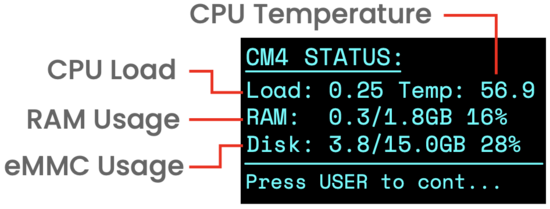
4# IP Addresses and CM4 status
Press the USER button to navigate to IP addresses page and CM4 status.
5# Shutting Down Safely
Press and hold the USER Button for 5 seconds; the buzzer will sound, and IRIV PiControl will shut down. Alternatively, you can also turn it off using the dashboard.
Hardware Components

IRIV PiControl - IR4.0 CM4 Industrial Controller
RM1,345.00++
x 1 unit(s)