 International
 Singapore
 Malaysia
 Thailand
 Vietnam
Your shopping cart is empty!

IRIV PiControl - Accessing Raspberry Pi Console
- Abdulrahman Alhamed
- 28 Jan 2024
- Tutorial
- 405
Welcome to the IRIV PiControl tutorial, where we'll guide you through essential steps for accessing the Raspberry Pi terminal. In this tutorial, we'll cover two methods: accessing the console via SSH and utilizing the serial port. Additionally, we'll show you how to disable the Demo Dashboard and connect your IRIV to a WiFi router. Let's dive in and make the most of your IRIV PiControl experience!
Method 1: Access Console Via SSH
Start by powering up IRIV PiControl
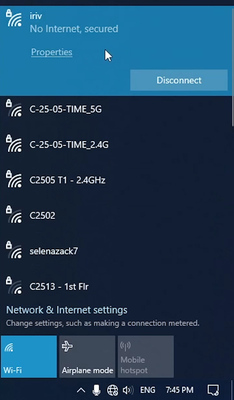
Make sure you are connected to the ‘IRIV Demo’ network.
If you're unfamiliar with the process, refer to the previous tutorial: (IRIV PiControl hands-on using Node-RED in Industry 4.0)
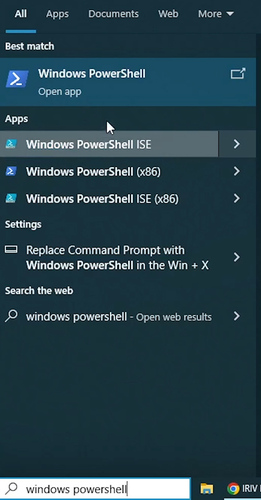
Open Windows Command Prompt or Windows Powershell
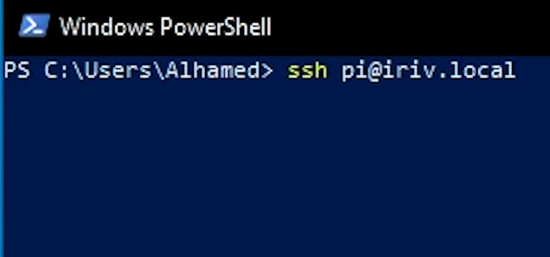
Type in: ssh username@network.address
in our case the command should be like this: ssh pi@iriv.local
The default password is: raspberry
Type the password and press Enter
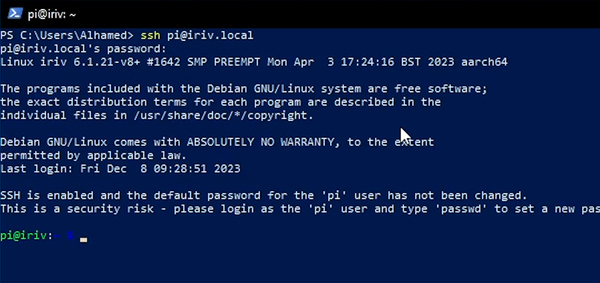
Now, you are successfully connected to the IRIV PiControl terminal.
Method 2: Access Console Via Serial Port
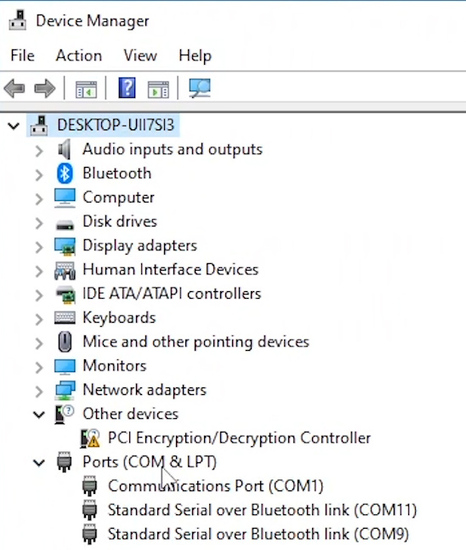
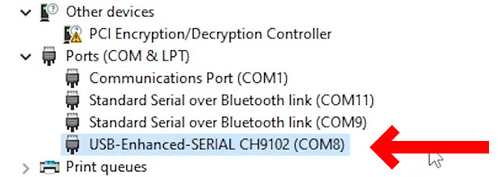
Open Device Manager and locate the Ports list
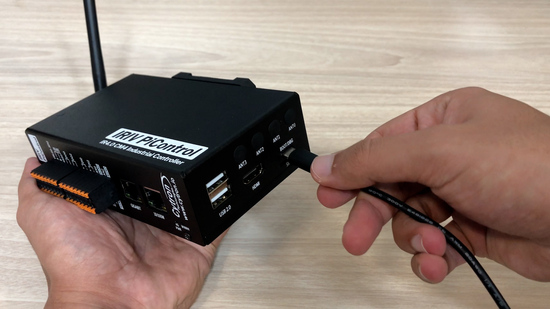
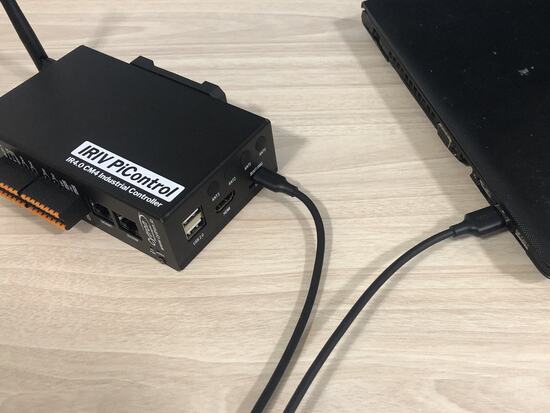
To proceed, power off IRIV PiControl by pressing and holding the USER button for 5 seconds. Once powered off, disconnect the USB-C power supply cable.
After that, take a USB-C cable designed for data transfer and connect one end to the USB-C port on IRIV PiControl and the other end to your laptop or PC.
A new COM port should be detected
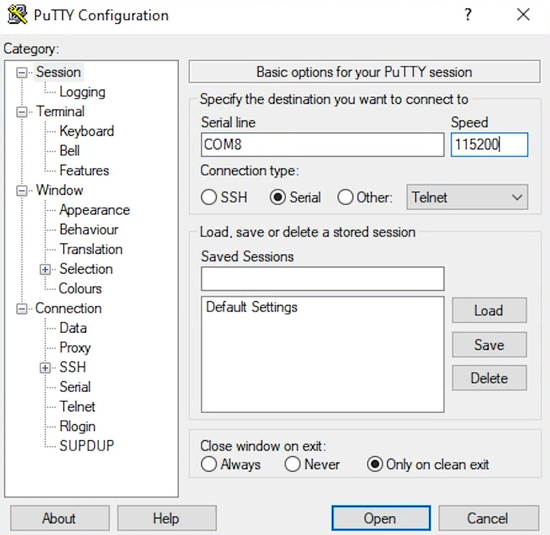
Use a terminal software such as Putty to connect to this COM port.
for the Connection type, select (Serial)
type in the detected PORT (COM8)
and change the baudrate speed to 115200
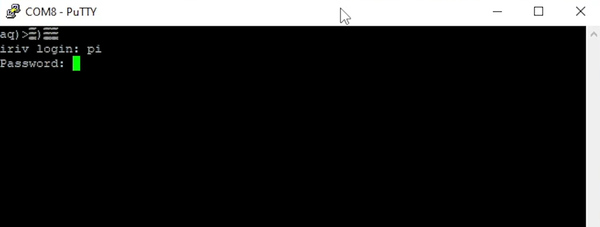
Press Enter, then use the following credential to login
Username: pi
Password: raspberry
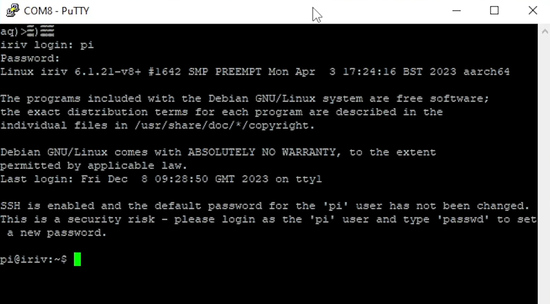
Now, you are successfully connected to the IRIV PiControl terminal
Disable the Demo Dashboard & WiFi AP
To proceed and prepare the IRIV to be ready for your use we need to disable Demo Mode and set up WiFi.
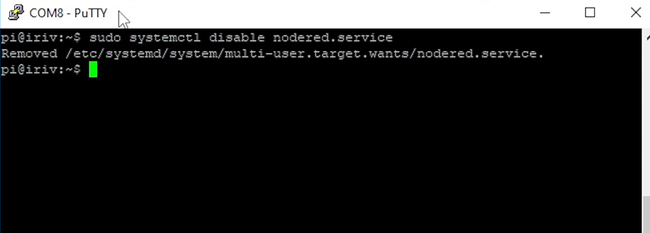
Run this command from the console to disable the autorun service for Node-RED:
sudo systemctl disable nodered.service
Once that done, restart your IRIV using the following command:
sudo reboot
Connect WiFi to Router
Run this command to list out the available WiFi network:
sudo nmcli dev wifi list
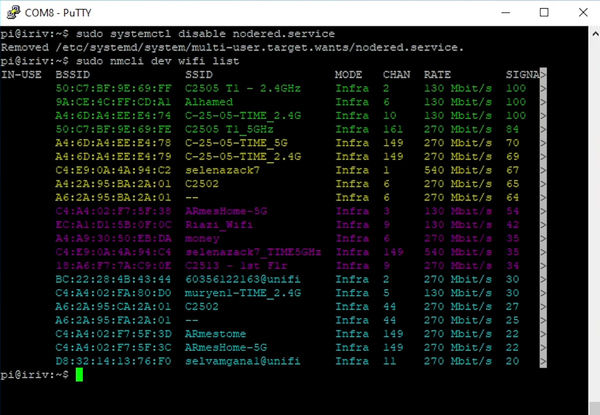
If there are more than 20 WiFi networks in your area, the window will restrict them to only 20.
Press Enter to view the next page of the WiFi list.
Press 'Q' to exit the list and continue with your command.
Use this command to connect to the WiFi network:
sudo nmcli --ask dev wifi connect (SSID)
Replace the (SSID)
Enter the password when prompted.
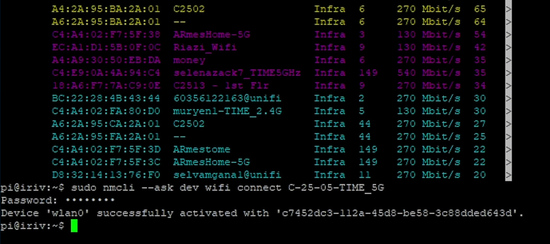
IRIV has connected to WiFi successfully.
Hardware Components

IRIV PiControl - IR4.0 CM4 Industrial Controller
RM1,345.00++
x 1 unit(s)