 International
 Singapore
 Malaysia
 Thailand
 Vietnam
Your shopping cart is empty!

IRIV PiControl - OLED Display With Node-RED
- Abdulrahman Alhamed
- 05 Mar 2024
- Tutorial
- 282
Hi and welcome back again to another tutorial on using IRIV PiControl with Node-RED. In this tutorial, we will learn how to work with the OLED display.
In the palette, you will notice a specific section of nodes designed to work with OLED, making the process straightforward.
Let's explore some of these nodes to get a better understanding of their usage.
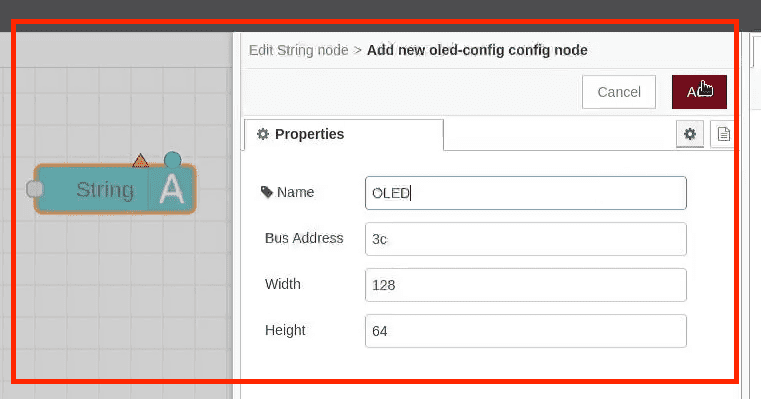
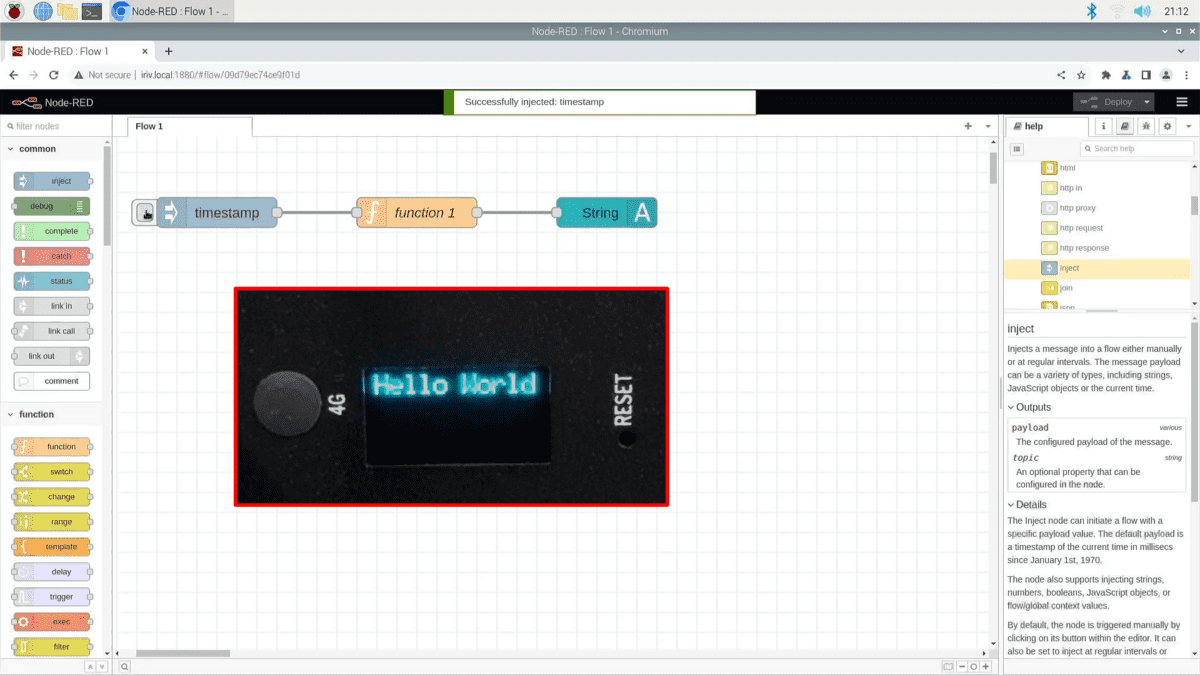
We will start with the String node. Drag it to the workspace, then open the properties and set the Bus Address to "3c".
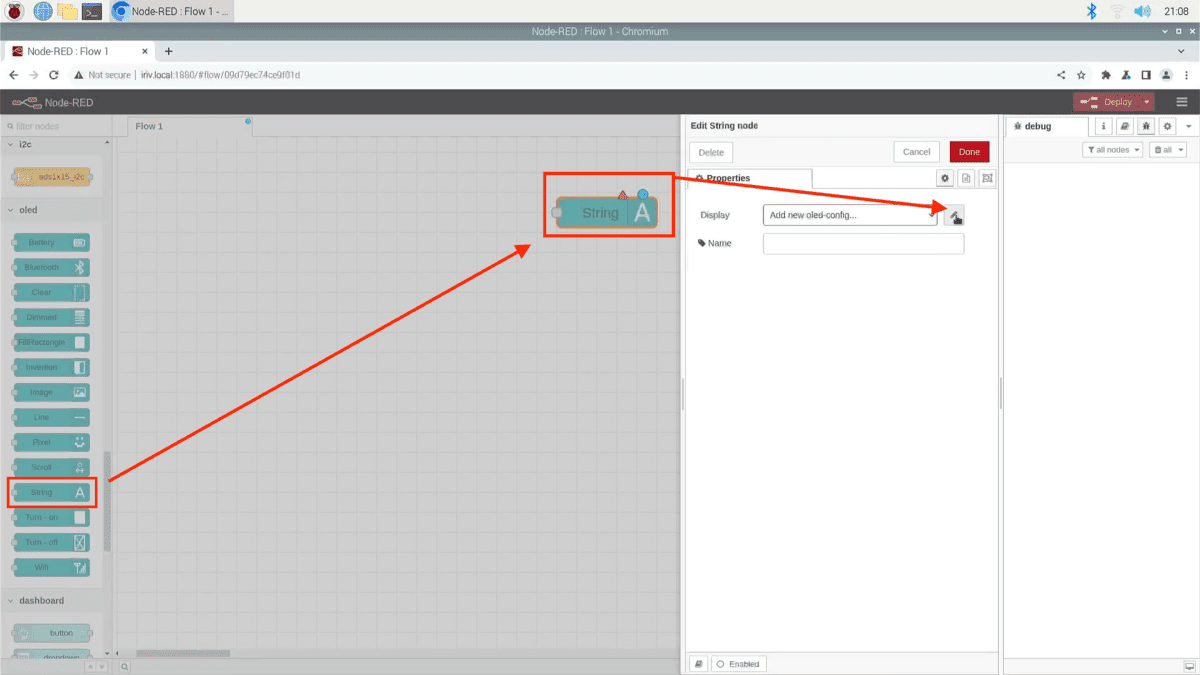
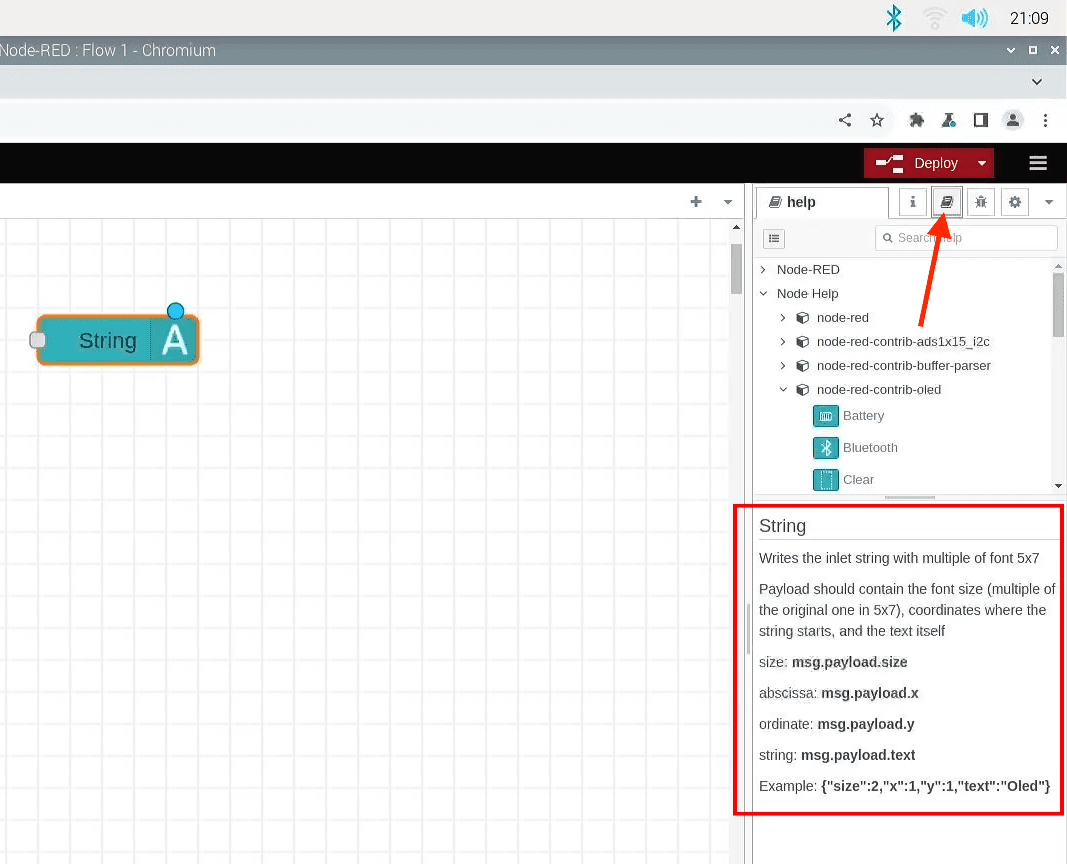
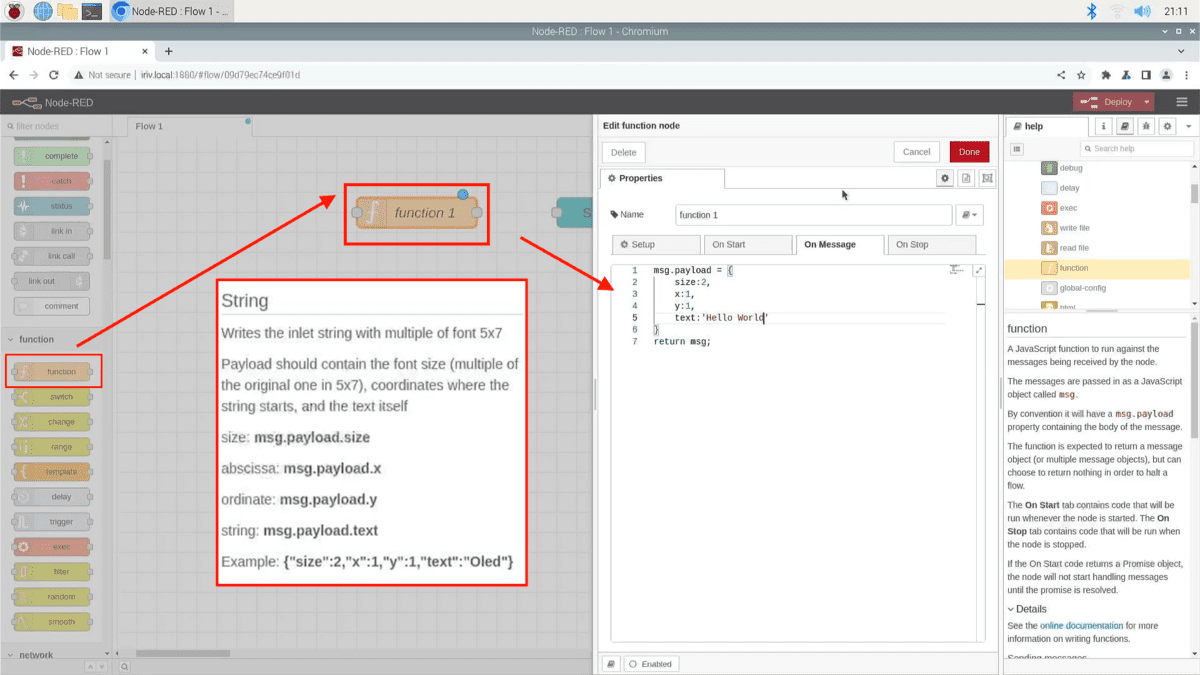
Then click on the 'Help' icon to learn how to use this string with the function node. As you can see, we need to set a "Payload" to the following parameters. Let's use the provided example.
Drag a function node, open its properties, and write this code to activate the "String" node.
Of course, you can adjust the parameters as you like, including the text message.
Click done, and now drag an Inject node to the workspace, and connect all of them together this way.
Click on Deploy, and then press the Inject node. Now you will see the OLED display the text message.
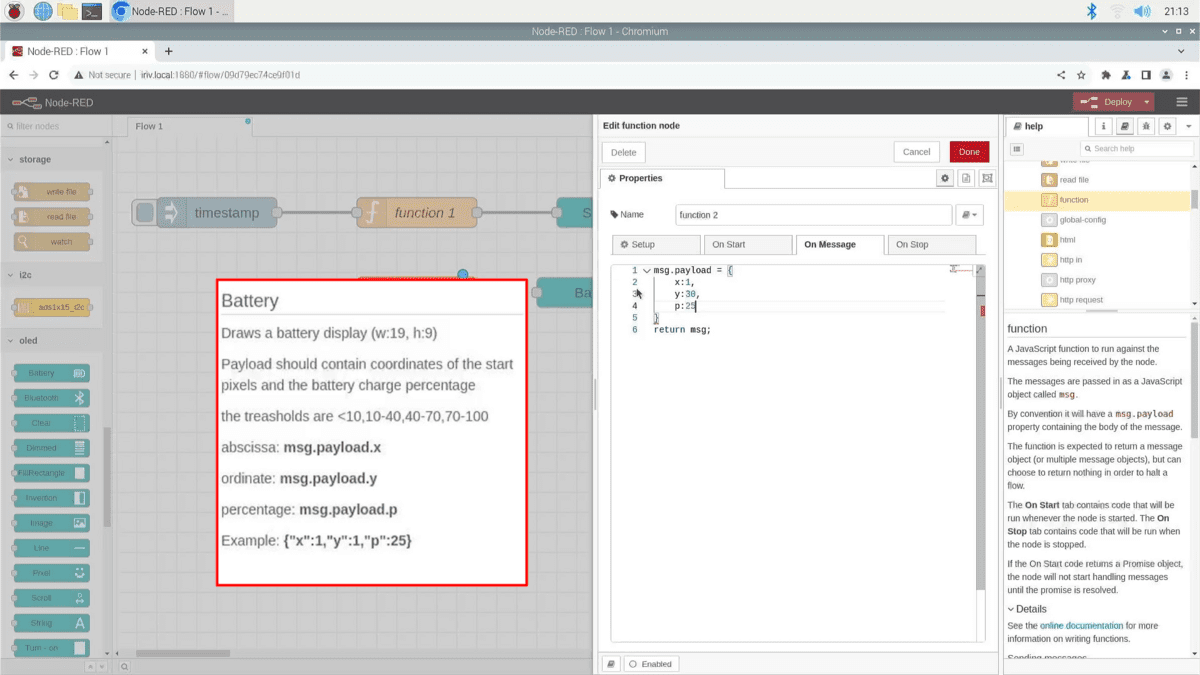
You can try other OLED nodes using the same principles. For example, let's see how we can draw a battery display on the OLED using the battery node.
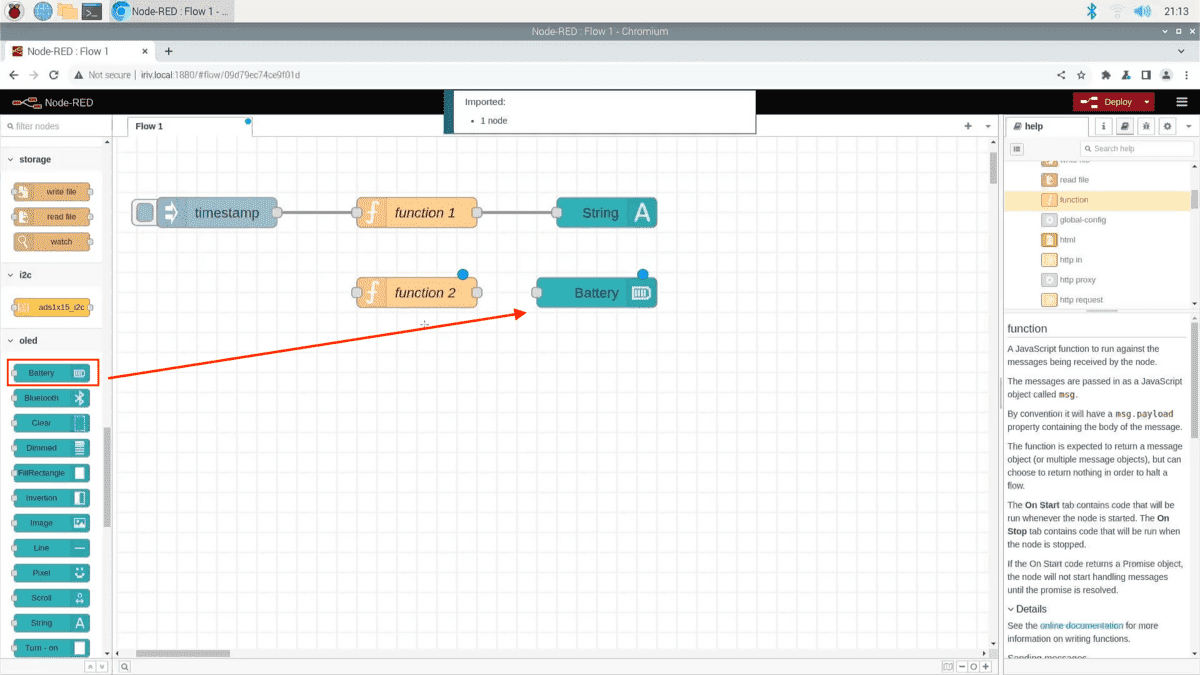
From the help window, you will see how this node works. Basically, all you have to do is use the provided example in the function node and repeat the same process.
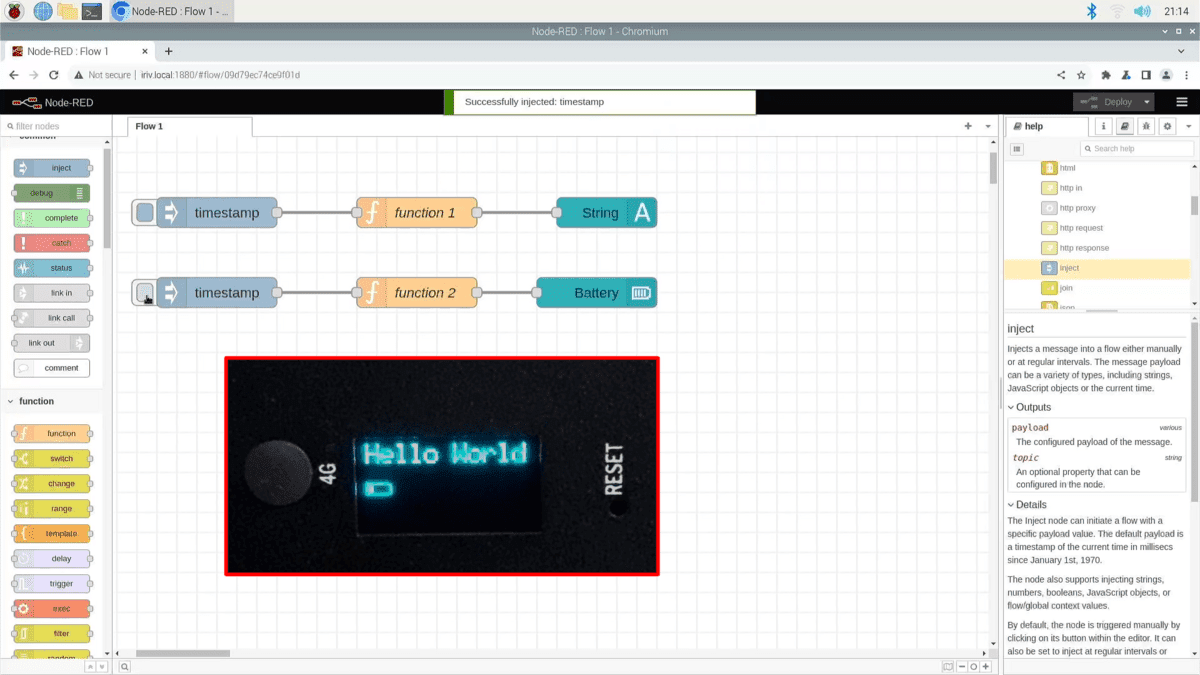
Click Deploy, and press the inject node to see the battery display.
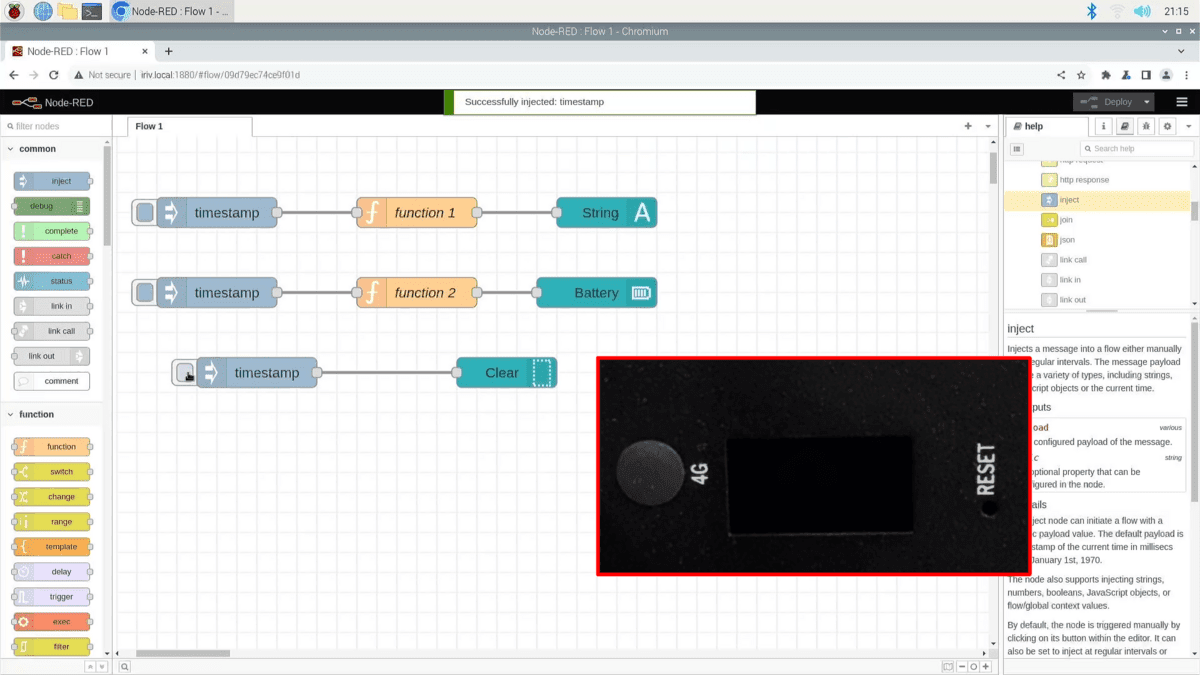
Lastly, let's see how we can use the Clear node to clear all the display. All you have to do is drag this node and connect to it an Inject node, that's it.
Now, once activated, you will notice the OLED has been cleared.
That's all for this tutorial. Go ahead and try out the other OLED nodes. Thanks for reading, and stay tuned for more exciting tutorials.
Hardware Components

IRIV PiControl - IR4.0 CM4 Industrial Controller
RM1,345.00++
x 1 unit(s)