 International
 Singapore
 Malaysia
 Thailand
 Vietnam
Your shopping cart is empty!

Basic Setup on Ultimaker Cura
- Khairul_Tajudin
- 11 Jan 2024
- Tutorial
- Beginner
- 559
Ultimaker Cura is open source slicing software for 3D Printers. It is commonly used by 3D Printer users nowadays due to compatibility and features that suit most 3D Printers in the Market. In this tutorial, we will learn how to set up and explore each of the features of this software
Installing Software
1. The software installer can be downloaded from Ultimaker Cura Official Website
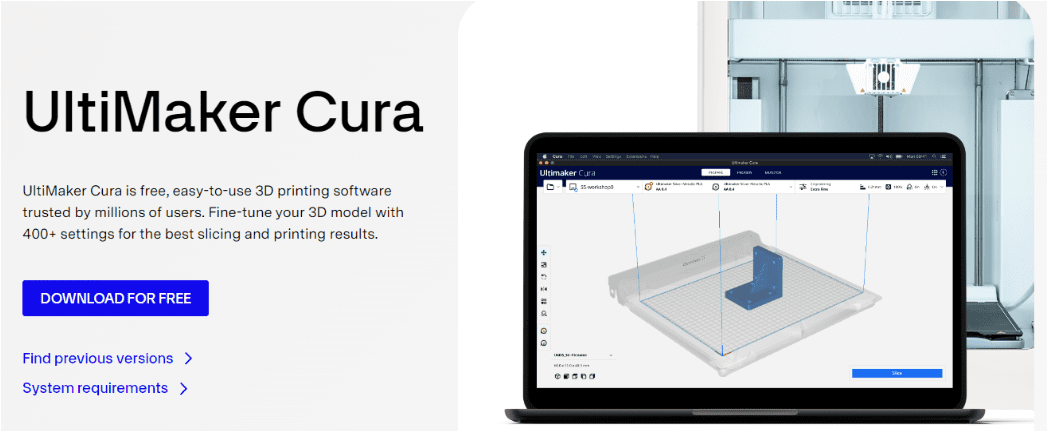
2. It's recommended to download the latest version of this software to make sure it has a latest update on 3D Printer and updated features. It can be downloaded for Windows, Mac OS and Linux.
3. Once downloaded done, we can proceed to software setup
Software Setup
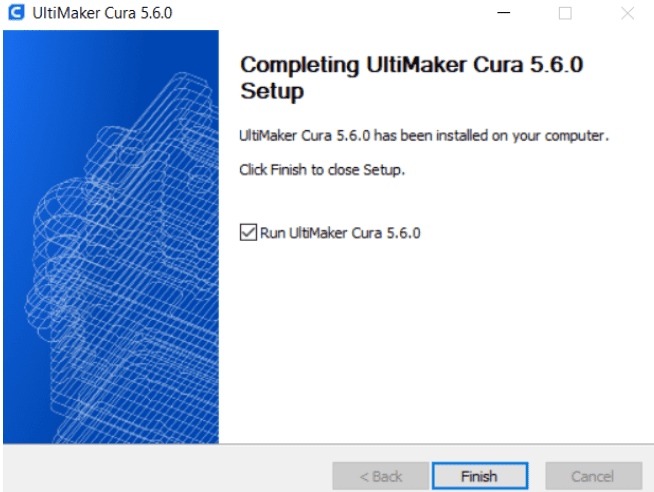
1. Run the installer. Open Ultimaker Cura and click through the welcome screen and agreement. Just do a normal installation into your computer. It may take around 2-3 minutes for installation to finish.
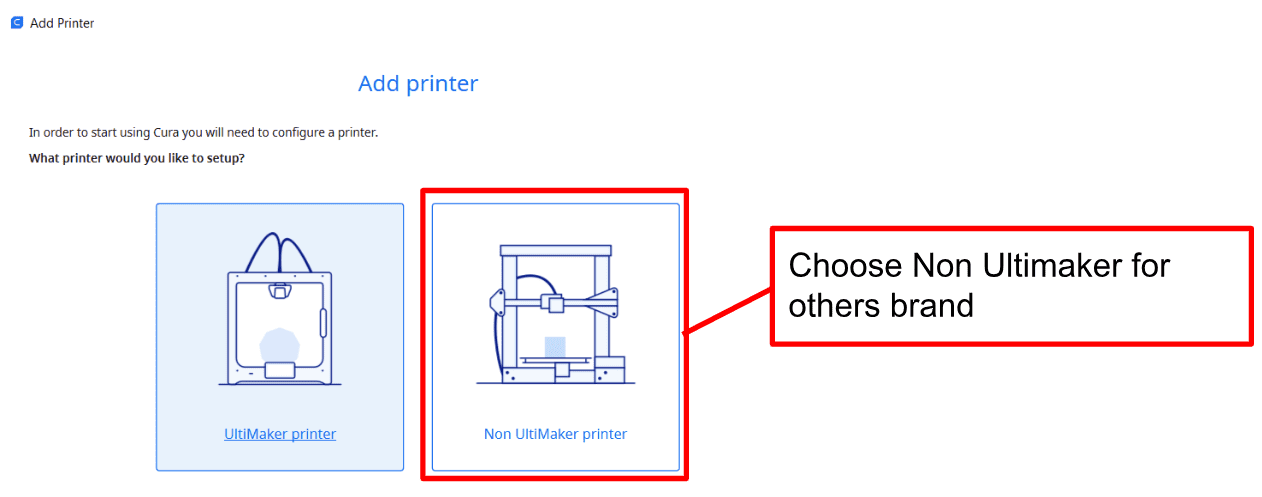
2. To start using Cura Software, we need to add our printer first. For this part, if you use Ultimaker Brand, you may choose an Ultimaker printer. If you use other than Ultimaker brand 3D Printers such as Artillery or Creality, you need to choose Non-Ultimaker Printer.
For our case, we use the Artillery and Creality brand, so we choose Non-Ultimaker Printer
3. Next, we set up our 3D Printer either networked or non-networked printer. If you have a 3D Printer that can connect through the network, you can choose networked printers, otherwise just choose non-networked printer

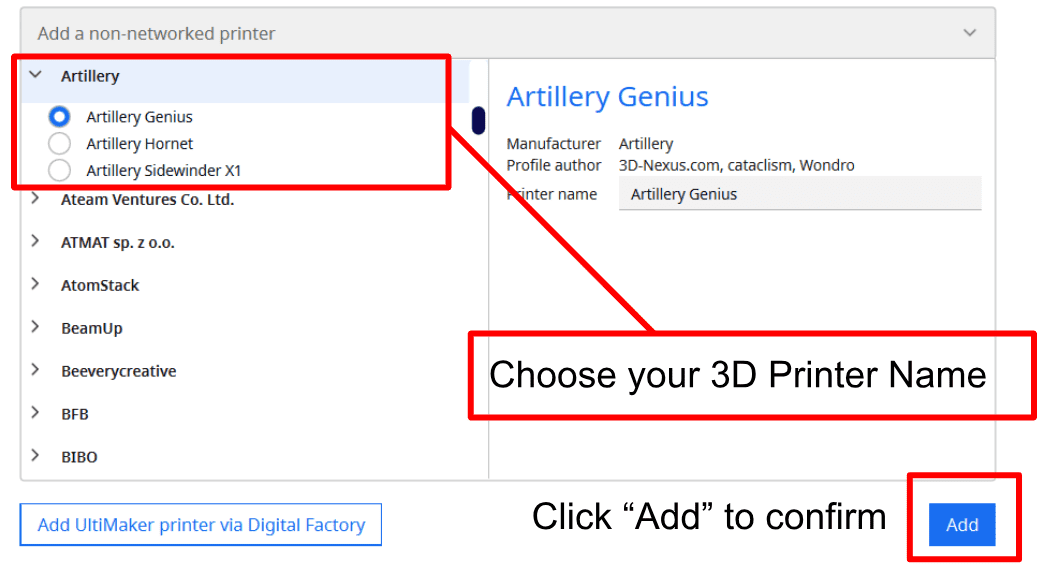
4. Next, we choose our 3D printer brand. In our case, we want to use the Artillery Sidewinder X3 Pro. Based on the latest update on Cura 5.6.0 version, there is no profile for Artillery Sidewinder X3 yet. By referring to the manufacturer guide, we may use the Artillery Genius profile.
If you have another 3D Printer brand, you can pick based on your 3D Printer name. Click “Add” to confirm.
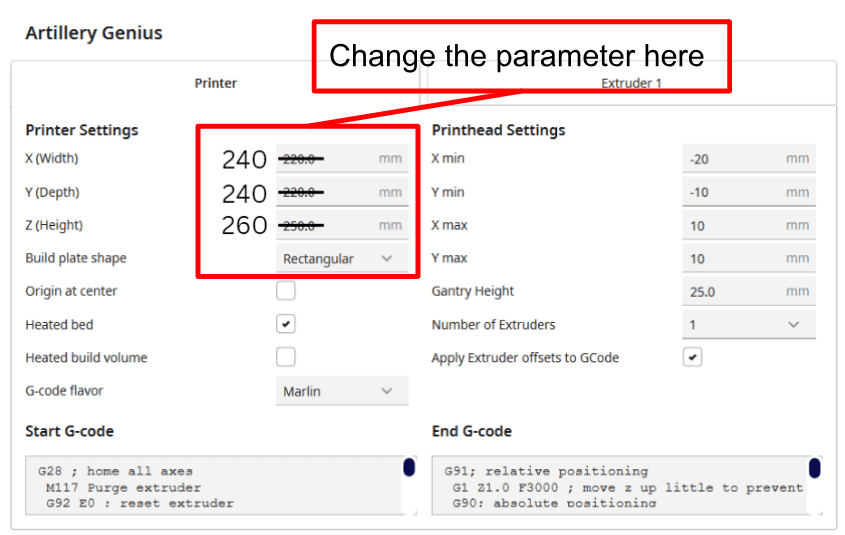
5. From here, we can see the default machine setting. It's important to check the setting for printer size (width, depth and height). Based on specifications from the manufacturer, Artillery Sidewinder X3 Pro size is 240x240x260mm.
So we need to make some adjustments on the size of the printing bed. After the adjustment, click on the “Next” button
Printing Setup (G-Code)
1. Now we can see the interface of the software
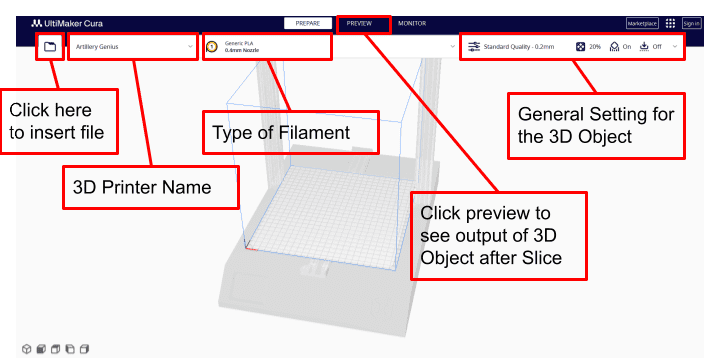
2. After we set up a 3D Printer, we need to set a material that we will use for this 3D Printing. At the top center of the screen, we can set the type of material. PLA Material is material that is commonly used by any 3D Printer user.
We will set Generic PLA Material by using this step. Material > Generic > PLA.
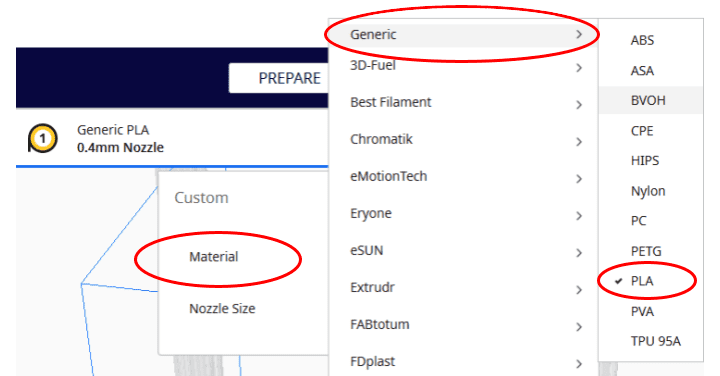
If we want to use another type of material such as PETG or ABS, we can change from this setting. Reference for another type of filament can be check it out on here
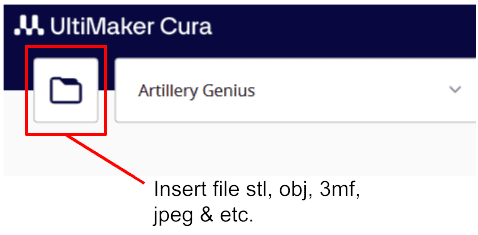
3. Now, we can start importing the file by clicking the “File” icon at the top left corner of the software. The object will be shown on the heat bed.
Notes: Make sure it is in STL format or others compatible format
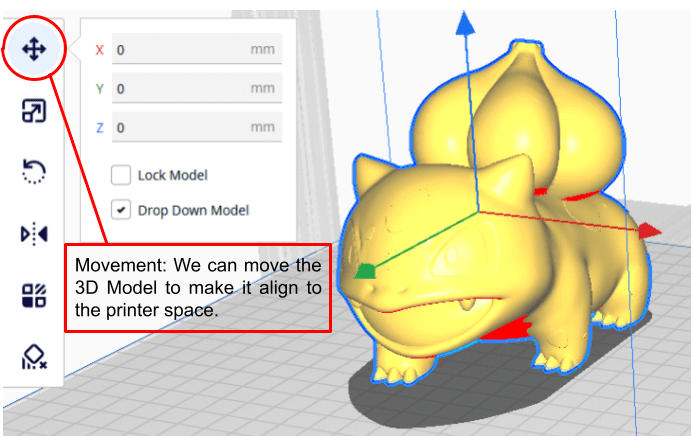
4. After inserting the object, we need to set the position, size, orientation of the 3D Object. Let’s see how to do it.
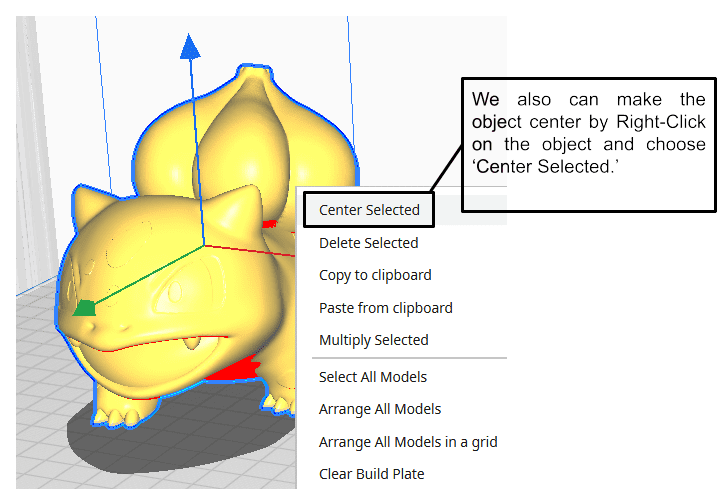
a) Features of Slicing Software: Movement/Position
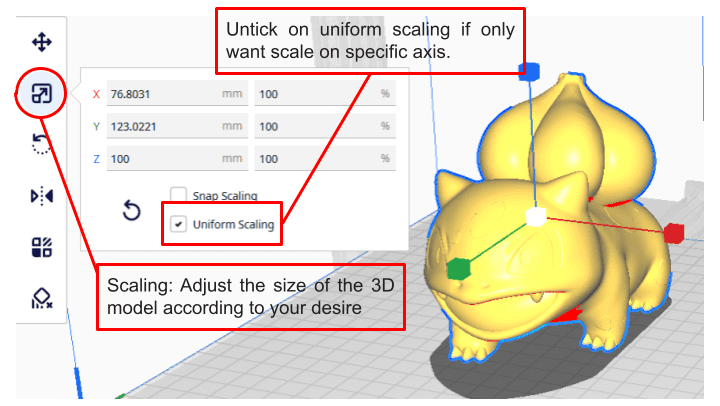
b)Features of Slicing Software: Scaling
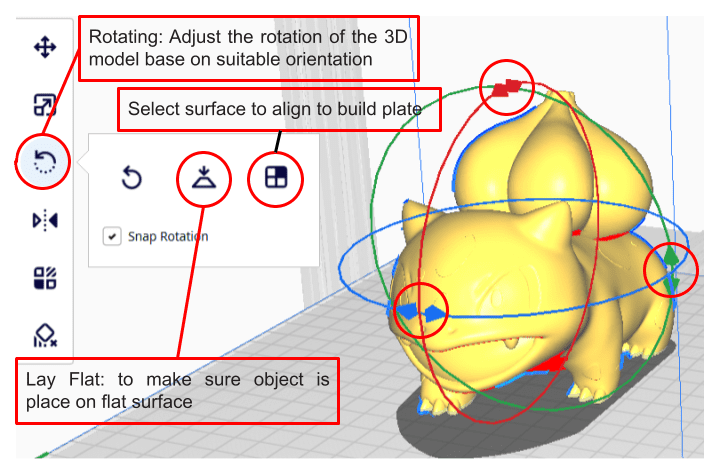
c)Features of Slicing Software: Rotation
5. Next, we will do a general setting for 3D objects. We can adjust the setting by clicking the option on the top right corner.
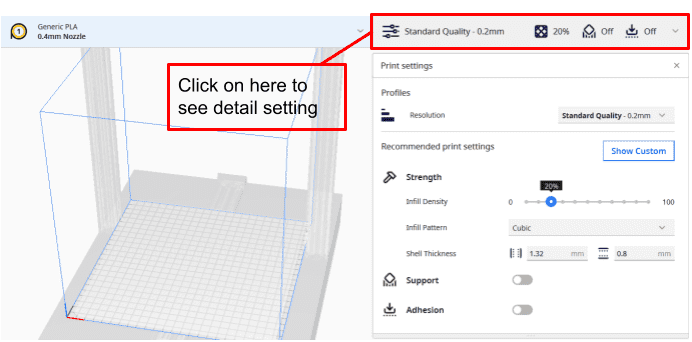
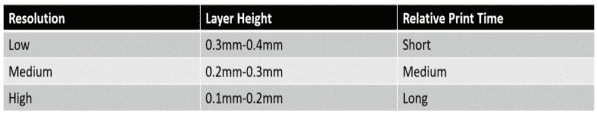
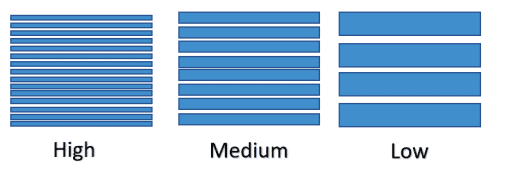
a) Features of Slicing Software: Layer height (Object Resolution)
The resolution of a 3D object is highly dependent on its layer height. Smaller layer heights give high resolution and smooth surface. However, the overall printing time could be more.
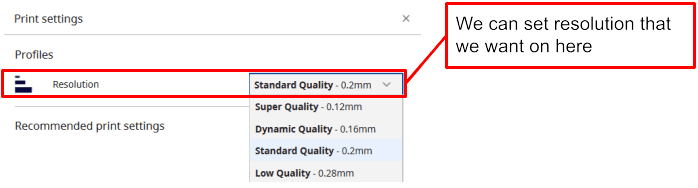
On Cura, we can set this resolution using preset layer height. Scrolling the setting and choose our preferred setting.
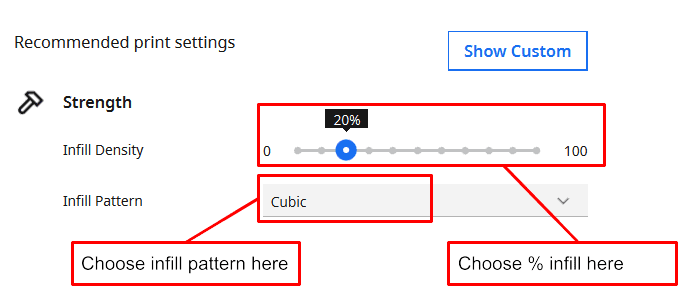
b) Features of Slicing Software: Infill Density & Pattern
Infill density is measured in % percentage. It can range from 0–100%. An object with 0% will have a hollow interior and an object with 100% density will be solid. Objects with high density will have a longer printing time.
Infill density has a variety of patterns depending on usage of the product.In terms of optimal speed and strength honeycomb structure is the best on it.
Let's check it out more detailing on this topic by visiting Infill Tutorial
Other suggestion for specific use is like below:
Functional prints: Cubic, octet, gyroid
Figurine and model prints: Lines
Standard prints: Grid or triangles
Flexible prints: Concentric
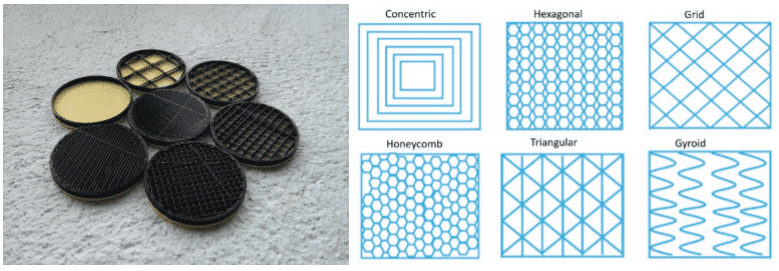
Types/Shapes of Pattern: The design of the infill pattern can have an impact on the strength and flexibility of the 3D prints.
Based on your requirements you can pick the infill % and pattern type.
c) Features of Slicing Software: Support
This feature needs to enable its functionality to support ‘hanging’ objects or surfaces. In the process of 3D printing, one layer is printed over another existing layer. This means every layer needs an underlying layer to support it. If a model has an overhanging part, it still needs a supporting layer. This supporting layer is called the support structure. The support structures are easily detachable post-printing.
To get more clear explaination about support structure, feel free to visit our Support Tutorial
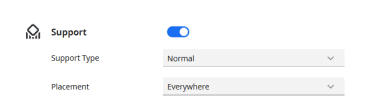
For Support Type, there are two options which are normal and tree support. For tree support we already prepared a special tutorial for you. You can check it out here Tree Support
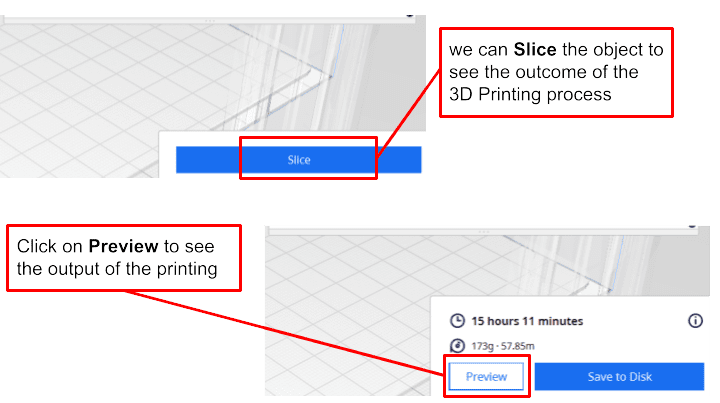
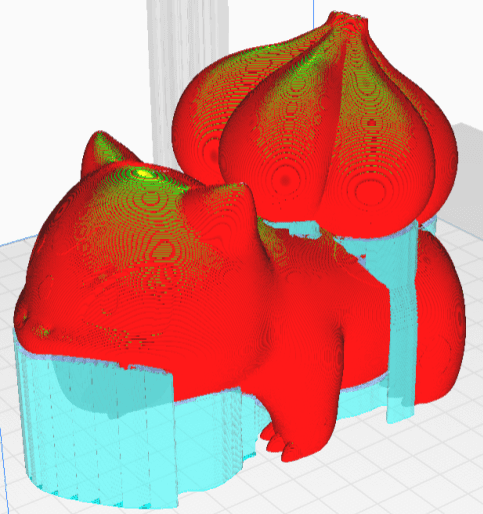
If you want to preview the object with support and without support, you can start to slice the model.
In the picture below, the blue color component is the support structure for the given 3D model.
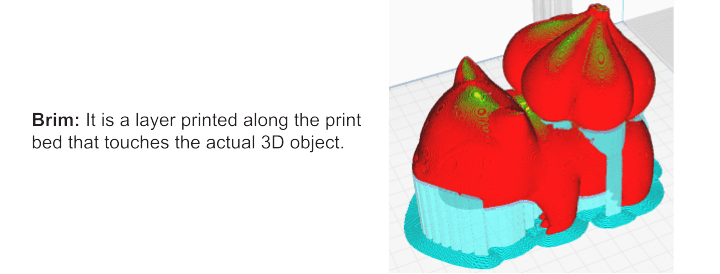
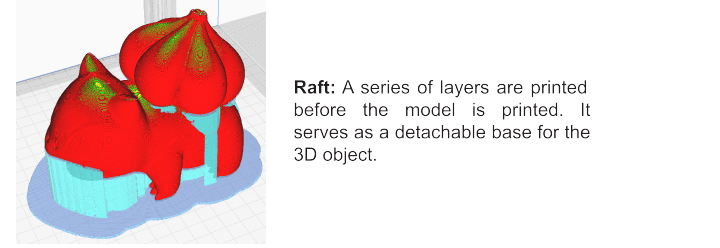
d) Features of Slicing Software: Adhesion
It is common for 3D printed objects to get stuck on their print beds (physically, not in software). To avoid this, the slicer offers some good solutions. It uses some structures that make detachment easier.
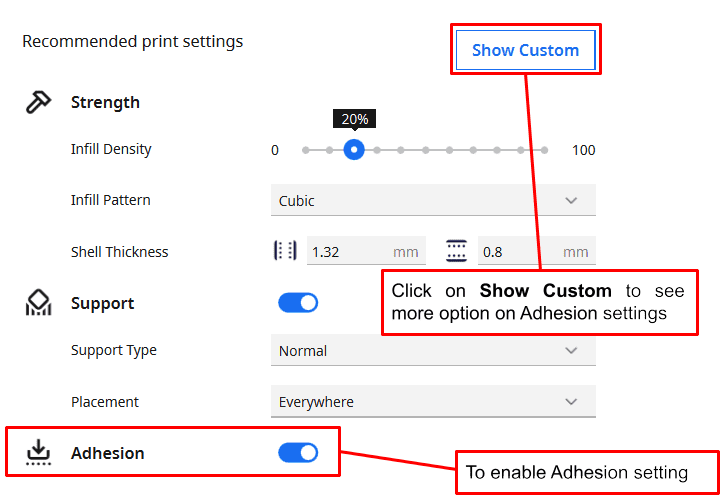
Click on Show Custom to enable more adhesion settings.
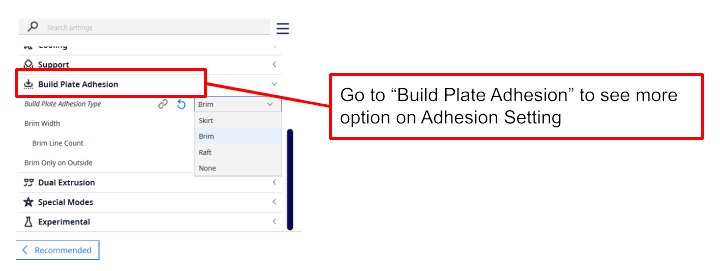
In Cura, there are several type of adhesion setting, let see what we can use for our 3D model. We also already prepare some tutorial for you regarding Adhesion Setting
6. After completing setting all the parameters, we will Slice the object to produce a G-Code file. We also can see the outcome of the 3D Printing process through the Preview pane.
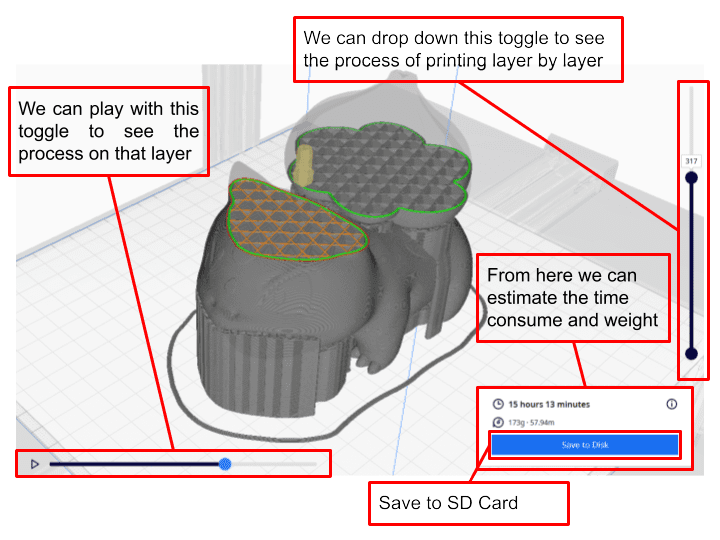
7. Last step to finish the setting is to save the G-Code into your removable drive or SD Card by clicking on Save to Disk. Then you are ready to 3D Print! GoodLuck!
Printing Result:
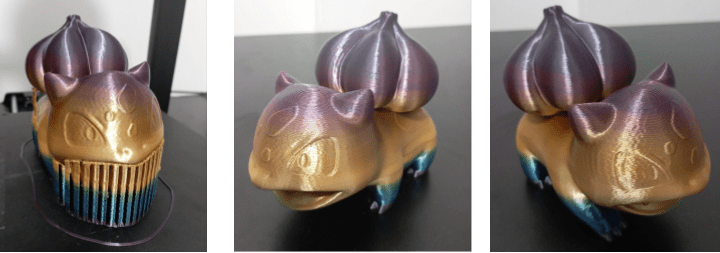
3D Printer: Ender 3 V3 SE
Setting:
Resolution: 0.2mm Layer Height (Standard Quality)
Infill Density: 20%
Infill Pattern: Cubic
Support: On
Build Plate Adhesion: Skirt
Hardware Components

Artillery Sidewinder X2 3D Printer - Partially ...
Discontinued
x 1 unit(s)
 -5%
-5%Artillery Sidewinder X3 Pro 3D Printer + 1KG PLA
RM1,097.00 RM1,150.80
x 1 unit(s)
 -10%
-10%Artillery Sidewinder X3 Plus 3D Printer + 1KG PLA
RM1,497.00 RM1,650.80
x 1 unit(s)
 -7%
-7%Creality Ender-3 V3 SE 3D Printer + 1KG PLA
RM997.00 RM1,072.00
x 1 unit(s)
Related Posts

5 Best Plug-ins for Cura
Ultimaker Cura is a powerful slicing software for 3D printers. It's undoubtedly one of the most popular slicers providing ease of use and flexibility. In addition to that, Cura plug-ins add extra feat..
The Most Common Filament Types and Their Uses
In 3D printing, there are a large variety of printing materials to choose from. Each material/filament has its own unique properties and uses. In this article, we are going to walk you through the mos..
All You Need to Know About Cura Tree Support
Tree support is one type of support structure available in Ultimaker Cura. It saves time and material compared to normal support...
Cura Ironing Feature - Achieve Smooth Top Layers
We will introduce you to a fascinating slicing feature called “Ironing” which allows you to smooth out the top surfaces of our 3D-printed objects...
8 Reasons Why You Should Get a 3D Printer
In this article, we will go through a list of reasons why you should get a 3D printer when you can..