 International
 Singapore
 Malaysia
 Thailand
 Vietnam
Your shopping cart is empty!

Make Turntable using MD10-POT Motor Driver
- Khairul_Tajudin
- 15 Feb 2024
- Tutorial
- Beginner
- 404
Introduction
This tutorial is an application of MD10-POT motor driver that can be used directly from the board without programming. The turntable is produced using the 3D Printing method.
Component List
1. 10 Amp 7V-30V Potentiometer & Switch Control DC Motor Driver (MD10-POT)
2. 12V 75RPM 3kgfcm Brushed DC Geared Motor
3. LIPO Battery 7.4V 900mAH or LiPo Battery 7.4V 450mAH
4. JST RCY Receptacle with Wire 15cm
5. 4x Self Tapping Screw
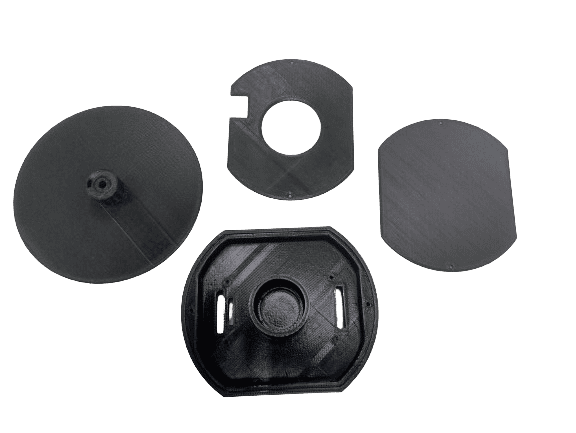
6. 3D Printed Part - Get the STL FILE
Hardware preparation
Step 1: Gather your 3D Printing part. For basic setup on your slicer, you can visit our tutorial.
Settings:
Layer Height - 0.2mm
Infill - 20%
Support - On (for MD10POT Base.STL), Off for others part
Adhesion - Skirt only
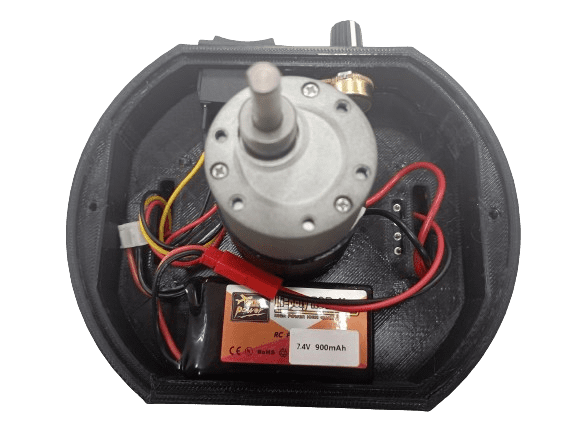
Step 2: Wired your DC Motor with around 10cm length.
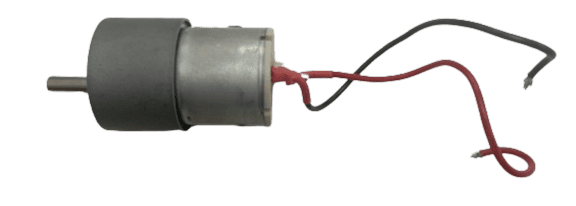
Step 3: Insert DC Motor into the designated area. Insert the wire first and go through the hole provided as shown in the picture. This is to make sure the wiring is in good management.

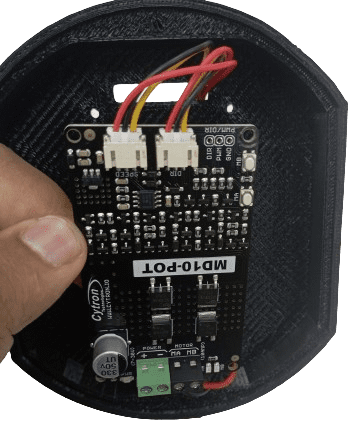
Step 4: Wire from DC Motor was inserted into the MD10-POT through “MOTOR” port
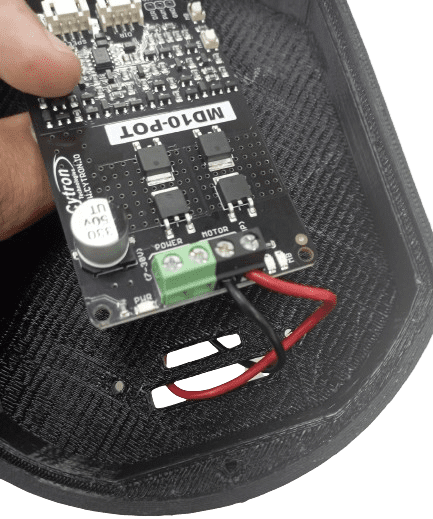
Step 5: For the POWER port, insert the JST connector. Beware of the polarity. RED is +VE terminal, and BLACK is -VE terminal.
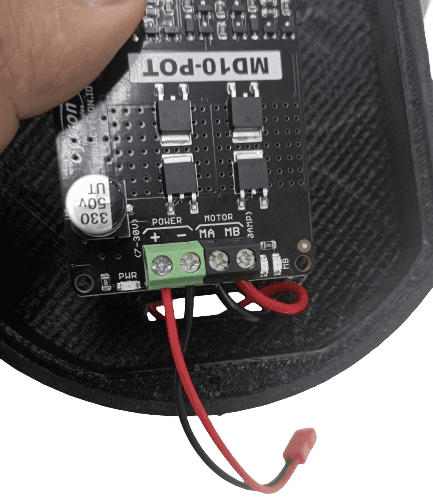
Step 6: Insert Potentiometer and Switch (these two items come together with MD10-POT packaging) into designated slots.
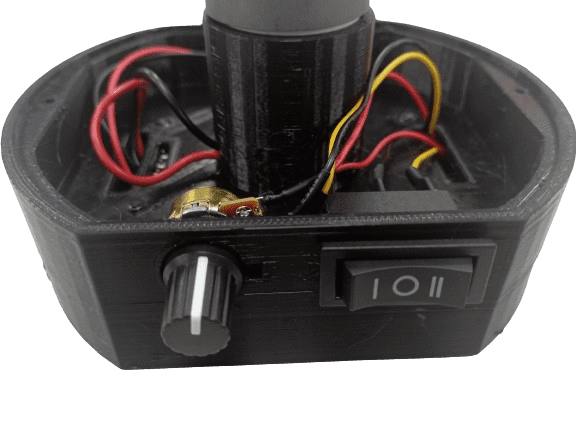
Step 7: Insert potentiometer and switch connector into MD10-POT port.
Step 8: Screw MD10-POT on the robot base using a Self Tapping screw. Arrange also the wiring to make sure it in good wire management.
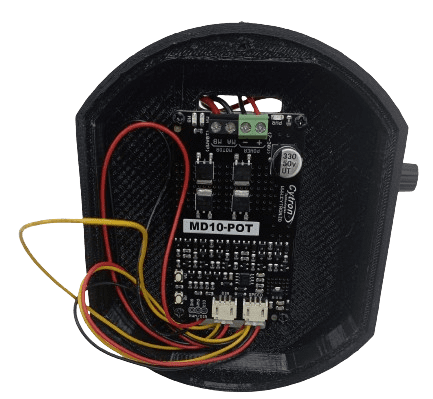
Step 9: Once all the bottom area is finished, put the Bottom cover to protect the board. The cover is push fit type, needs a little force to make it fit.

Step 10: Put the battery inside the upper body base.
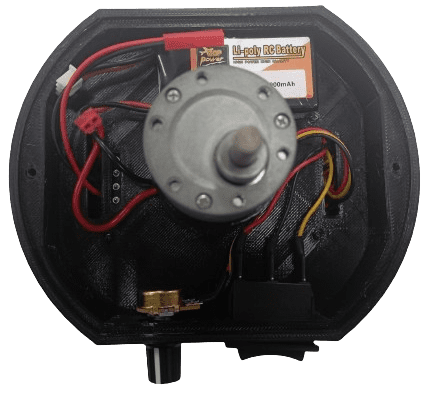
Step 11: Connect the power supply after check all the connections.
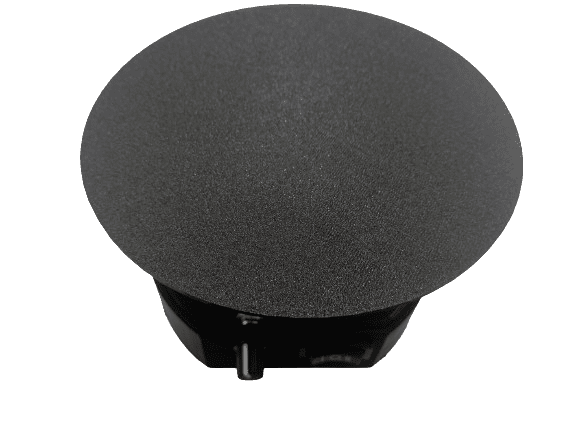
Step 12: Place the top cover on the body base.
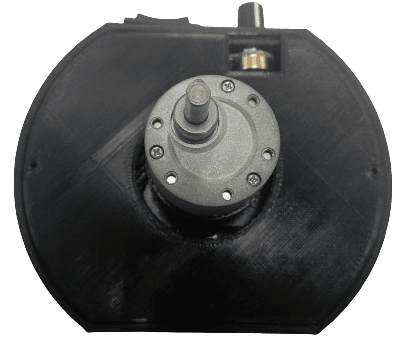
Step 13: Place the platform on the DC Motor shaft.
Step 14: Already done for assembling the turntable. You can start playing with the switch and potentiometer.
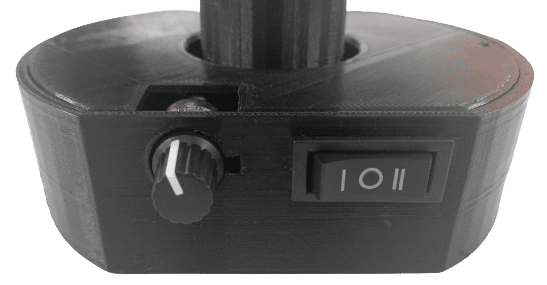
By using switch, you can select either turn the platform into clockwise or anticlockwise
By using Potentiometer, you can adjust the speed of the motor rotation
Step 15: Thank you and enjoy your project!
Hardware Components

x 1 unit(s)
x 1 unit(s)
x 1 unit(s)

x 1 unit(s)