 International
 Singapore
 Malaysia
 Thailand
 Vietnam
Your shopping cart is empty!

IoT Blynk
- Abdul Salam A Haris
- 11 Jul 2023
- Tutorial
- Beginner
- 640
In this tutorial, we'll connect a CircuitPython device to the Blynk IoT platform. Blynk is a cloud-based, hardware-agnostic IoT platform that allows you to control and monitor your IoT projects remotely.
Gathering Credentials
If you are first time using Blynk App feel free to visit this tutorial on How To Get Auth Token From Blynk.
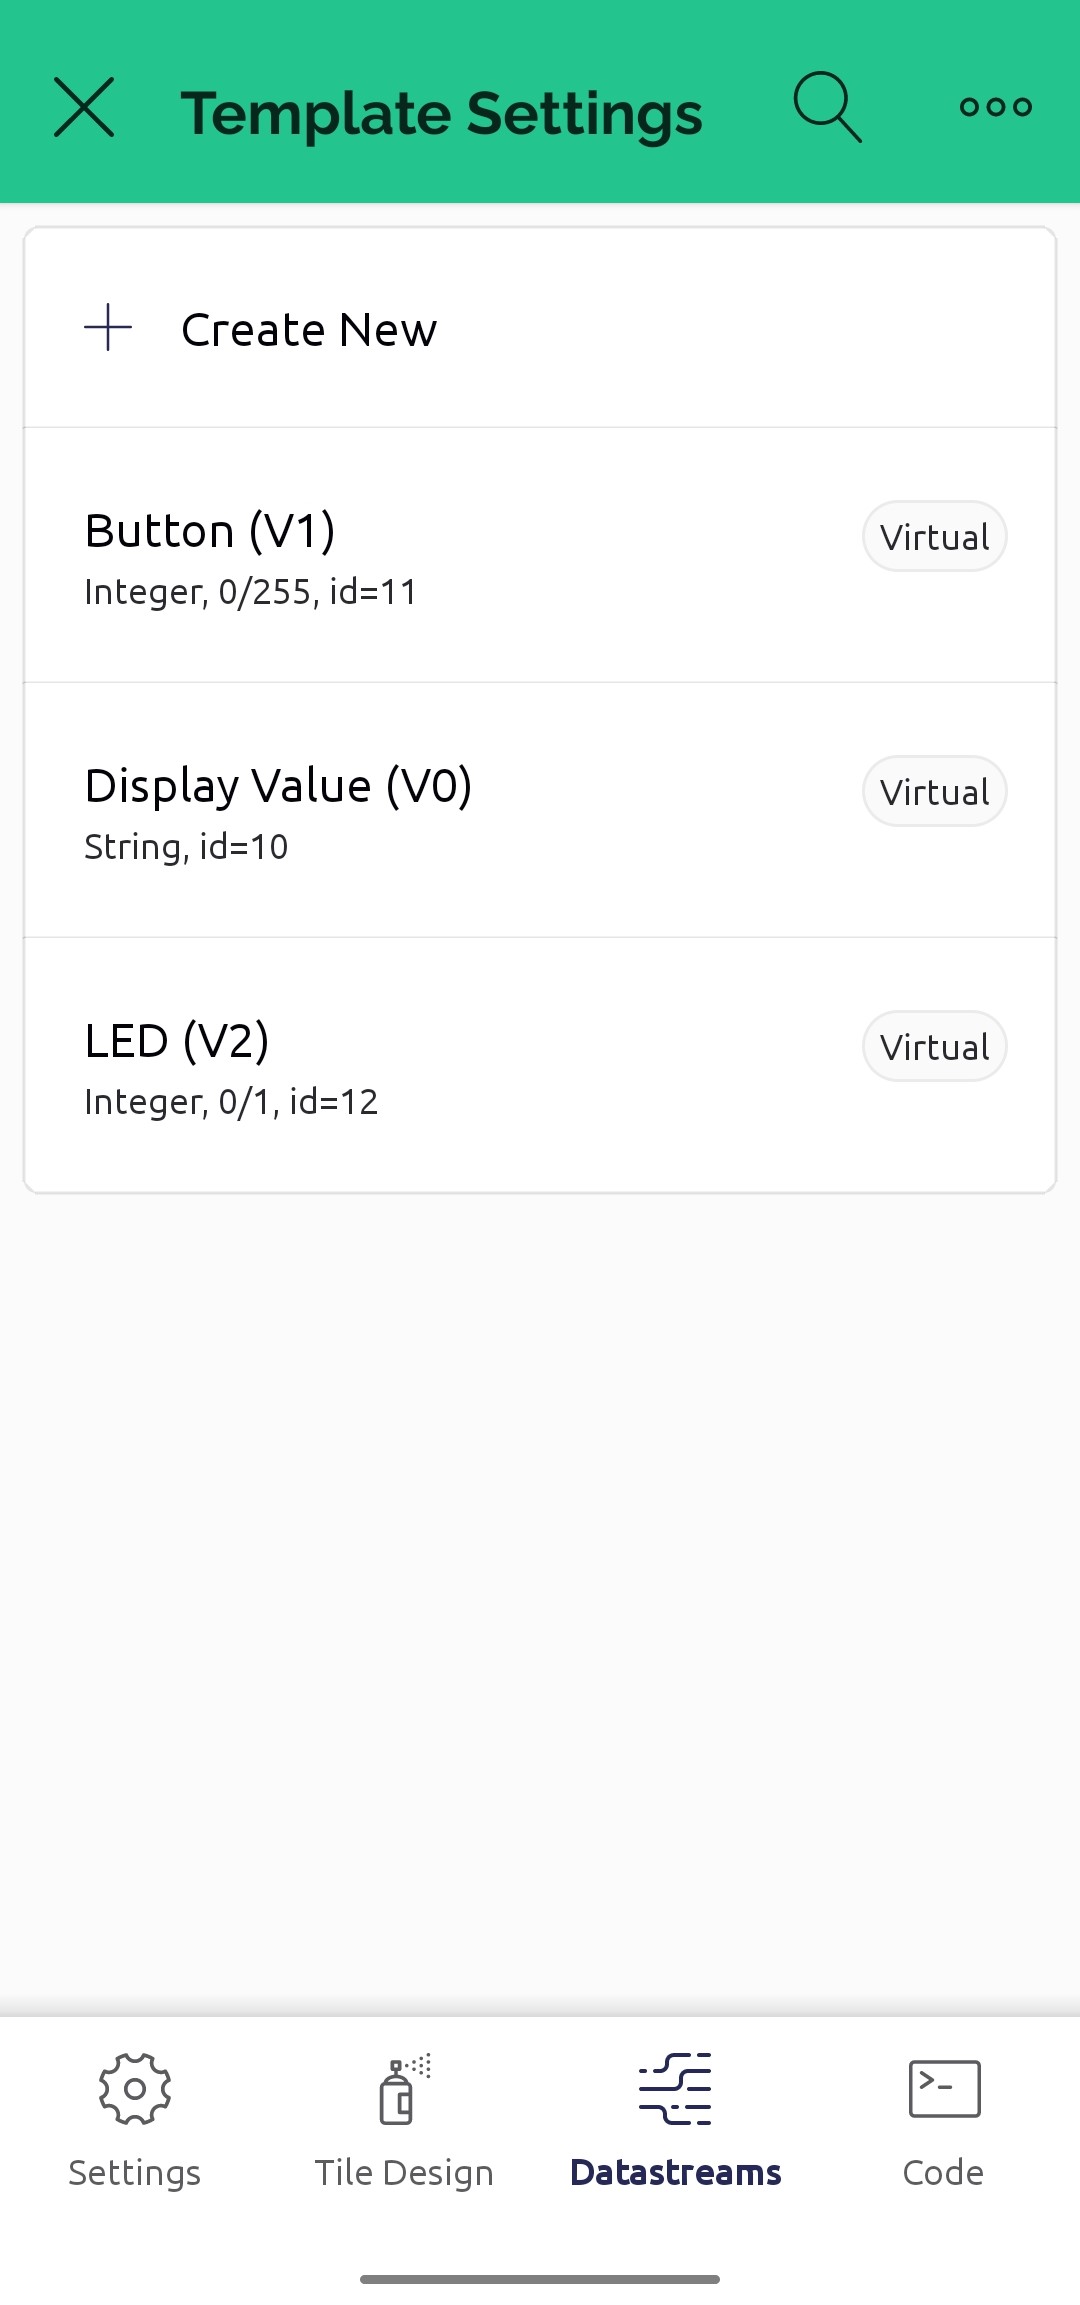
Follow the template settings and widgets as shown below.

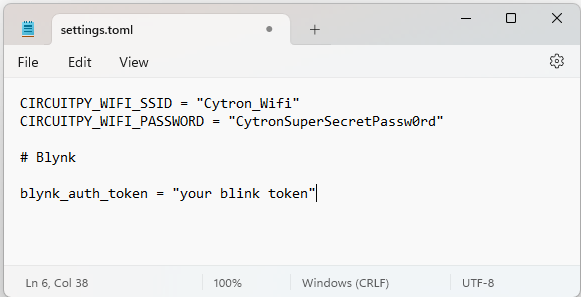
Fill in your Wi-Fi SSID and password, along with the Blynk Auth Token, in the settings.toml file.
The CircuitPython Code
First, you'll need to copy the files from the 'IoT_Blynk' folder on Github and paste them onto your CIRCUITPY drive.
Your CircuitPython script should look like the one provided.
Flash the codes to your Raspberry Pi Pico / Pico W. And your CIRCUITPY drive should look like this:

Library file(s) required:
adafruit_requests.mpy, adafruit_simpleio.mpy
File(s) required:
settings.toml
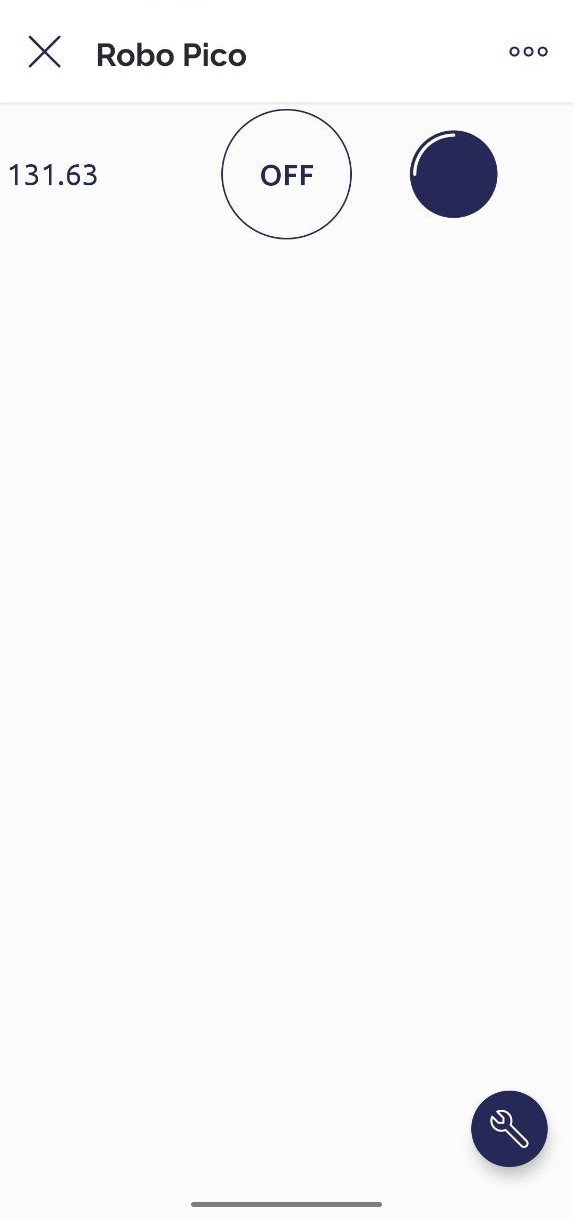
Now, run your script and ensure your device is connected to Wi-Fi. You should be able to control the LED on your device through the Blynk app and see the LED status in the Blynk app update when you press the button on your device. Moreover, you should observe the random values being sent to V0 on the Blynk app.
Congratulations, you've just completed an IoT project using CircuitPython and Blynk! You can modify this setup according to your needs or use it as a base for more complex IoT systems.
Hardware Components

Robo Pico
RM59.60
x 1 unit(s)