 International
 Singapore
 Malaysia
 Thailand
 Vietnam
Your shopping cart is empty!

Getting started with EdgeBox RPi 200 and CODESYS
- Hussien Jawhar Sathik
- 17 May 2023
- Tutorial
- 677
Introduction
In this tutorial, we would like to see how to get started with EdgeBox RPI 200 and CODESYS. Previously we have have seen how to get started EdgeBox RPI 200 and Node-RED. To know more about the EdgeBox RPI 200 can check here. Now let's get started with CODESYS.
What is CODESYS?
CODESYS is a development and runtime system used for programming and controlling industrial automation devices and systems. It is a popular software platform for the development of programmable logic controllers(PLCs) and other automation devices. CODESYS stands for "Controller Development System" and provides a comprehensive set of tools for creating. configuring, and debugging control applications. It is widely used in various industries, inlcuding manufacturing, energy, transportaion, and building automation.
With CODESYS, engineers can develop control applications using the IEC 61131-3 standard, which defines five programming languages: ladder diagram (LD), functional block diagram (FBD), structured text (ST), instructional list (IL), and sequential function chart (SFC). These languages allow for the implemention of complex control logic, data handling, and communication tasks. Moreover the CODESYS development environment includes an integrated development environment (IDE), that enables programmers to write and organize their code, as well as debug and simulate the control application before deploying it to the target hardware.
One of the key features of CODESYS is its platform independence. It supports wide range of hardware platforms from various manufacturers, allowing engineers write code that can be deployed on different devices without significant modifications. This flexibility makes it easier to develop and maintain control applications for different automation systems.
Now let's get started!
Getting Started
The Hardware
For the hardware, we only need the EdgeBOX RPI 200. And the setup is similar to the the getting started with Node-RED
The Software
For the software part, first we need to download and install the CODESYS. The software can be download here. The installation process is quite straight forward. Just follow the instruction. Once the installation process is completed, launch the CODESYS.
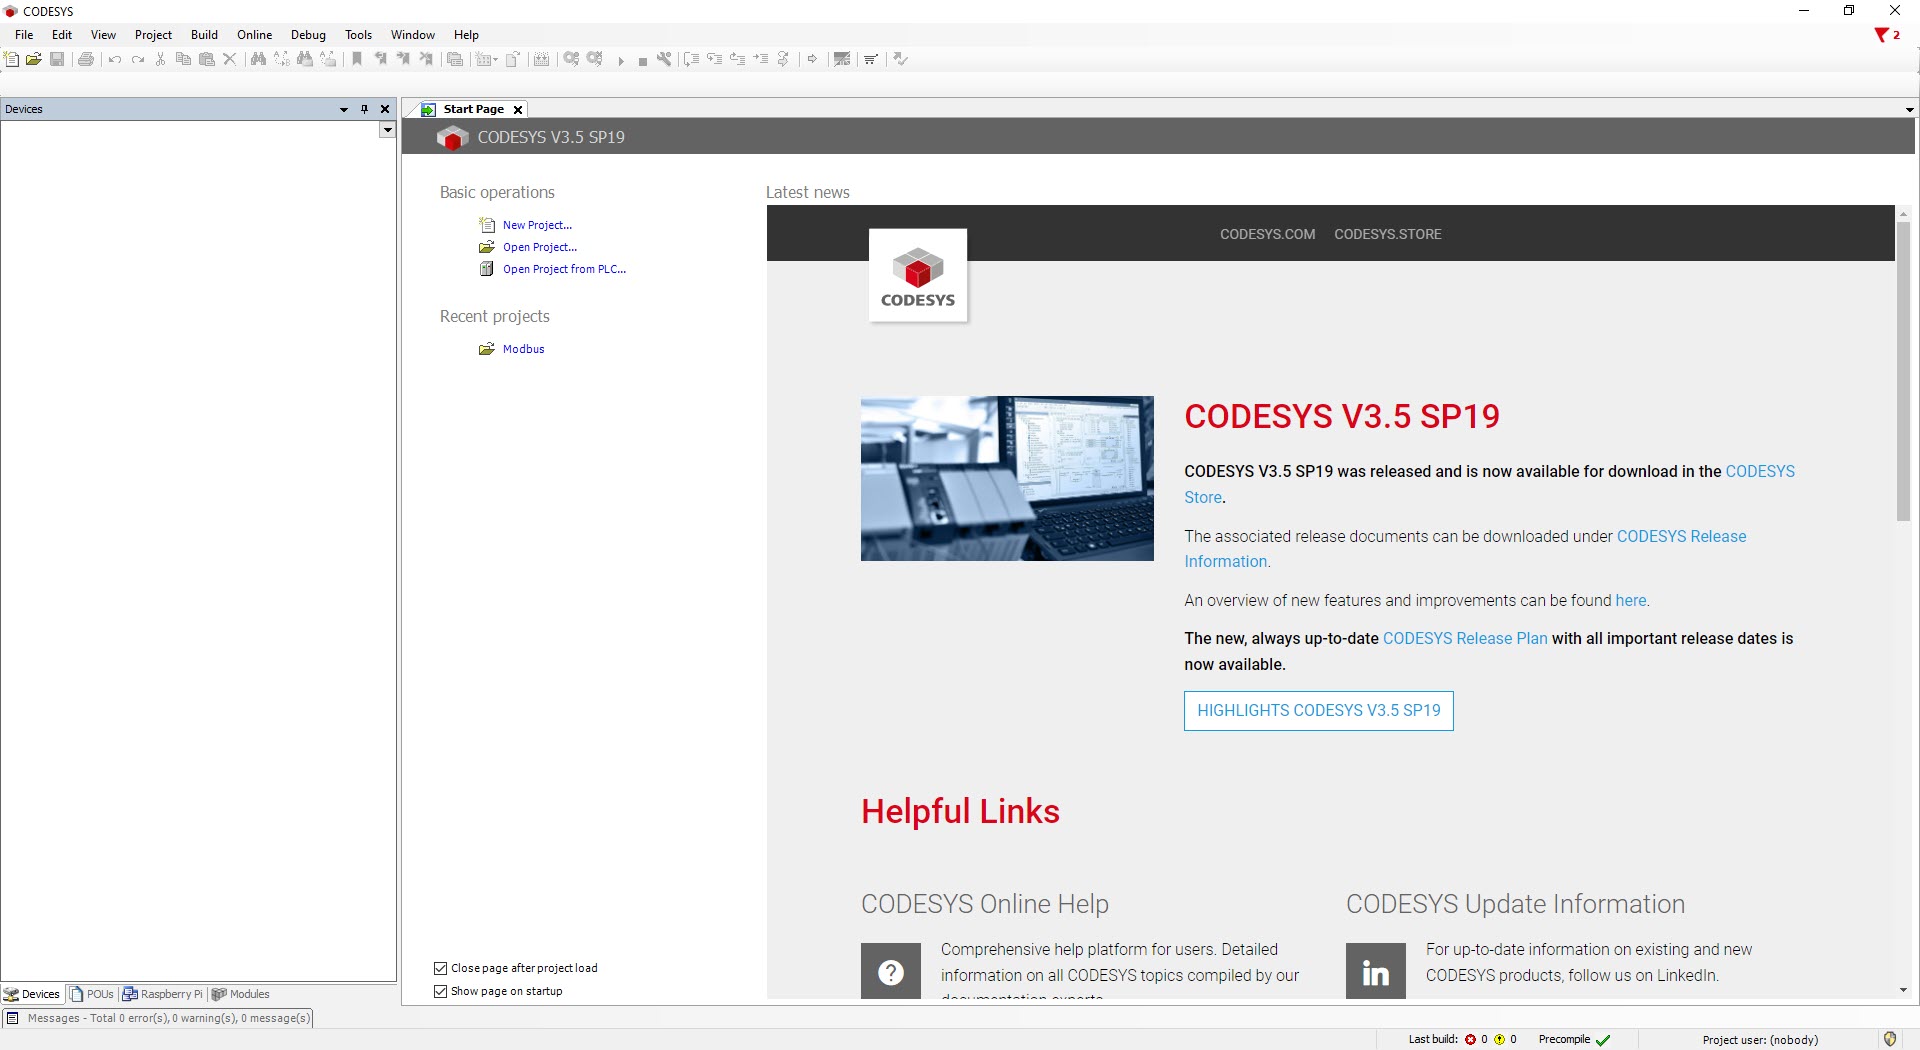
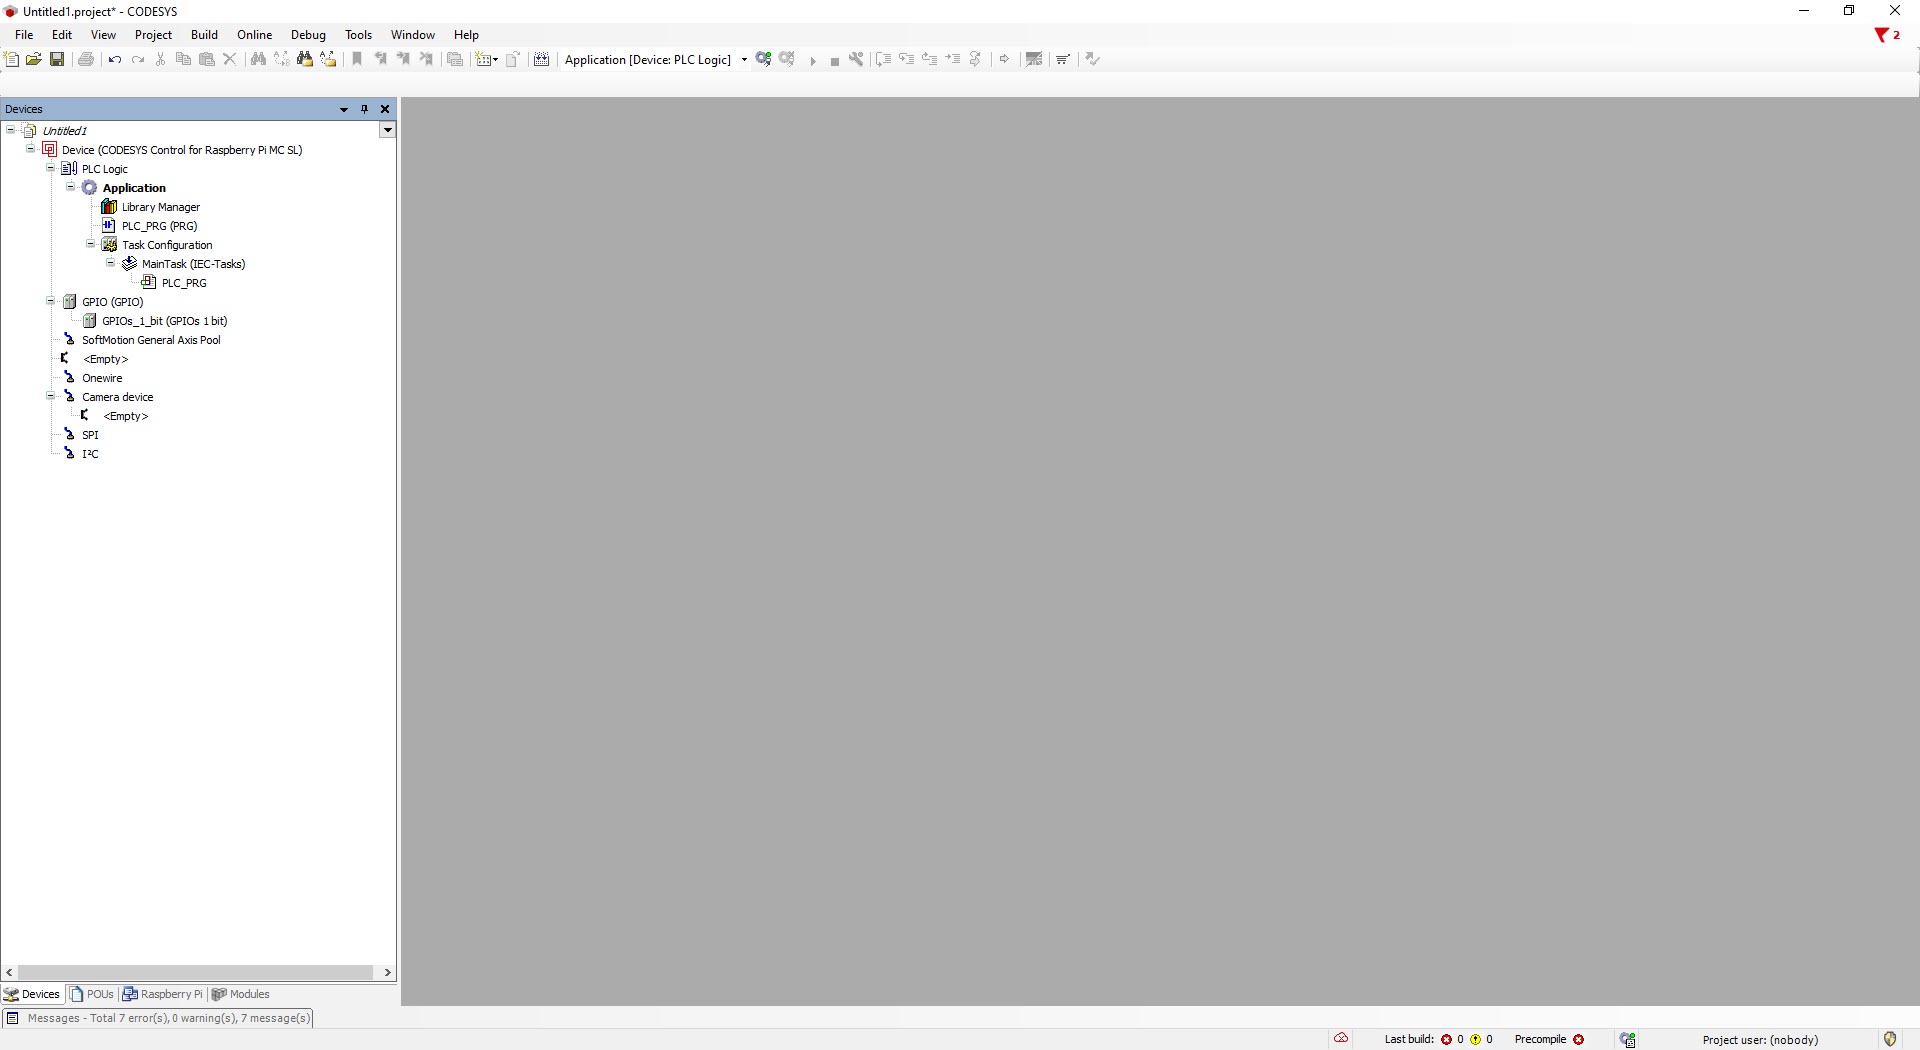
The first time you launced it, the application would look like this
The next thing that we need to do is to install the CODESYS control for Raspberry PI package on CODESYS Development System.
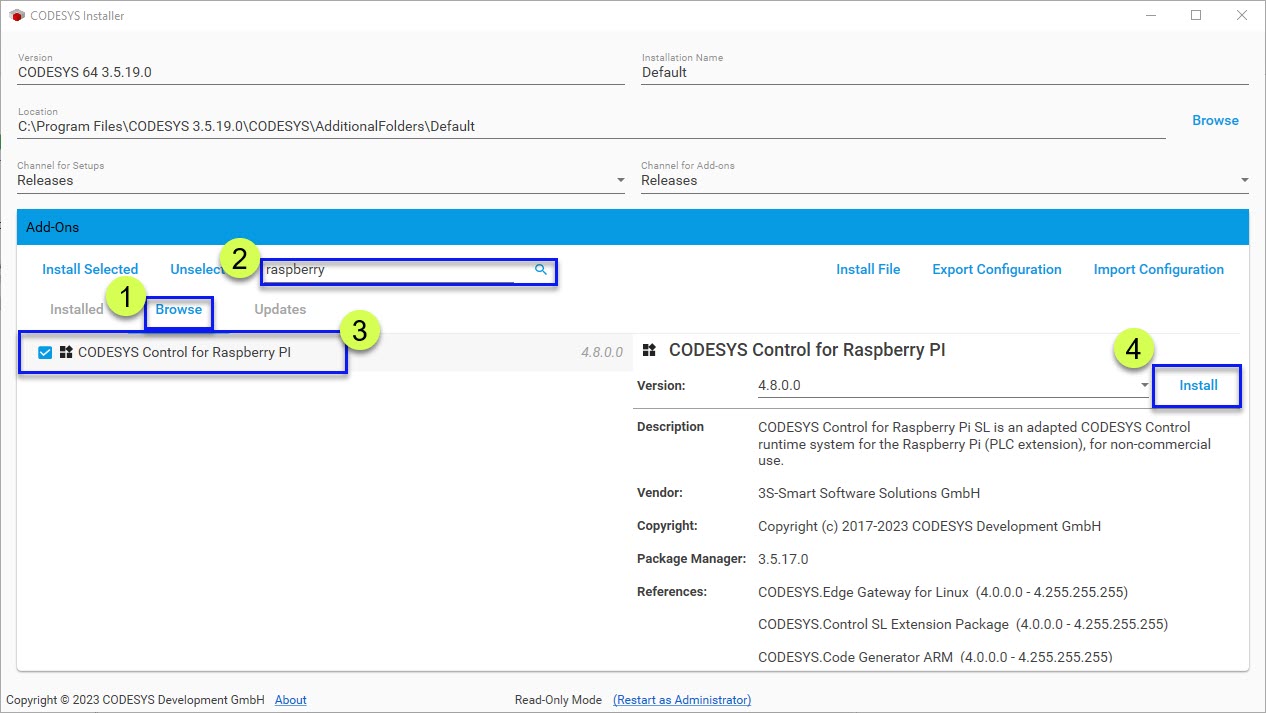
Go to Tools --> CODESYS Installer
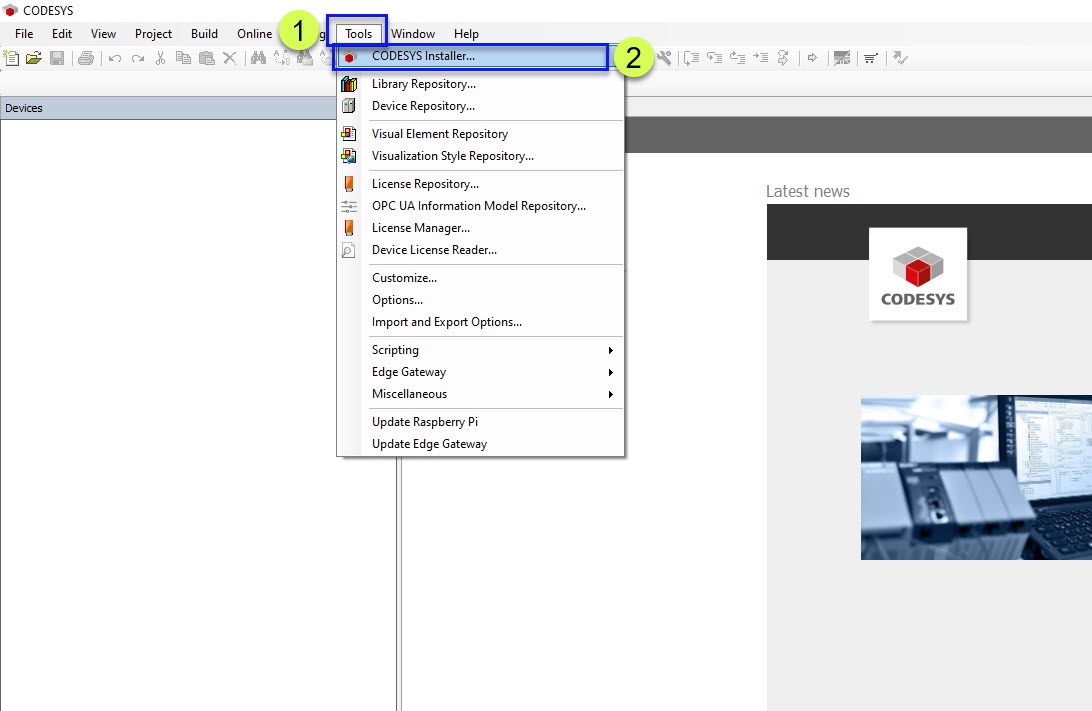
In the CODESYS installer window, click on the browser, then type "raspberry". Then choose CODESYS Control for Raspberry PI" and click the install button.
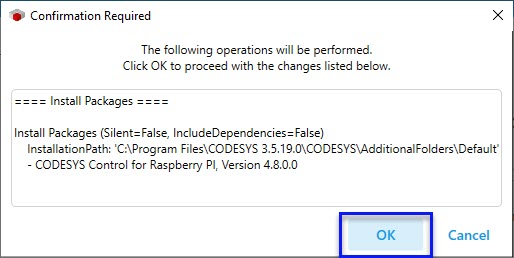
A confirmation window will pop up and click the "OK" button.
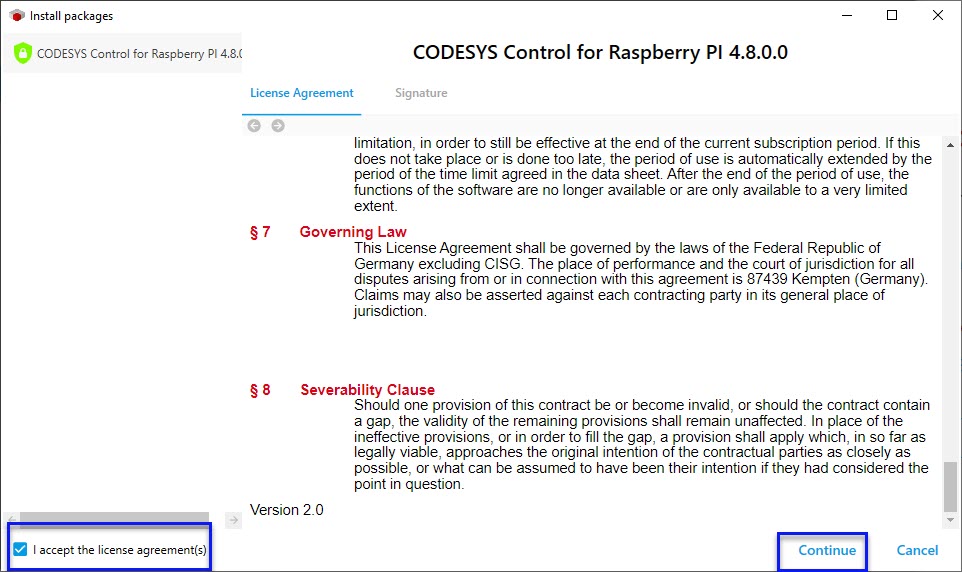
Next a new window will pop-up. Tick the "I accept the license agreement" and click continue.
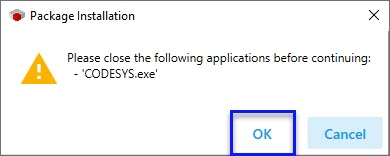
Next a new window will pop-up asking to close the CODESYS.exe. Close the CODESYS and click the OK button.
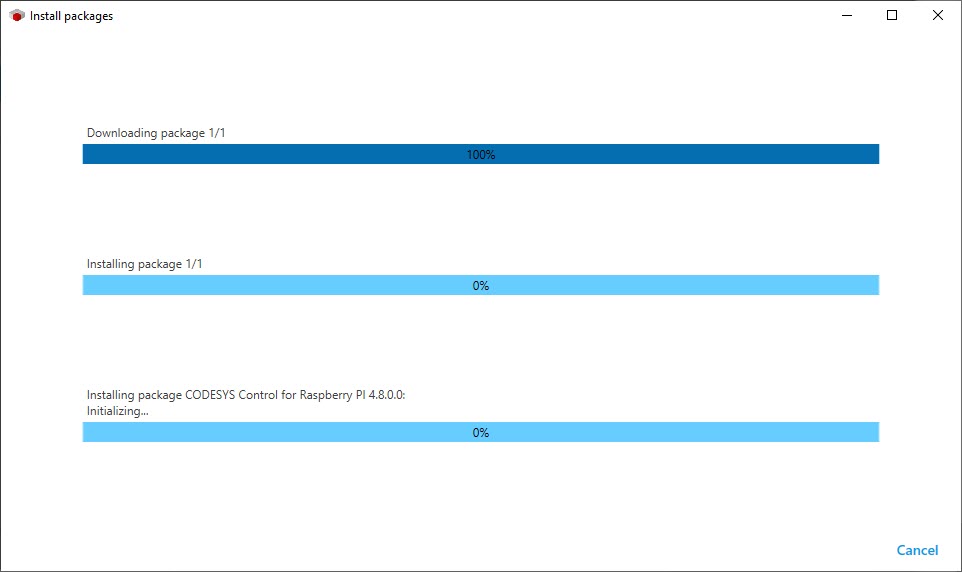
Wait until the installation process complete and click the OK button.
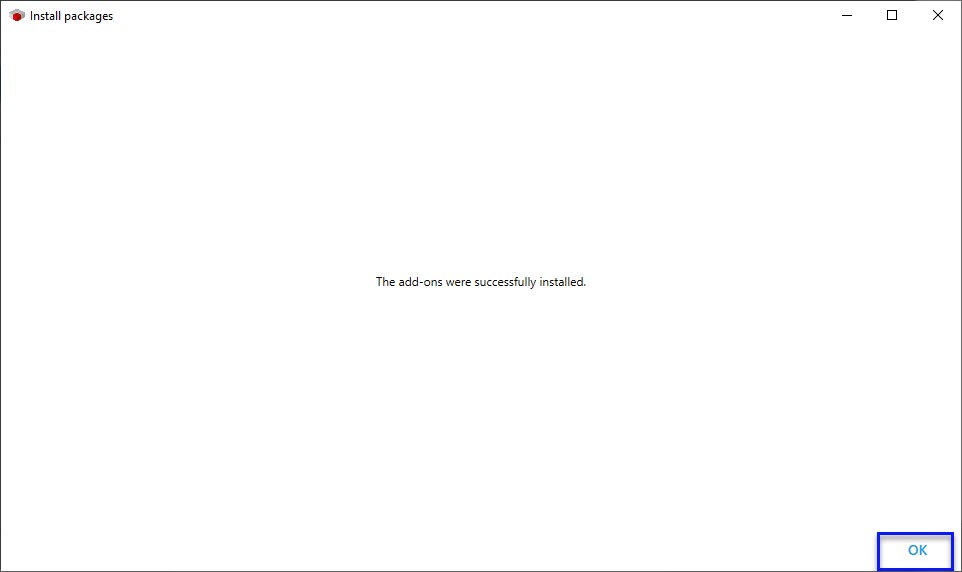
Note: Please note that some of the other installation are not shown here since the software has been previously installed in the machine. But the steps mentioned above are sufficient to install the CODESYS for Raspberry PI.
Now we installed the software and the packages, now we are ready to program our EdgeBox RPI 200 using CODESYS.
Simple LED Toggle With EdgeBox RPI 200
In this getting started tutorial we willl try to toggle the user LED. Let's get started.
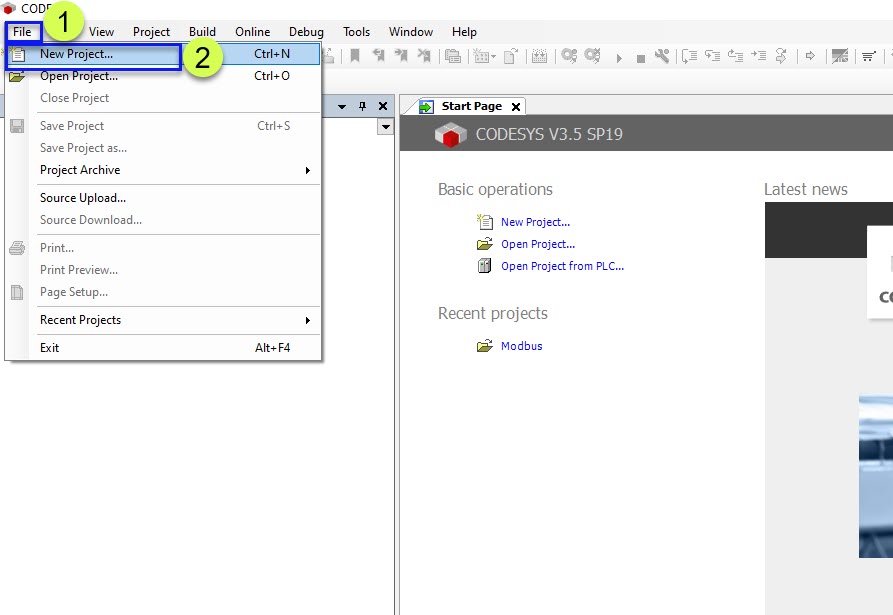
First open the CODESYS. And go to File --> New Project
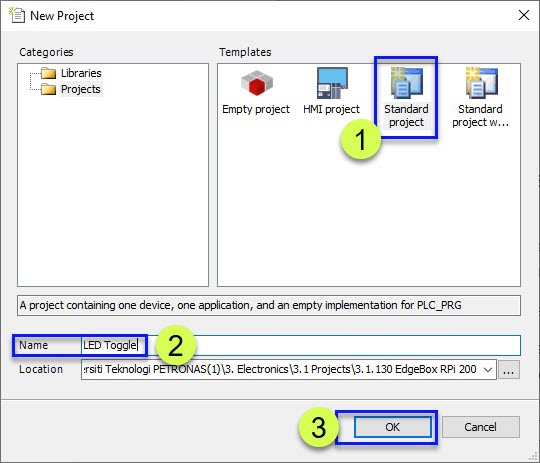
In the new project widow, select Standard Project and give a name to the project and click OK.
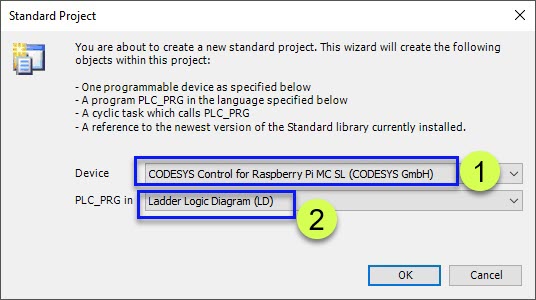
Next for the device choose "CODESYS Control for Raspberry Pi MC SL" and for the PLC_PRG in choose Ladder Logic Diagram(LD)
A new window will open, similar to the one shown in the figure below.
Next go to Tools --> Update Raspberry Pi
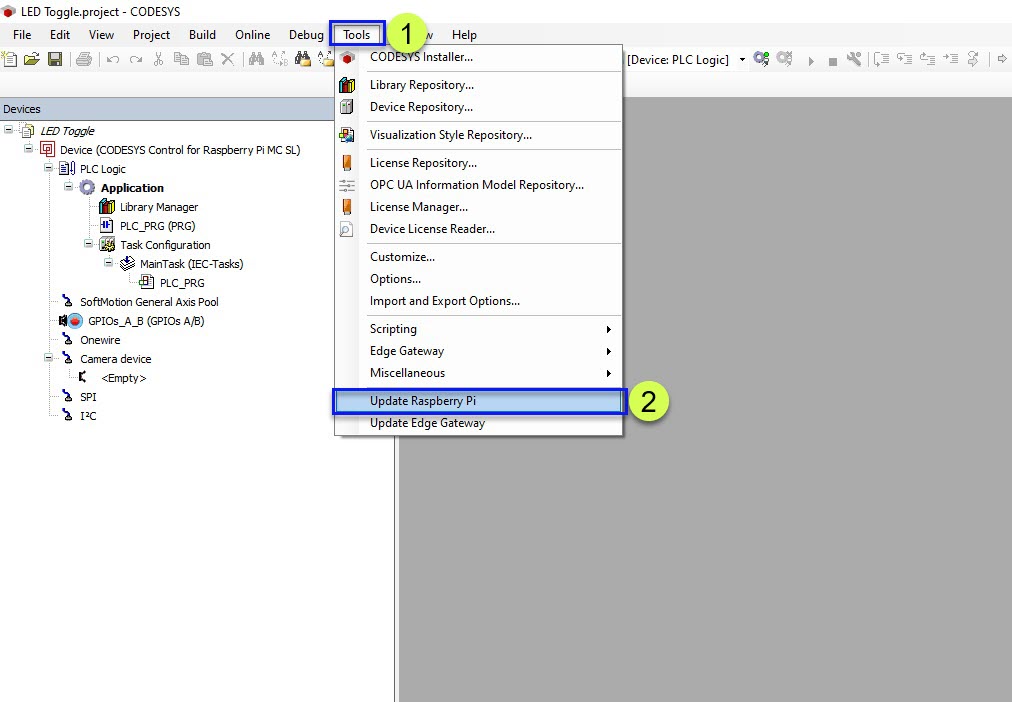
And in the following window go to the Raspberry Pi Tab key in the following parameters and click the install.
Username : pi
password : raspberry
IP address : the target IP adddress
CODESYS Runtime Package : x.x.x.x (raspberry, armhf)
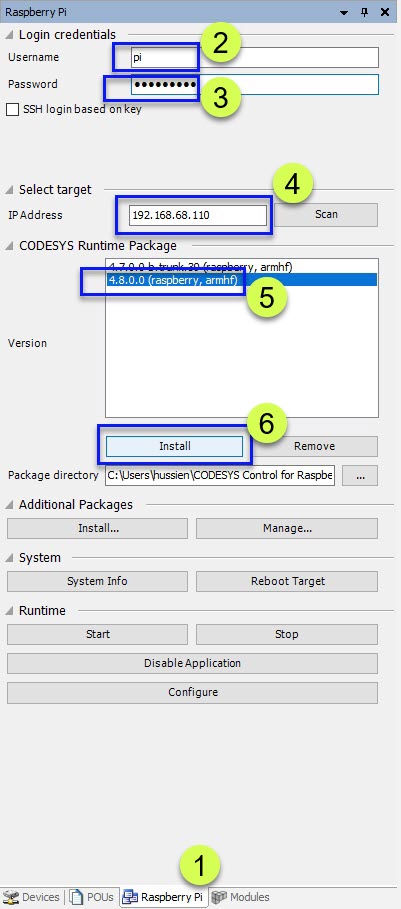
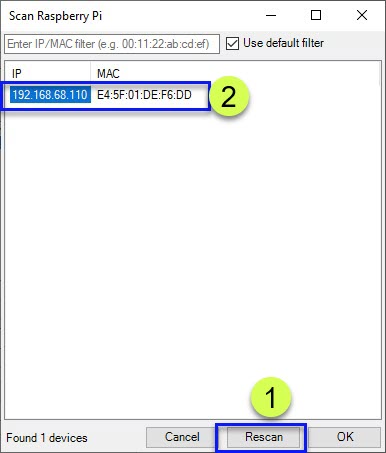
If you are unsure the IP address, can click the scan button as shown in the figure above to obtain the IP address.
In the scan window, click the Rescan button to obtain the IP address.
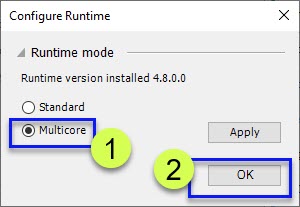
Once the Install button is pressed, a configure runtime window will appear. Choose the Multicore and click OK.
Once its completed , a message will shown in the messages window, stating that "codesyscontrol started". Which indacates that the process was successful.

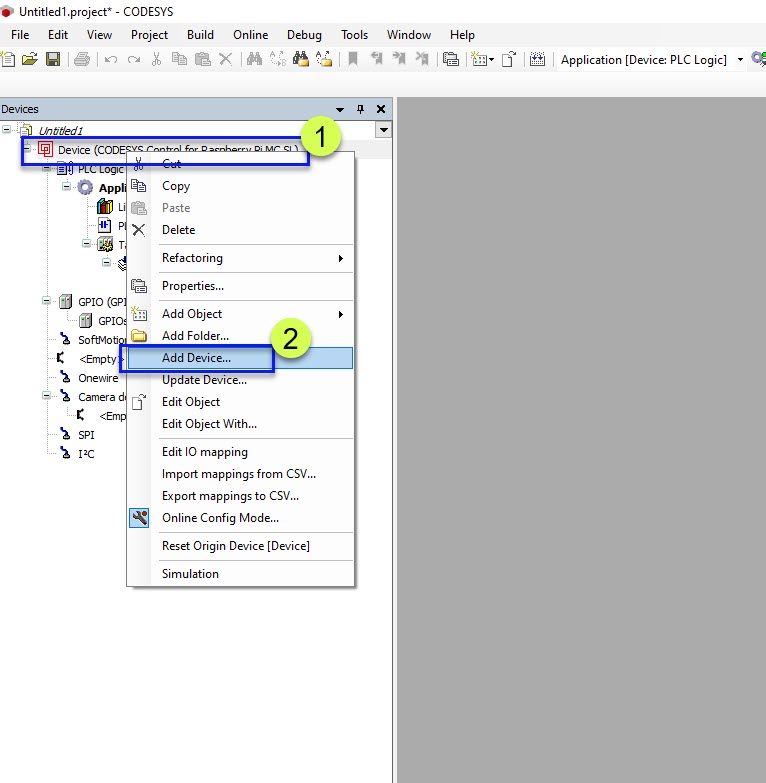
Next we want to configure the GPIO. For this right click on the "Device" and choose "Add Device"
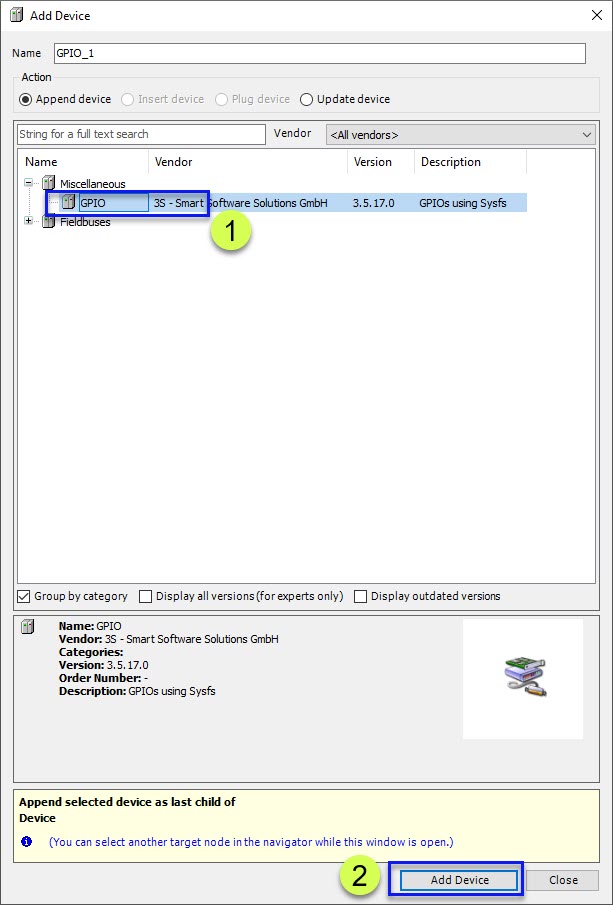
Choose GPIO from the Miscellaneous drop down and click Add Device. This will add a new GPIO device in the device tab.
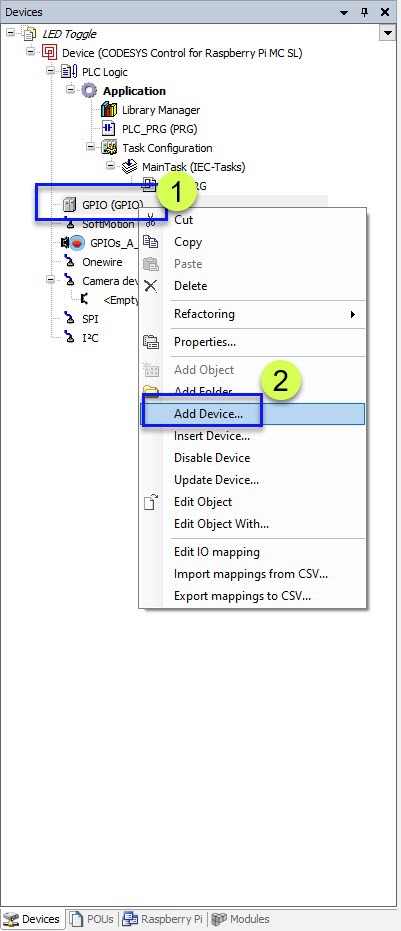
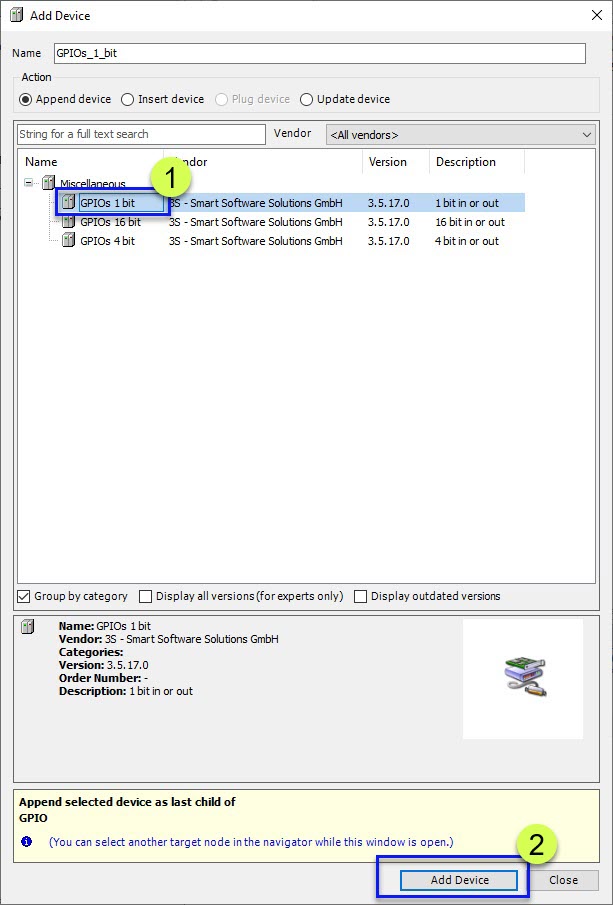
Right click on the GPIO and choose Add Device.
Choose GPIOs 1 Bit and click Add Device.
Double click on the GPIOs_1_bit to bring up the configuration window
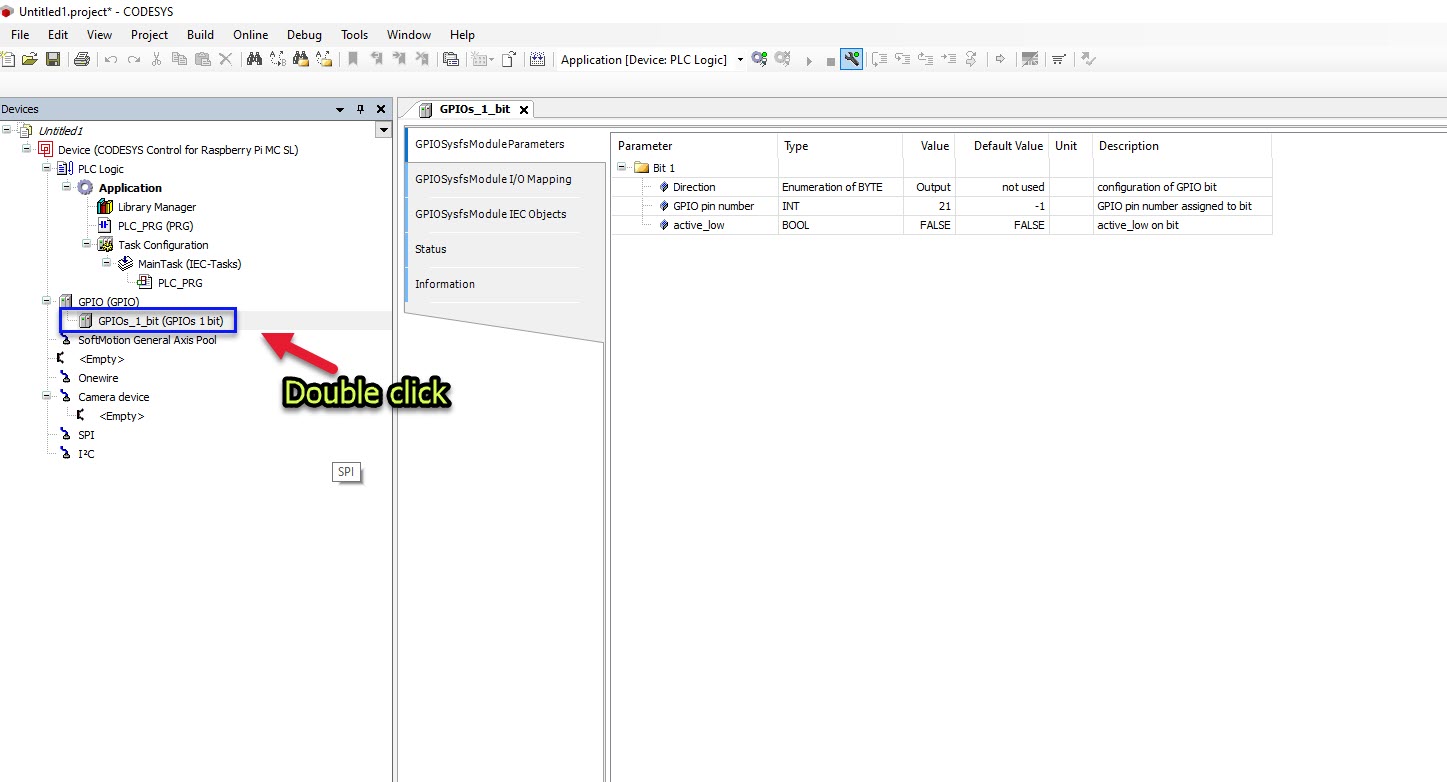
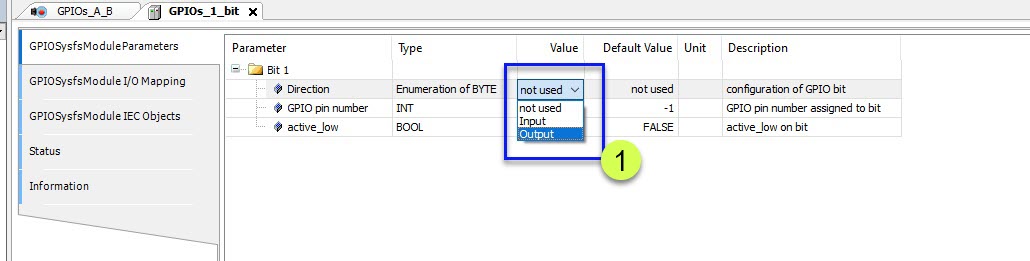
In the GPIOs_1_bit configuration window, select the first tab "GPIOSysfsModuleParameters" to config and assign the GPIO Direction, GPIO Pin Number and current PIN state.
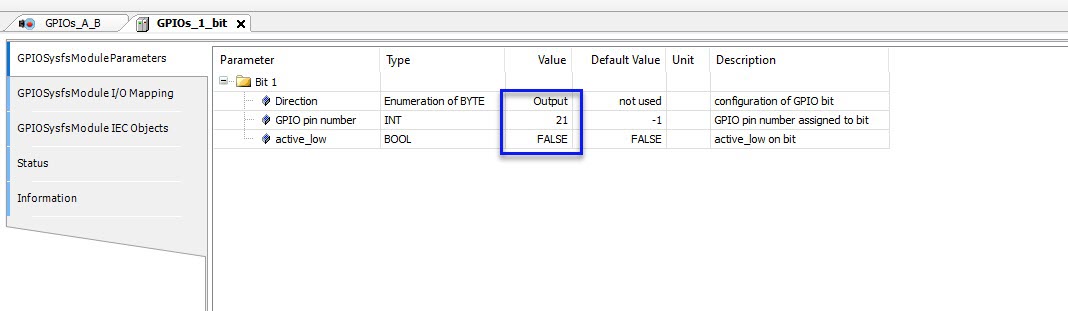
Referring to the datasheet the LED2 is connected to GPIO 21. The GPIO configuration is as shown below.
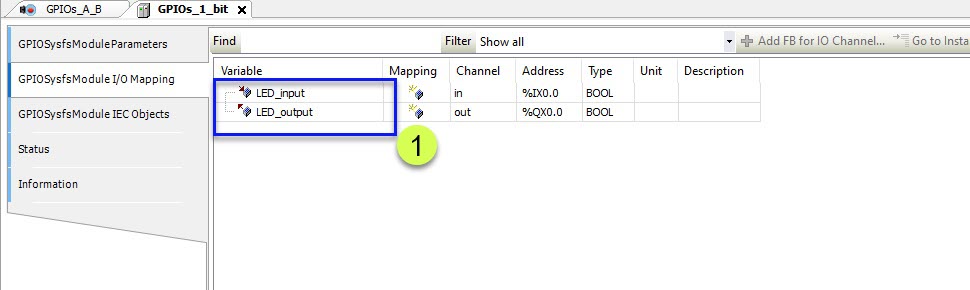
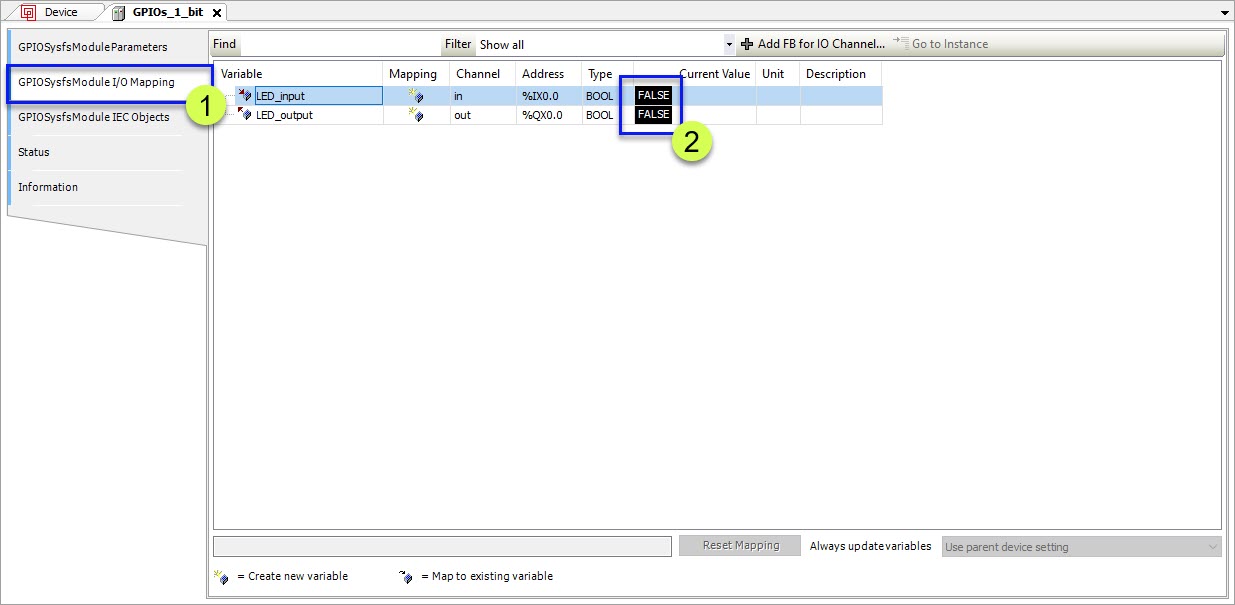
Next go to the GPIOSysfsModule I/O Mapping and assign a variable name to the GPIO, in this case I call it "LED_input" for "GPIO 21 input", and "LED_output" for "GPIO 21 Output".
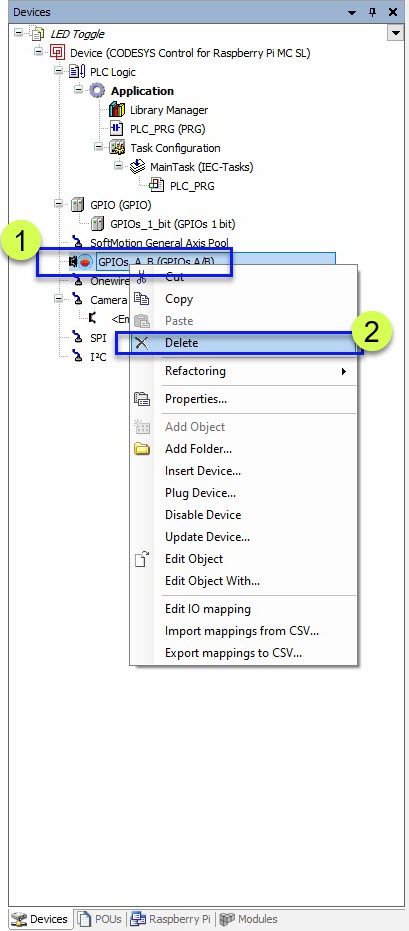
Delete the default "GPIOs_A_B(GPIOs A/B)" device as it will interfere with the new added GPIO Device.
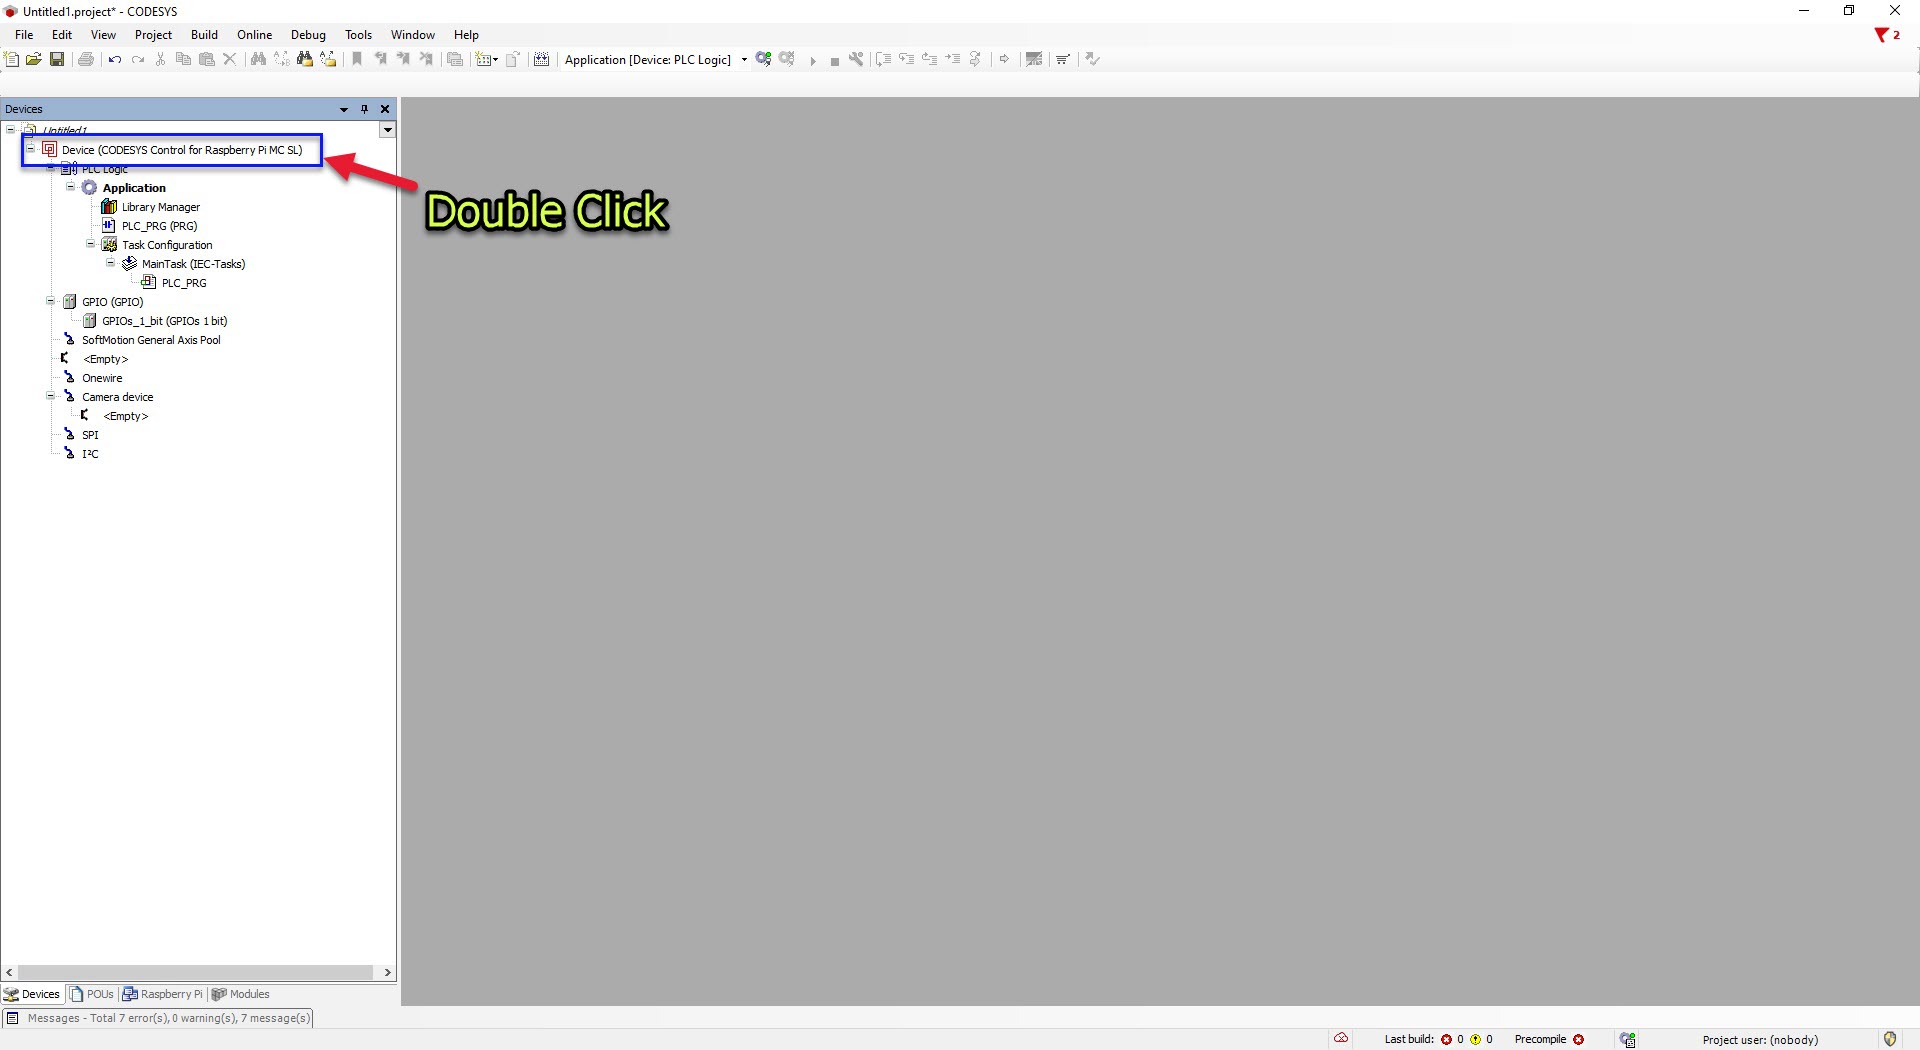
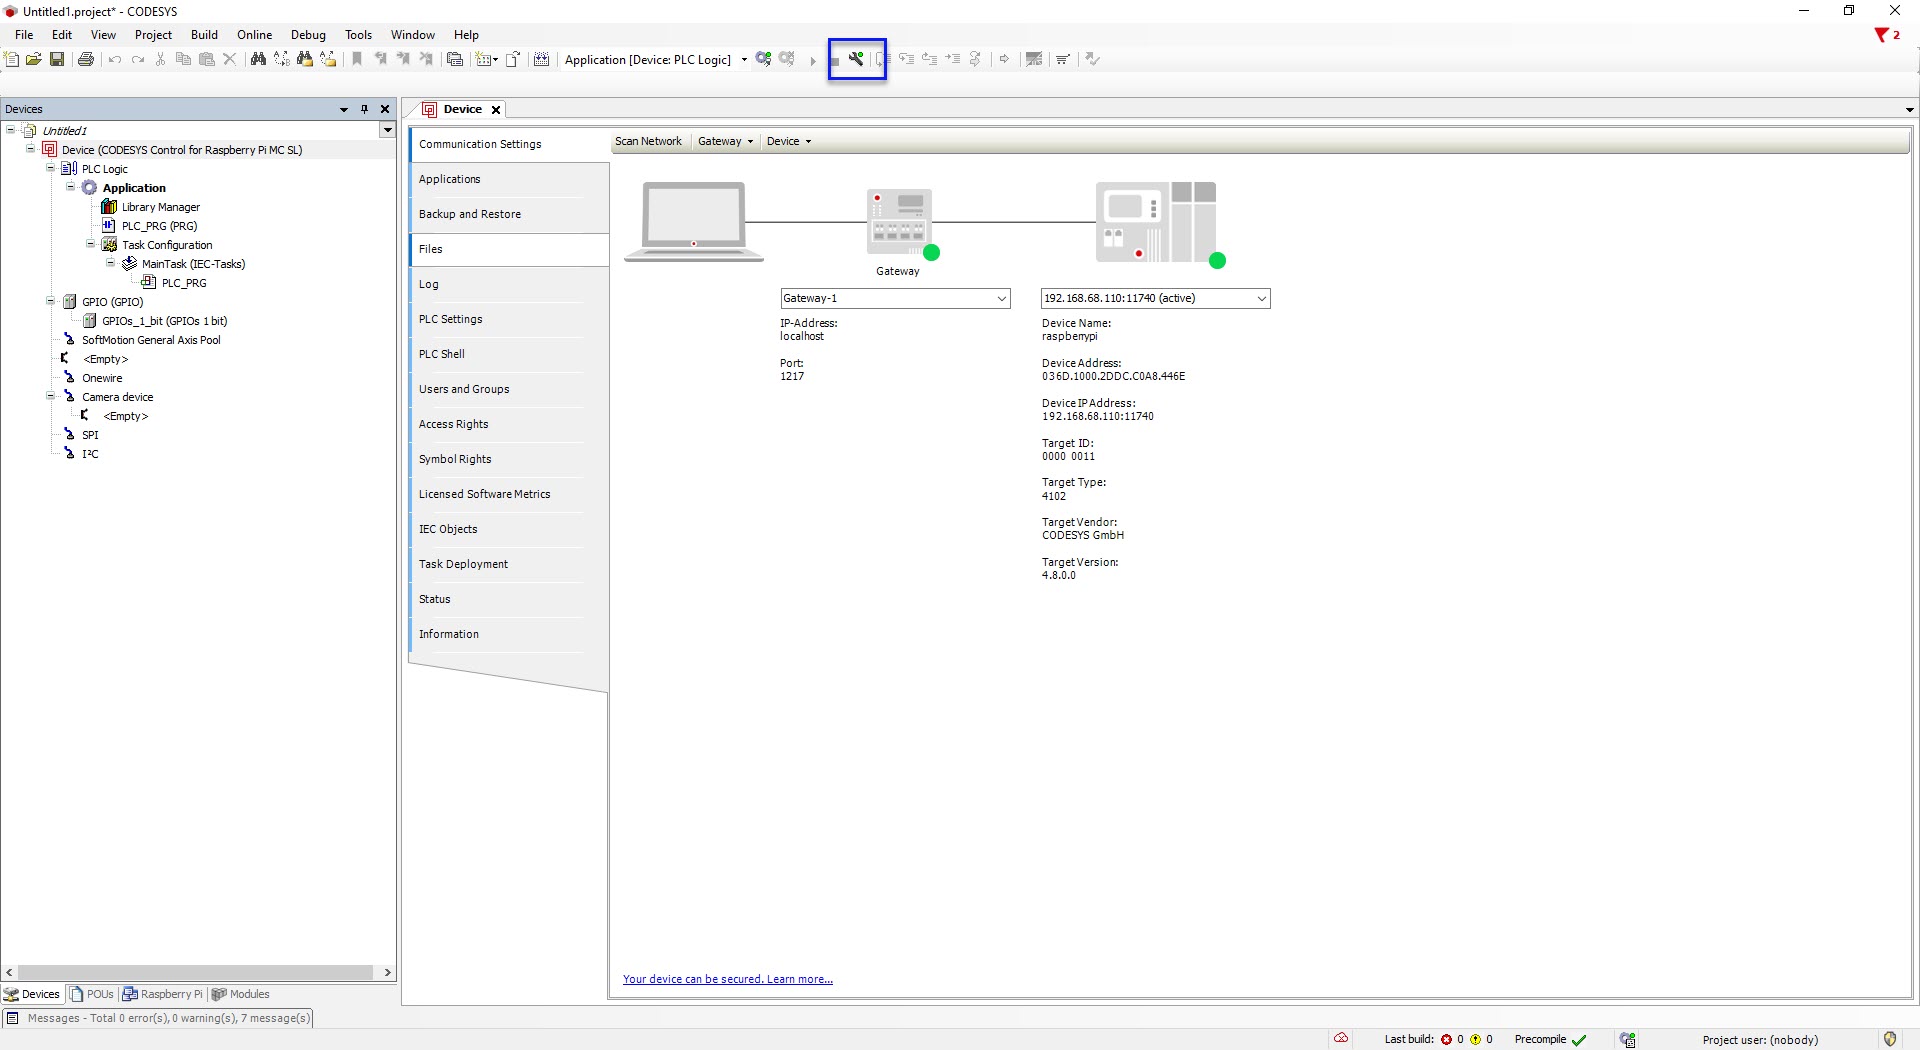
Next we want to enter the EdgeBox RPI 200 to online mode. First we need to double click the "Deivce (CODESYS Control for Raspberry Pi MC SL)".
The device configuration window will open.
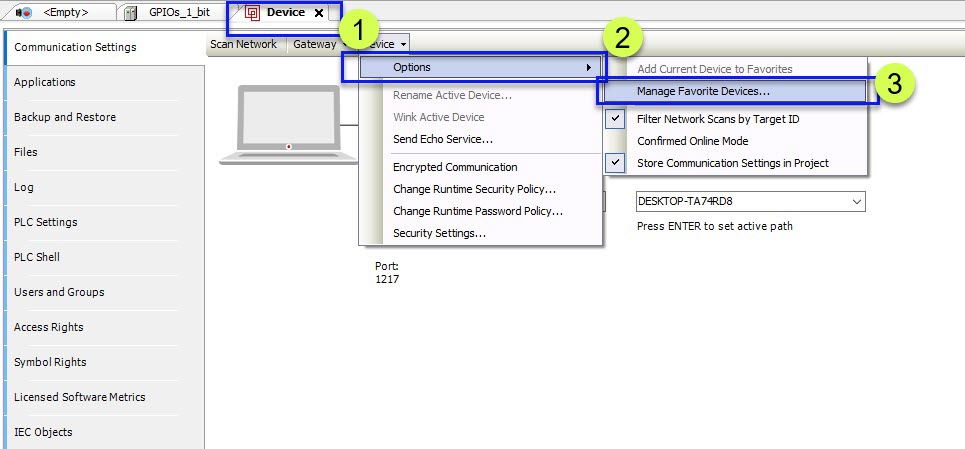
In the communcation settings window, click the Device --> Options --> Manage Favorite Devices
Click the Add button
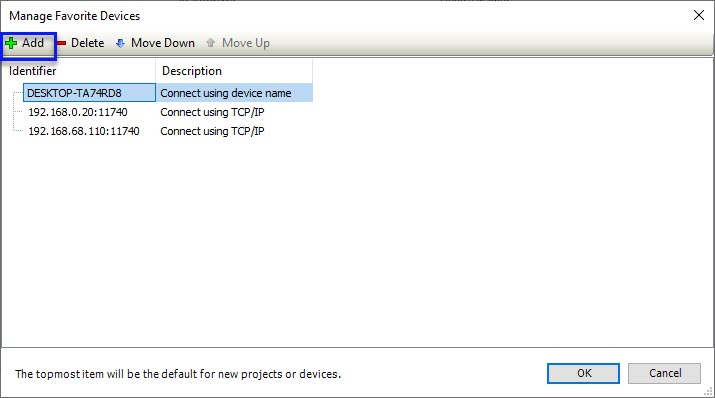
And key in the IP address.

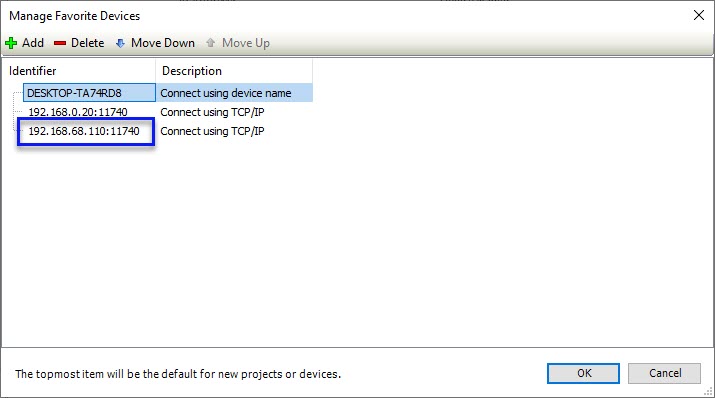
Select the new IP address and click OK.
In the communication setting tab, of the device communication window, click the dropdown list and select the new added device.
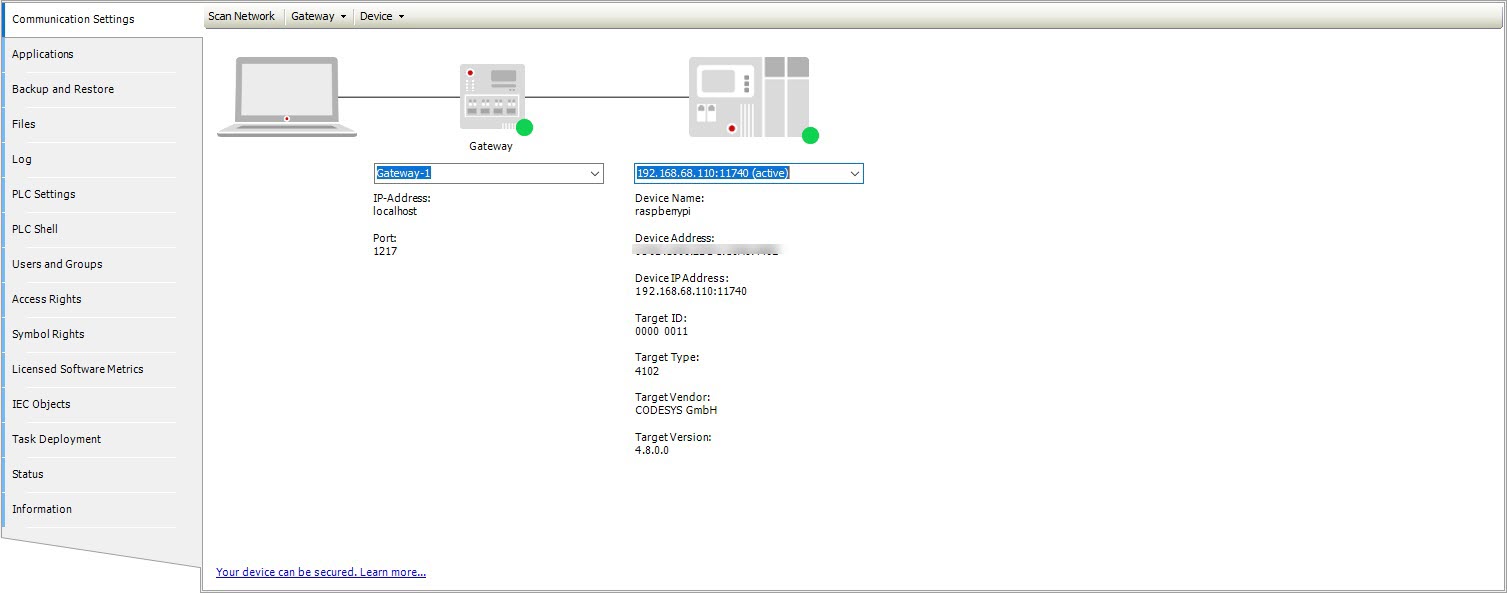
Next click the tool button highlighted in the figure below (config mode), the button should turn from green to red. With this we have connected to EdgeBox RPI 200.
Next, double click the GPIO_1_bit(GPIOs 1 bit) in the device sidebar.
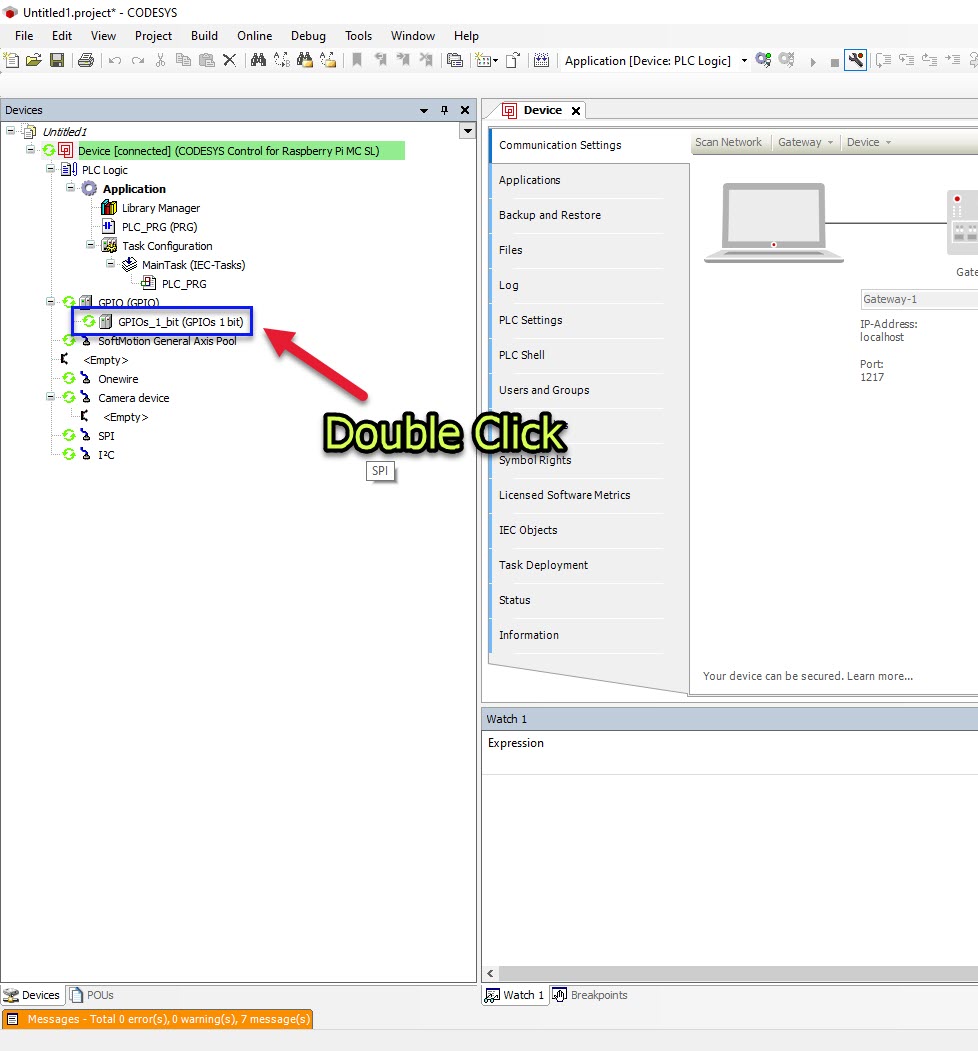
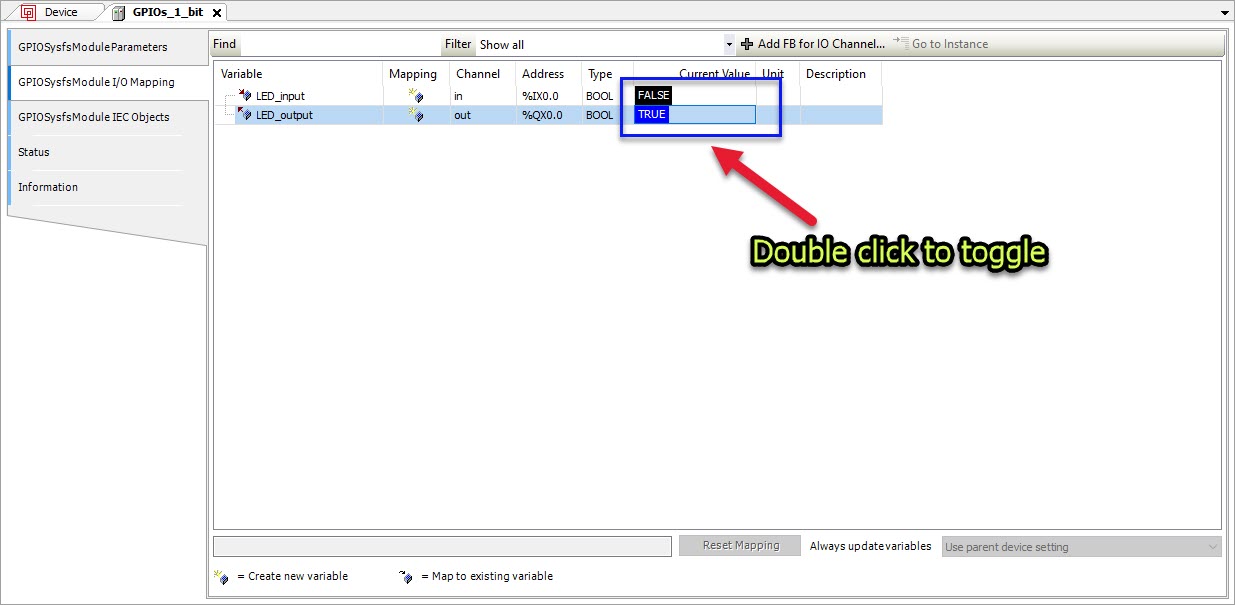
Select the "GPIOSysfsModule I/O Mapping". And to toggle the LED, double click the "False" at the "Current Value". This will make the LED2 to turn on/off according to the True/False Value.
DEMO