 International
 Singapore
 Malaysia
 Thailand
 Vietnam
Your shopping cart is empty!

1KG Autonomous Sumo Robot Starter Kit User Guide
- Khairul_Tajudin
- 17 Jan 2024
- Project
- Beginner
- 630
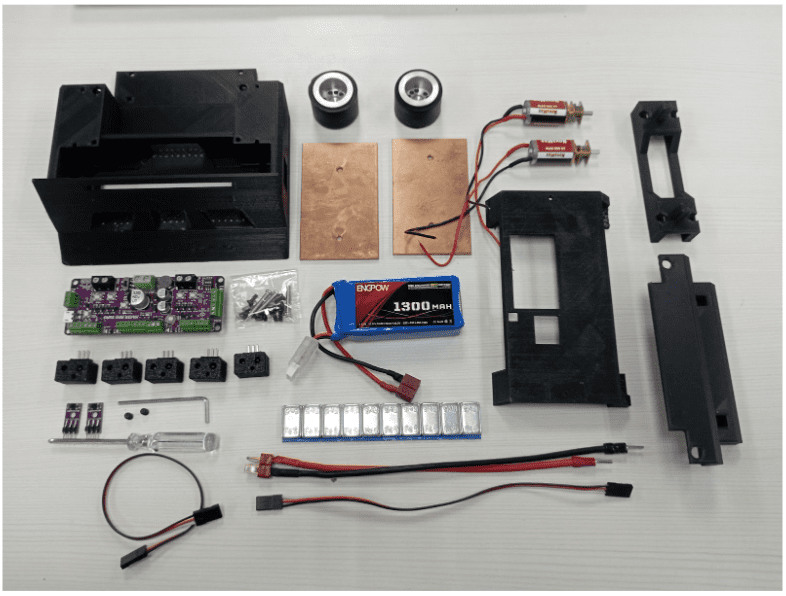
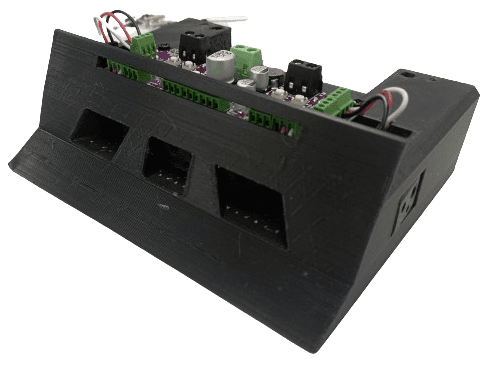
This is an upgraded version of the previous 500g mini-sumo robot, Ikedo Mini Sumo Robot Pro Kit. This version comes with a 1kg sumo robot specification which is less than 1kg (weight) and less than 15cmx15cm (size). Improvement with new body kit design to fit the specification.
This tutorial also continous project from Let’s Upgrade your Mini Sumo to 1kg Sumo Robot. Make sure you take a look on this tutorial first before jump into this excitement project.
3D Model for this Sumo Robot can get from this link
Overview
This is a beginner guide of the 1kg Sumo Robot Starter Kit that was developed by Cytron Technologies. There are various demands from the roboteer who hunger to participate in the Sumo Robot Competition especially for the 1 kg category. Previously we have built a Mini Sumo Robot (500g) and the feedback is very good. Since that, we developed this kit for the 1 kg category to meet the expectation from participants.
Hardware Assembly & Wiring
This is a construction kit where you have to assemble the robot by yourself. But don't worry, we will guide you step by step in this post.
*the illustration might be slight different from the actual part on previous tutorial due to small changes on the 3D Design. The illustration is just for reference in this user guide.
*In the illustration and throughout this tutorial, we use a 3S battery (11.1V). However, after many experiments and tests, we highly recommend using only a 2S battery (7.4V). This recommendation is due to the toughness of the gearbox in Novamax DC Micro Metal.
Let’s start making robots!
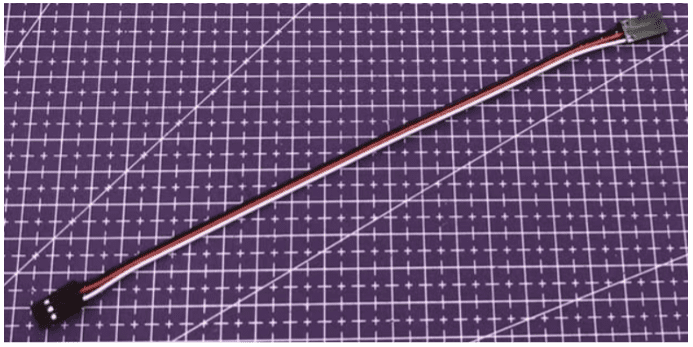
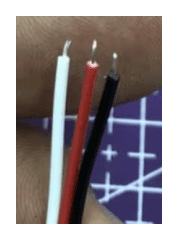
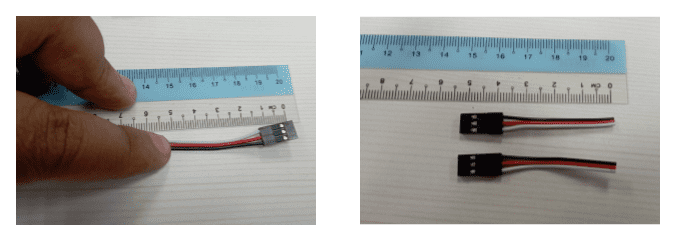
Step 1: Get ready the wire with a black connector at both ends.
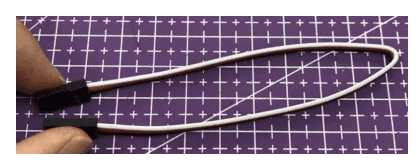
Step 2: Bend the wire into half, cut it into half so that we can get 2 wires with the same length.
Step 3: Separate the wires so that it is easier for you to work on it in the following steps.
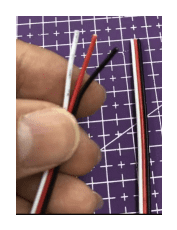
Step 4: Strip the wire isolator (about 5mm) using a proper wire stripper or a pair of scissors.
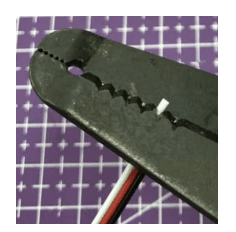
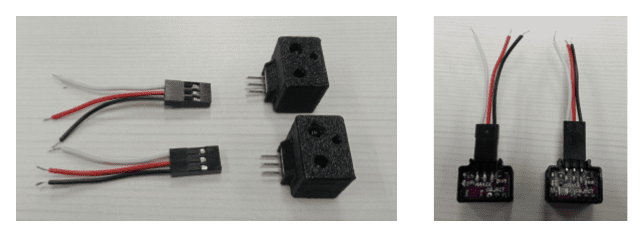
This is the end result we want. Repeat for another wire.
Step 5: Connect the wire to the edge sensor. Make sure you are connecting them at the correct side.


Step 6: Install the edge sensors at the underneath of the robot base using the black color self-tapping screw.
Step 7: Leave the wire
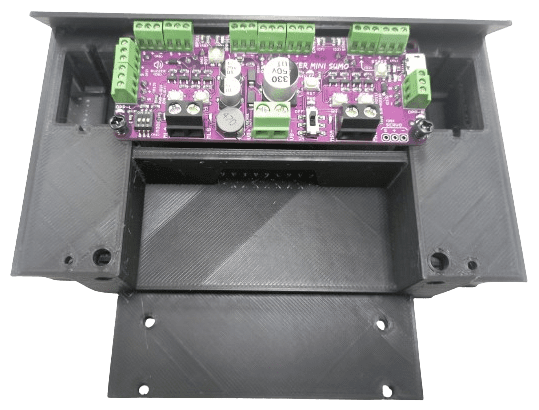
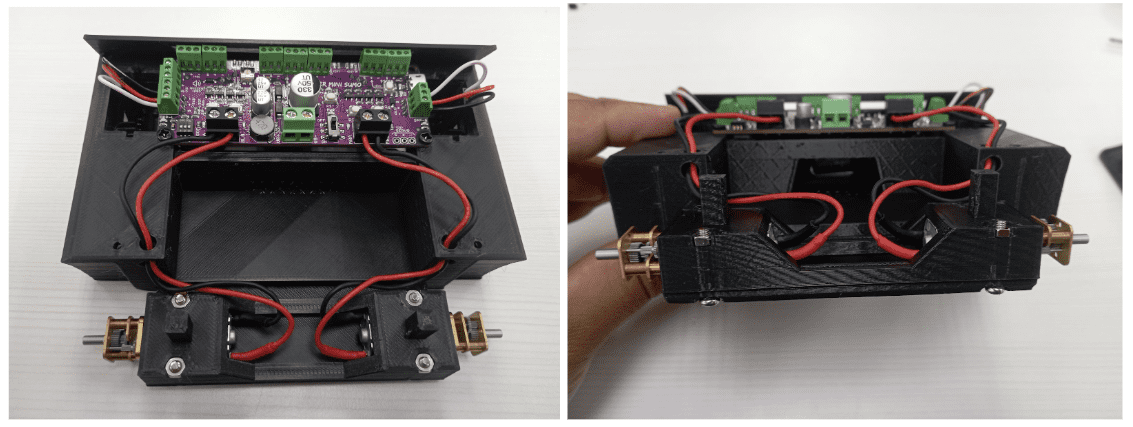
Step 8: Place the Maker Mini Sumo Controller on the robot
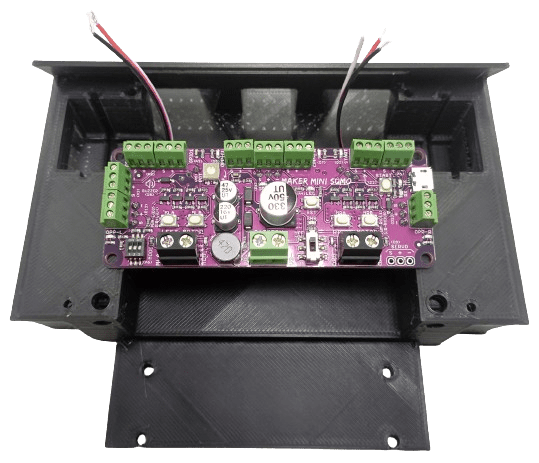
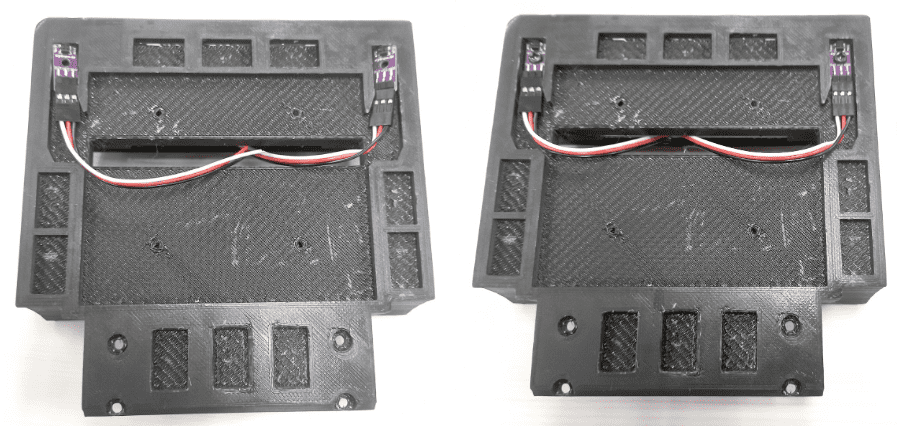
Step 9: Do a wiring from Edge Sensor to the Maker Mini Sumo Controller board. Make sure to wire first before screwing to the body.
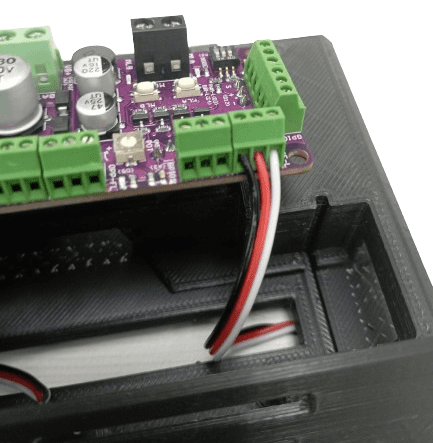
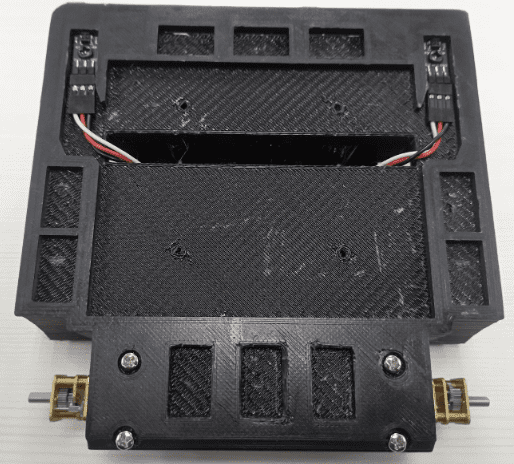
Step 10: Wiring both wire and the robot will look like this
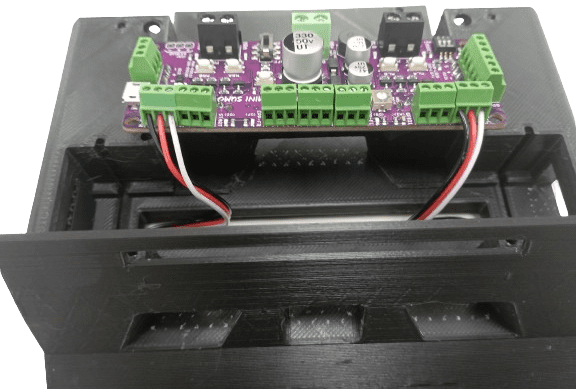
Step 11: Insert all 3 opponent sensors (front sensor) into the sensor slots at the maker board
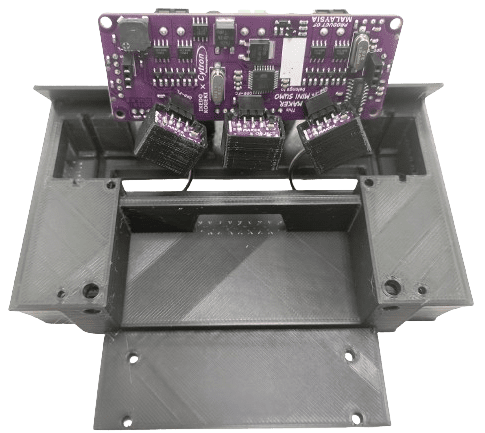
Step 12: Place the maker board on robot body base and screw on designated screw hole
Step 13: Cut another Extension Wire and make it into 2 connectors. Length for this wire is around 4cm-5cm. This connector will be used for another 2 Opponent Sensors.
Step 14: Connect that connector to the both Opponent sensors.
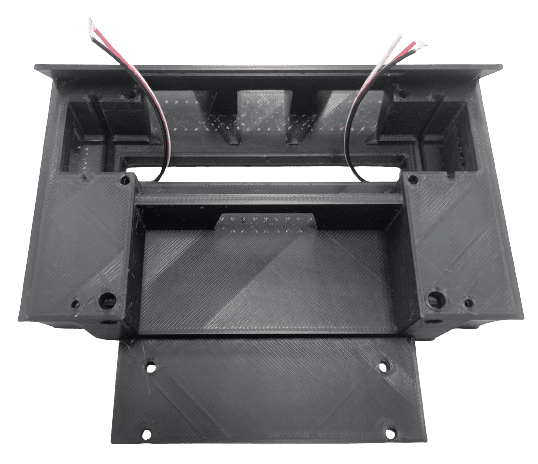
Step 15: Place left and right opponent sensors into the body chassis. Connect wire into the respective terminal block.
Make sure all the place for opponent sensor as shown in picture
Step 16: Insert M3 nut into slot in motor bracket part
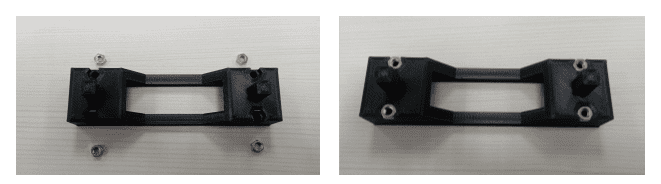
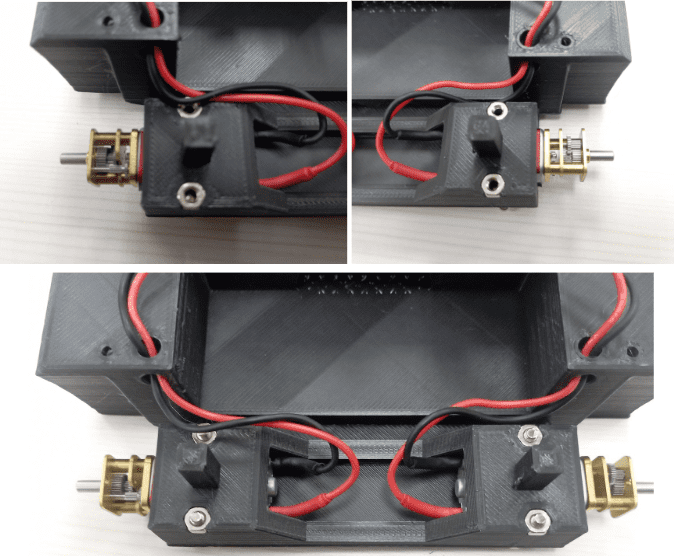
Step 17: Insert DC Motor into motor slot in motor bracket part. Make sure the wire from the DC motor is moving outside as shown in the picture.
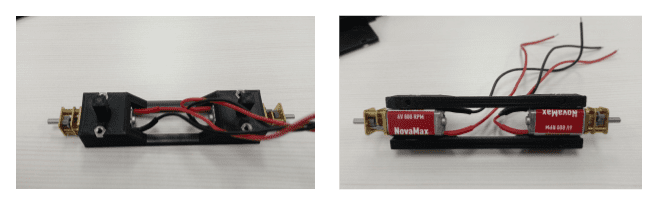
Step 18: Insert wire from the dc motor into the slotting hole to make sure the wire is in good wire management.
Step 19: Insert the DC Motor wire into the terminal block on Sumo Maker board.

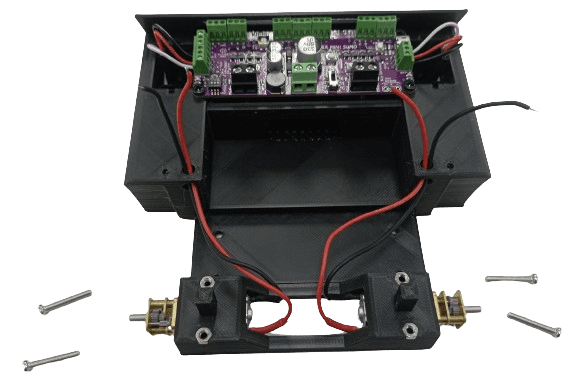
Step 20: Insert M3 Bolt to motor bracket to fit DC Motor into body chassis.
Step 21: Make sure there is a gap for the DC motor with the edge of the motor bracket as shown in the picture before we tighten up the bolt and nut.
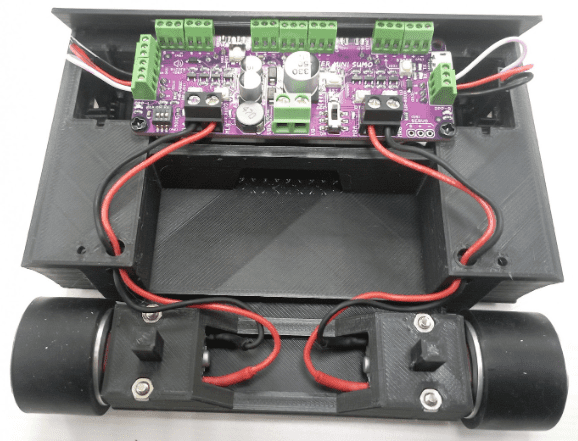
Step 22: Manage the wire to make sure in good wire management
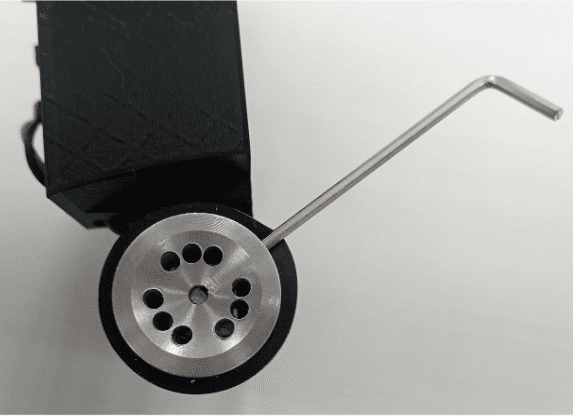
Step 23: Use the given allen key to adjust the tapping screw inside the wheel. Make sure that the allen key is aligned with the mark on the wheel as shown in the picture.
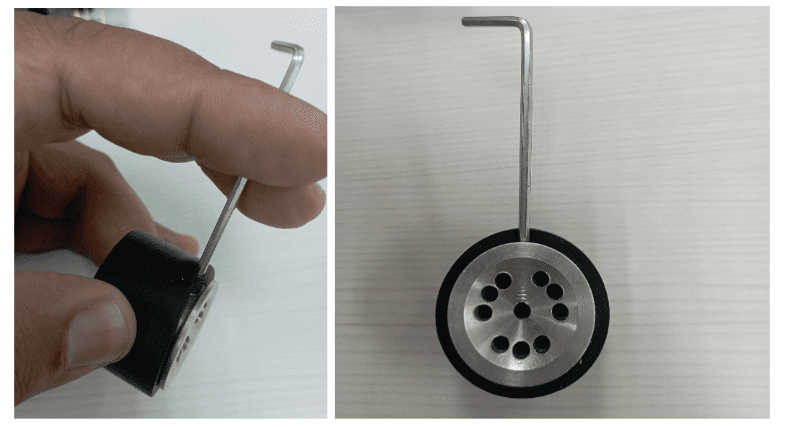
Step 24: Screw the wheel on the DC Motor by tightening up tapping screw inside the silicon wheel.
Step 25: Attach both silicon wheel on the sumo robot.
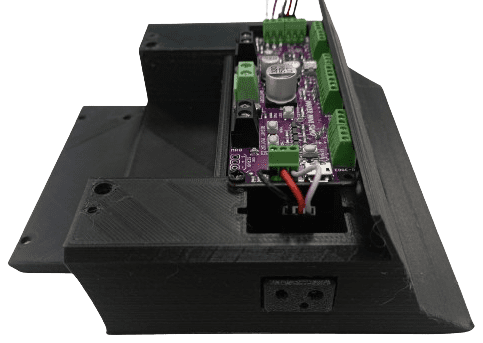
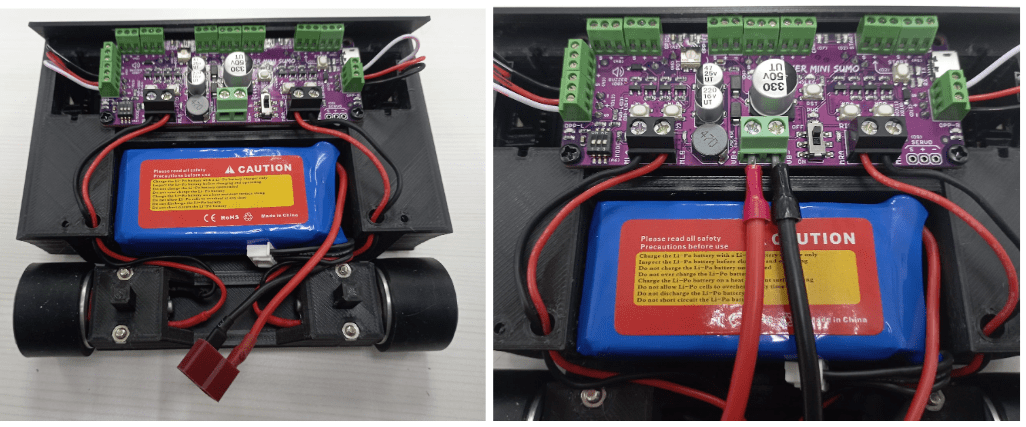
Step 26: Attach battery on the sumo robot chassis. Connect the battery connector on the terminal connector that is specifically for the power source. Beware of the polarity, make sure it connects with the correct +ve and -ve port.
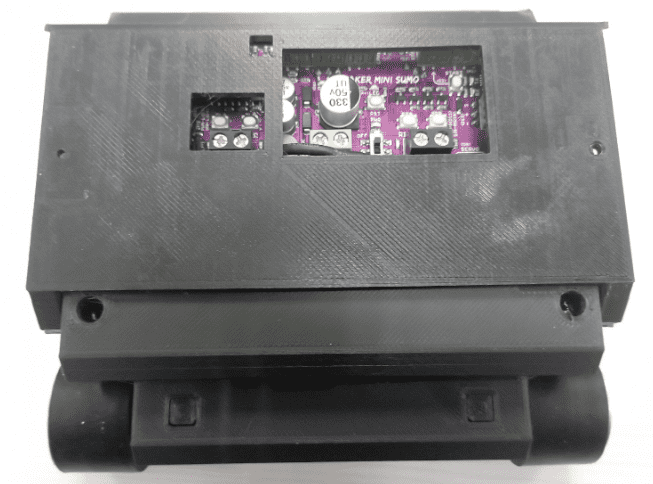
Step 27: Attach roof part on sumo robot. We can screw on a designated hole to tighten up the roof part.
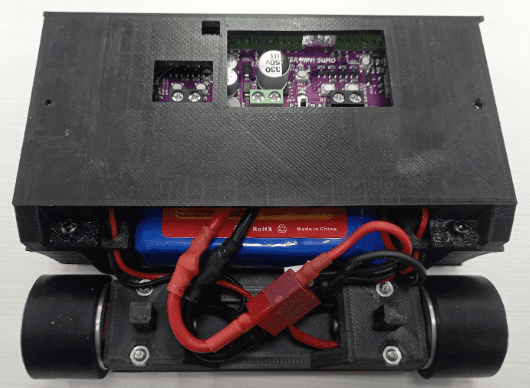
Step 28: Put the battery cover at the back of the robot. Make sure the wire management is in good condition before placing the battery cover.
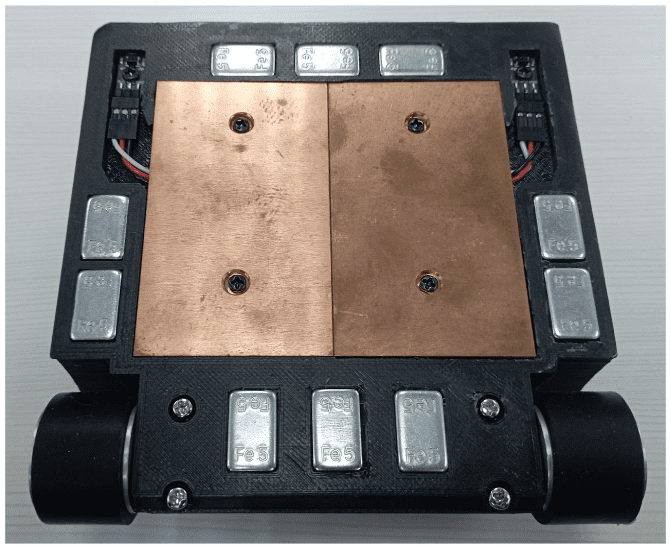
Step 28: Put the copper plate at the bottom of the robot and screw on it.

Step 29: Place weight balancing at the bottom of the robot in a designated place.
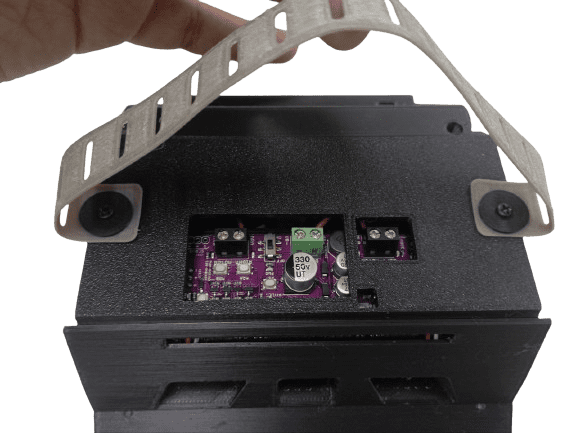
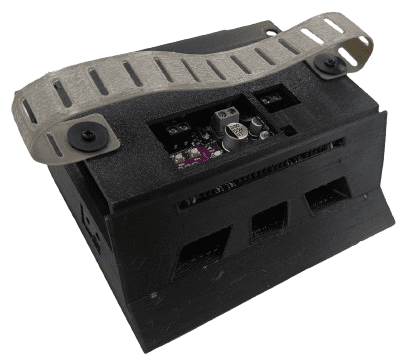
Step 30: Add the accessories to the robot using Strap Holder to make it easier to hold and catch when the robot out of control
Step 31: FINISH! Now your Sumo Robot is ready to action!
Wait a minute.... we need to program it first
Let's continue on Software Setup
Hardware Components
 Best Seller
Ikedo Mini Sumo Robot Pro Kit
RM660.00
x 1 unit(s)
Related Posts

Let’s Upgrade your Mini Sumo to 1kg Sumo Robot
This tutorial is specially designed for robotics enthusiasts that are excited about 1kg Sumo Robot. Let’s start on this journey!..