 International
 Singapore
 Malaysia
 Thailand
 Vietnam
Your shopping cart is empty!

No PC No Problem: Flash Raspberry Pi OS with Network Boot
- Asri Ruslan
- 28 May 2024
- Tutorial
- Beginner
- 583
Introduction
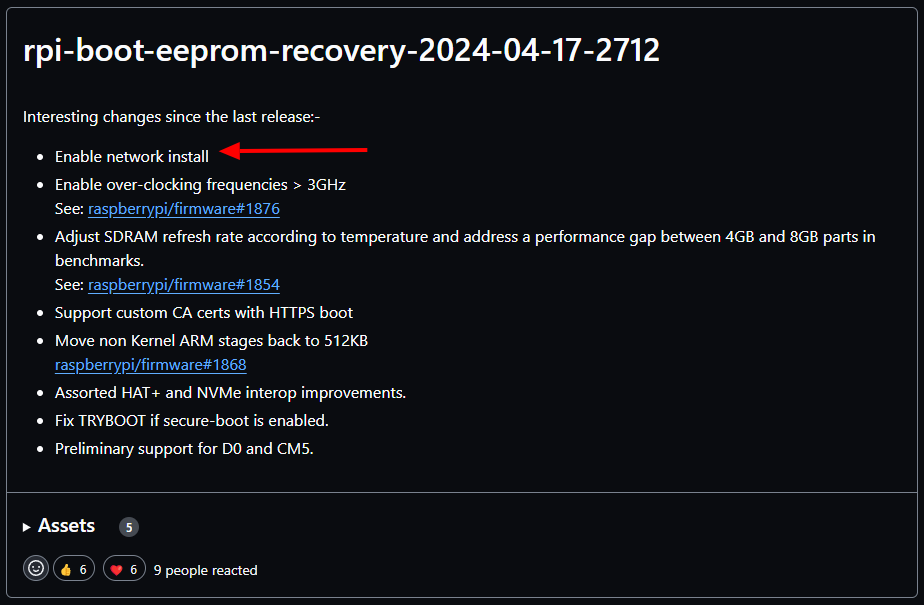
Raspberry Pi 5 major EEPROM update on 17/April/2024 allows for network boot and OS flashing. This new capability eliminates the need for a secondary computer, simplifying the setup process and making it more accessible, especially for beginners, educators, and makers.
Previously, installing an OS on a Raspberry Pi involved downloading the OS image to another computer, writing it to a microSD card (or SSD, or USB drive) with tools like Balena Etcher or Raspberry Pi Imager, and then booting the Raspberry Pi from the microSD card. This process was often complex and time-consuming, particularly for those less experienced with technology. Moreover, the need for certain hardware such as a microSD Card reader made the process more hassle.
Of course, to simplify the process, Cytron offers MakerDisk microSD card (and also SSDs) preloaded with Raspberry Pi OS which you can always boot into the Raspberry Pi OS without going through all the above hassle.
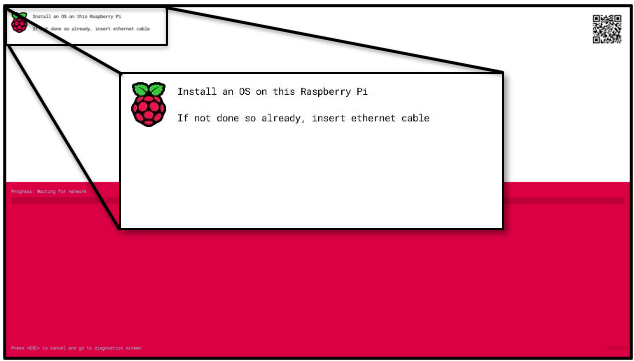
With network OS flashing, users can now install the operating system directly over a network connection (wired), removing the need for an additional device. This innovation streamlines the initial setup, making the Raspberry Pi 5 more user-friendly and ideal for education and getting started.
Note: You will need WIRED Network, WIRELESS Network will not work at this stage. So get yourself a good long Ethernet cable to connect the Raspberry Pi 5 to your network router.
Note: This process will format your microSD card or SSD, erasing all current data.
In this article, we’ll explore how this feature works, provide step-by-step instructions for using it, and discuss its benefits and potential drawbacks. Whether you're an experienced user or a newcomer, this new feature promises to make your Raspberry Pi experience smoother and faster.
Step-by-Step Guide: Flashing OS on Raspberry Pi 5 via Network
Materials Needed:
Ethernet Cable for Wired Network Connection
Latest version of Raspberry Pi Firmware (How to Update Raspberry Pi Firmware)
Steps:
Prepare Your Raspberry Pi 5: Connect it to a monitor, keyboard, and network via Ethernet.
Insert the storage (NVMe or microSD Card) then power on the Raspberry Pi.
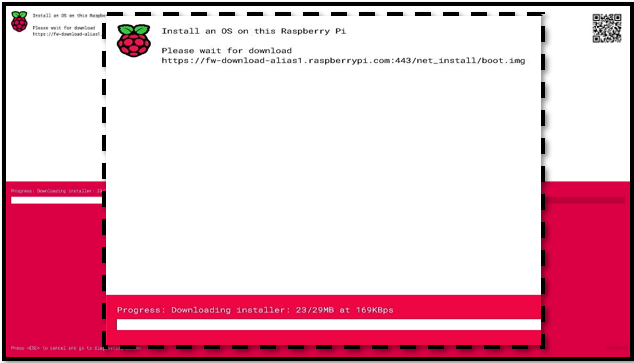
Access Network Boot Mode by pressing the Shift key on your keyboard: It will download & install Raspberry Pi Imager.
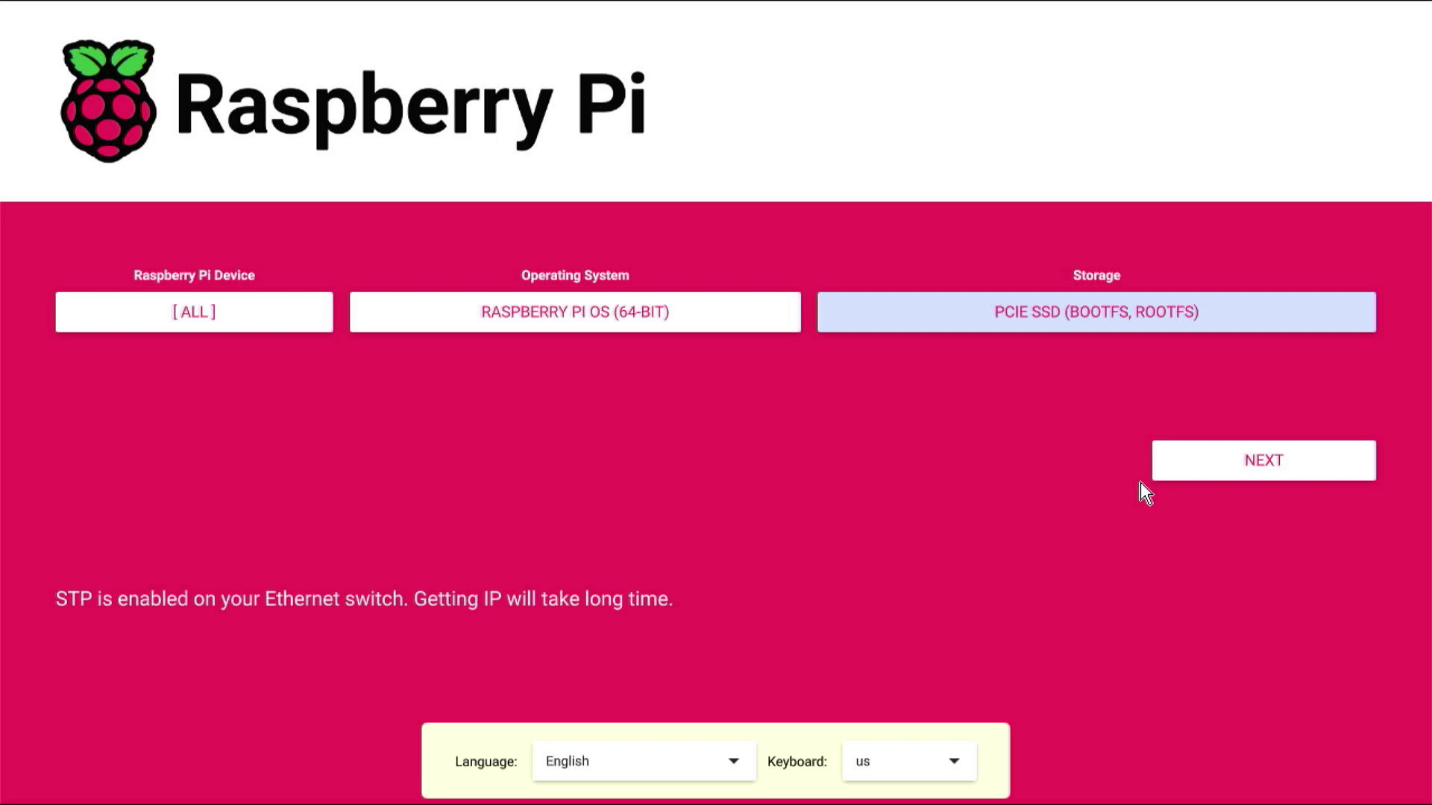
Click on “Choose OS” & select your preferred operating system. Next, click “Choose Storage” & select PCIE SSD or SD Card.
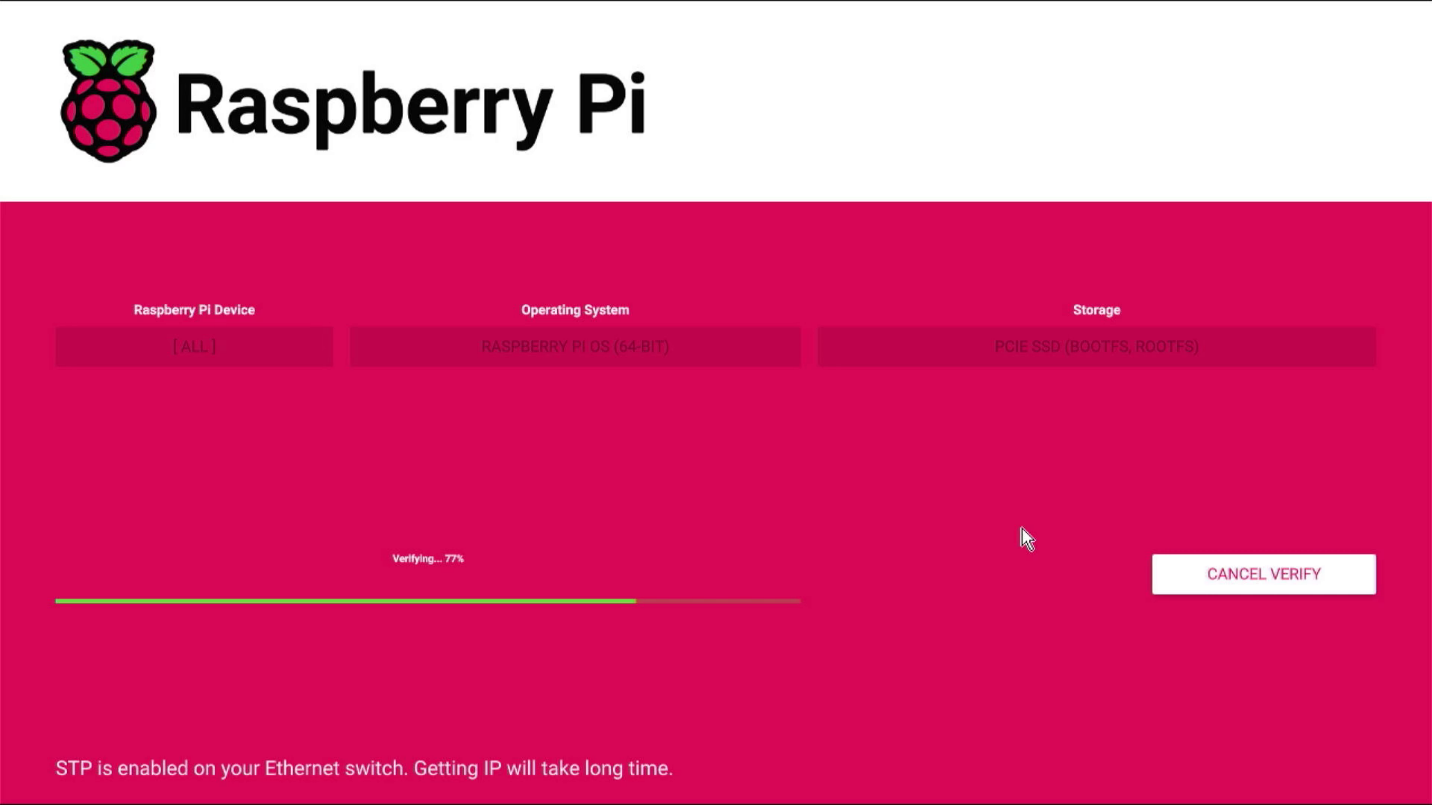
It will take a few minutes for the operating system to be installed & verified.
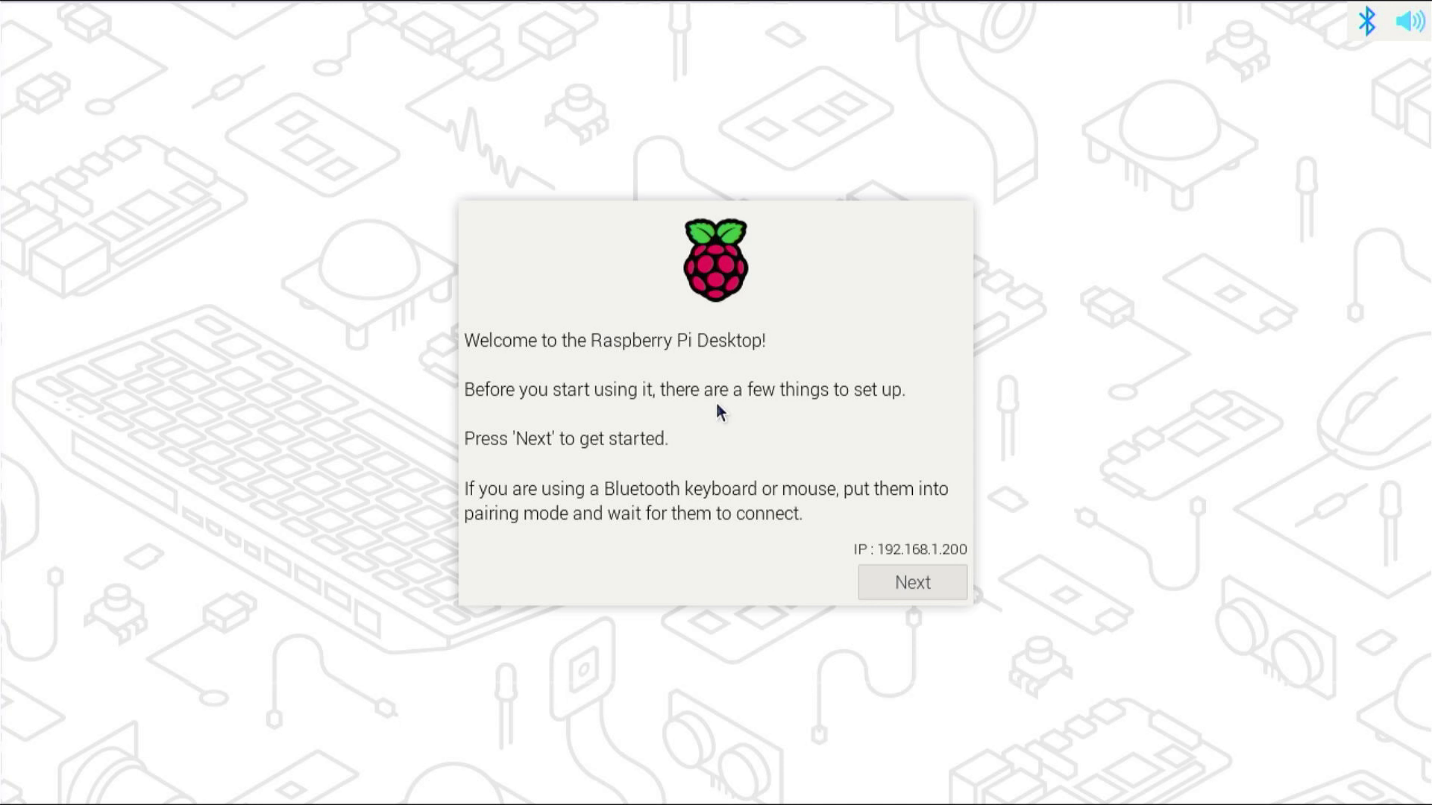
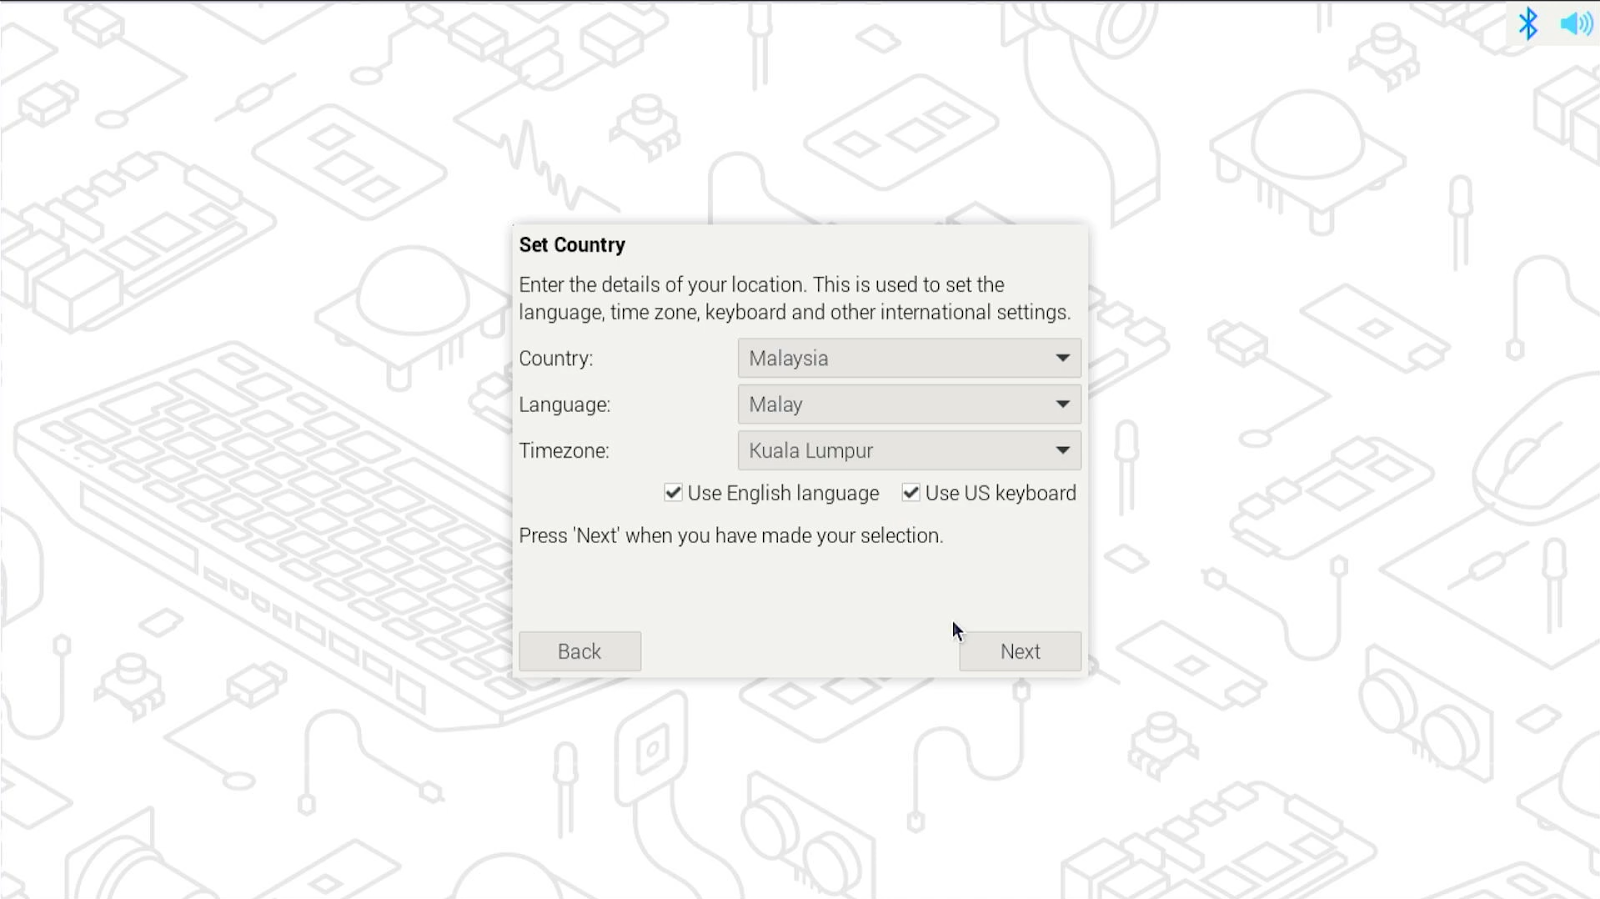
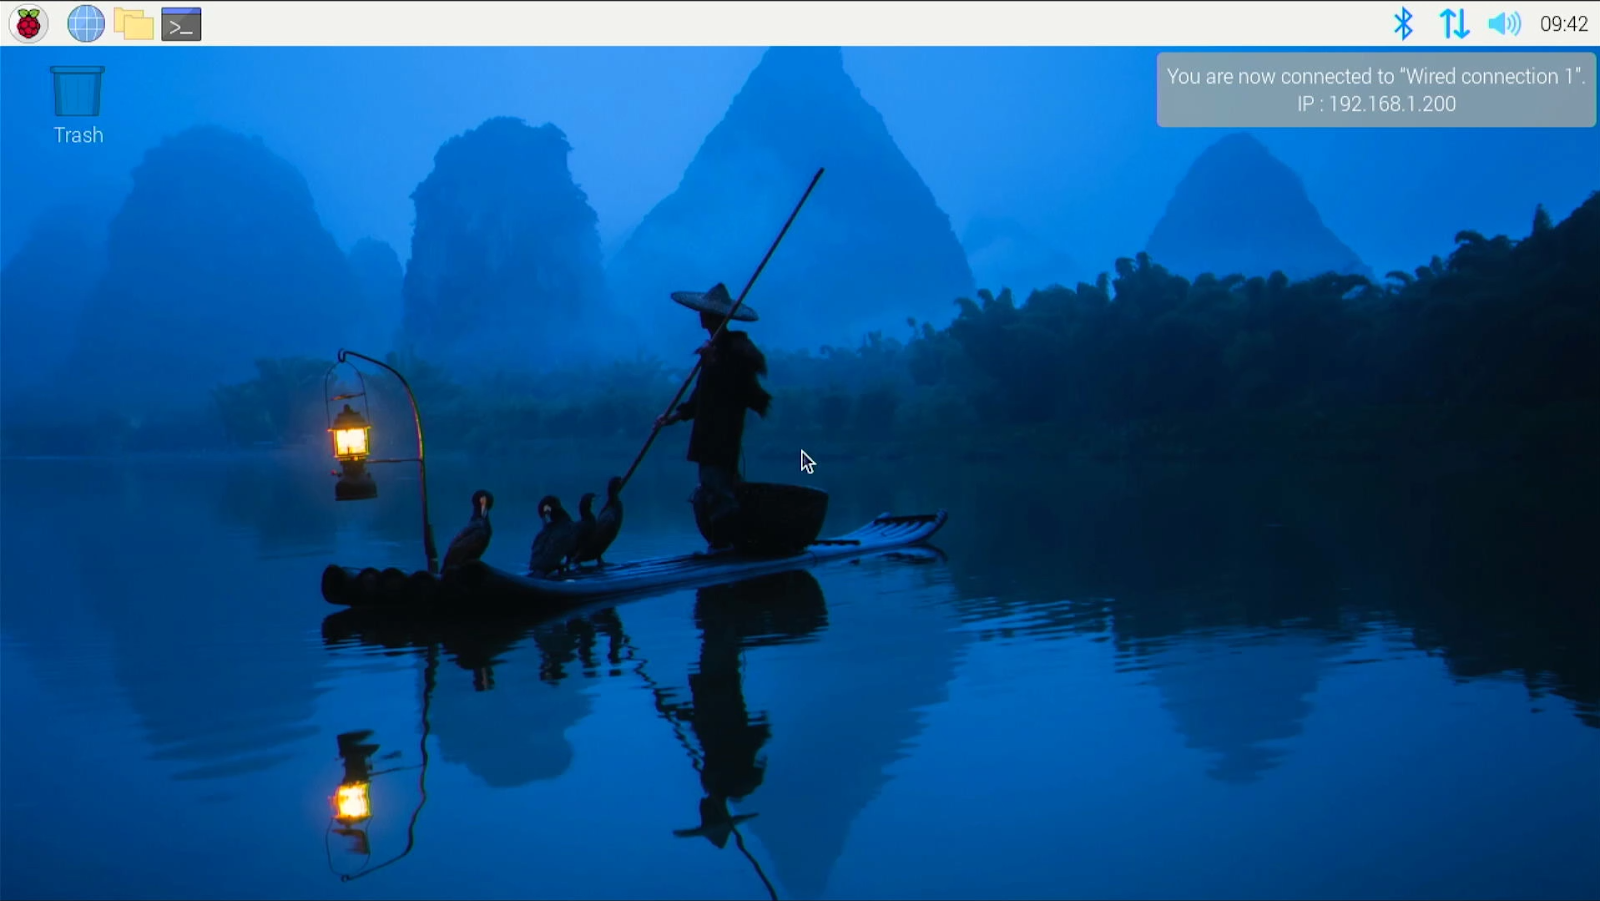
Complete the initial setup wizard to configure language, timezone, and Wi-Fi settings. Install any necessary updates and additional software.
Troubleshooting Tips
Network Issues: Ensure your Ethernet connection is stable.
Monitor and Keyboard: Check that they are properly connected.
Download Failures: Restart the process or use a different network if needed.
Storage Not Detected: Ensure the microSD card or NVMe drive is properly inserted and formatted correctly.
Example Use Case - Changing Your OS: From Raspberry Pi OS to Ubuntu
The network OS flashing feature in the Raspberry Pi 5 not only simplifies the initial setup but also makes switching between operating systems straightforward and hassle-free. Suppose you have Raspberry Pi OS installed on your microSD card and decide to switch to Ubuntu. With traditional methods, this would involve using another computer to download and flash the new OS onto the microSD card. However, with network OS flashing, this process is significantly streamlined.
Conclusion
The ability to flash Raspberry Pi OS via the network without a secondary computer is a significant advancement. It simplifies the setup process, making the Raspberry Pi 5 more accessible and user-friendly. Whether you’re a seasoned Raspberry Pi enthusiast or a newcomer, this feature promises to enhance your experience and reduce setup times significantly.
Hardware Components
 Best Seller
Raspberry Pi 5 Single Board Computer
RM259.00++
x 1 unit(s)