 International
 Singapore
 Malaysia
 Thailand
 Vietnam
Your shopping cart is empty!

Project 4: Light Control using Blynk
- Irsyad Aiman
- 26 Jul 2024
- Tutorial
- Beginner
- 77
Overview
Utilize the power of IoT to control the LEDs remotely using ESP8266 through Blynk Cloud.
Required components
In this tutorial, these are required components:
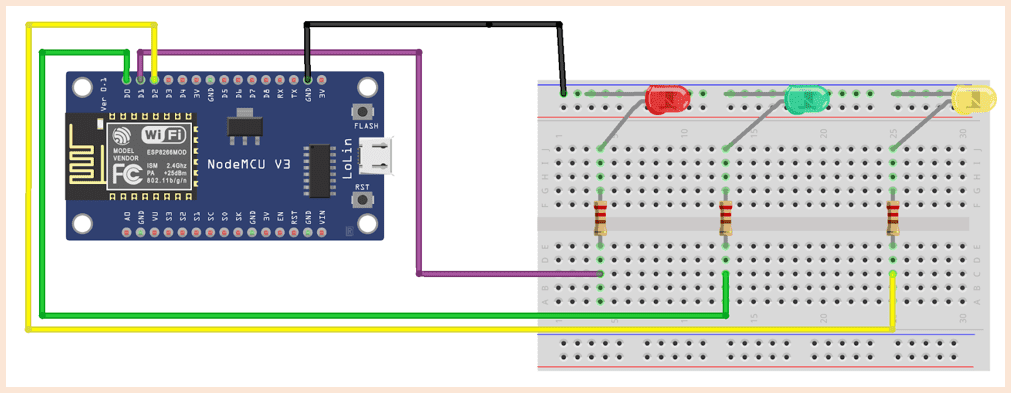
Circuit Diagram

Blynk setup
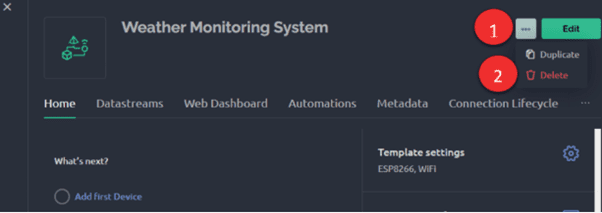
1. Due to Blynk free account limitations, you can only have a maximum of three templates. Delete one of the previously created templates to create a new template for this project.
2. To delete a template, select the template you want to delete, click on the three-dot menu in the upper right corner, and then select the Delete option.
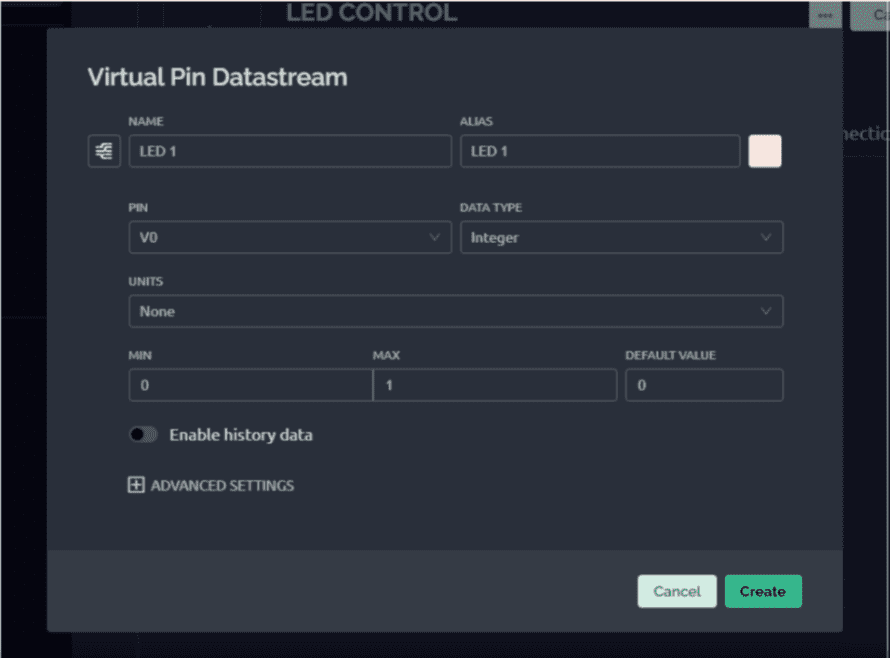
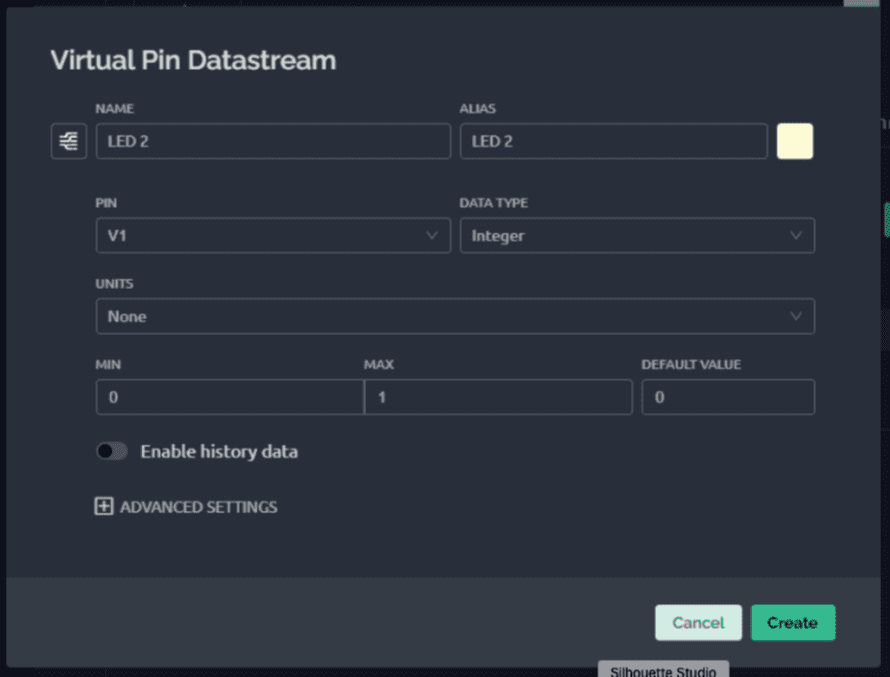
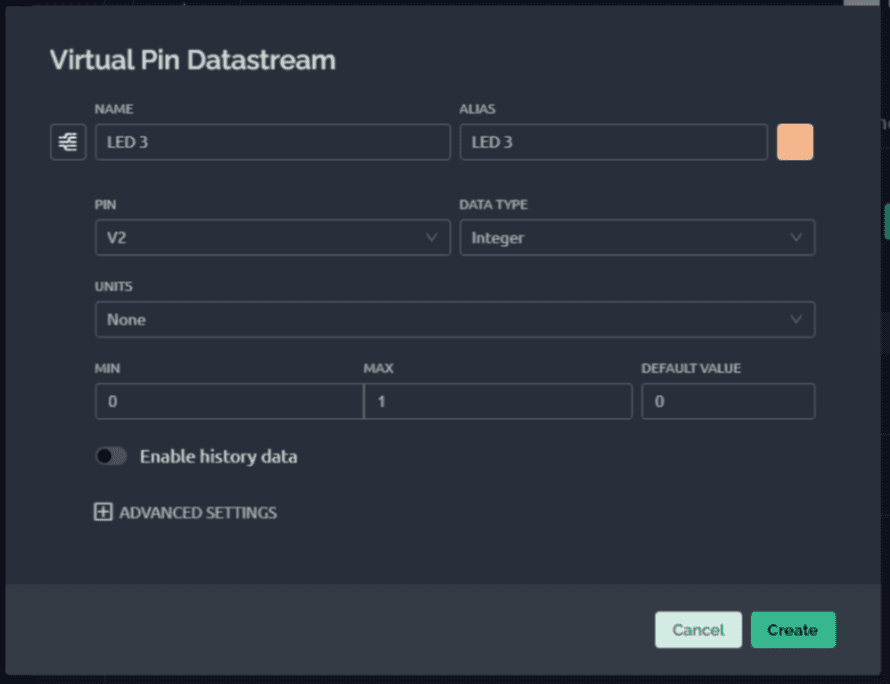
3. Create three Datastreams for three LEDs respectively with details shown below.
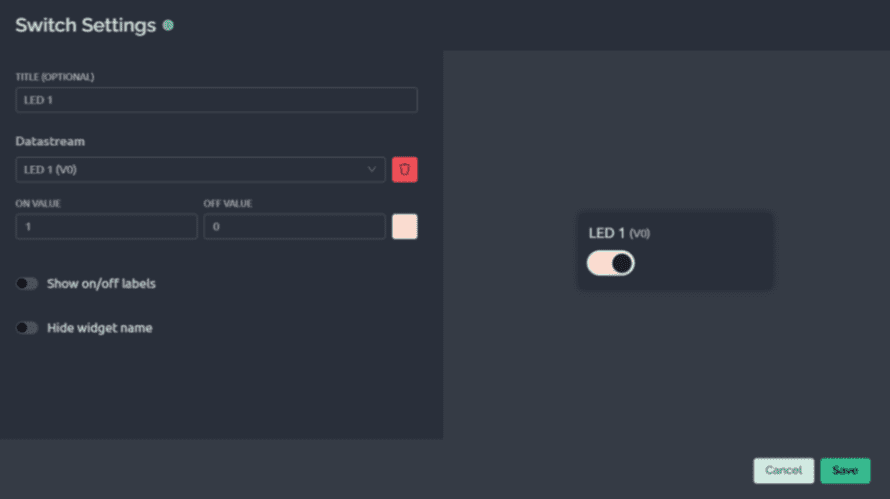
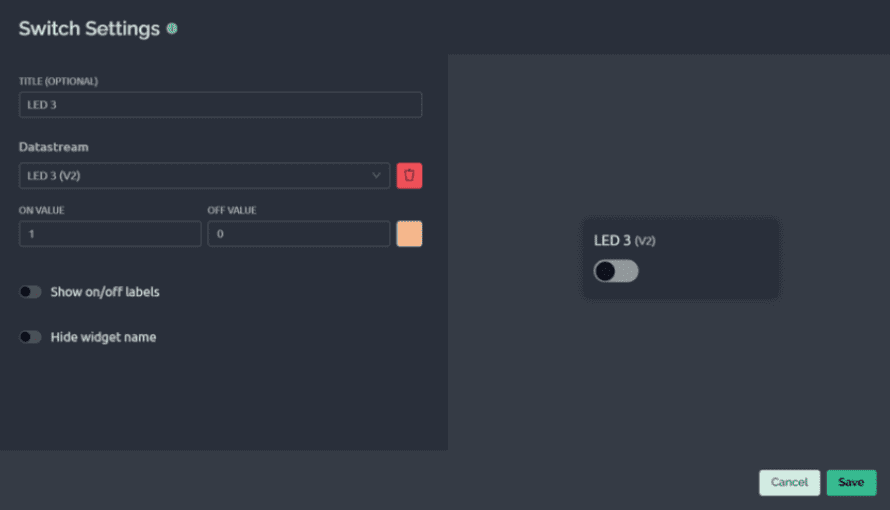
4. For the dashboard, create three switch widgets with the details shown below.

Code
1. Copy and paste the code below in Arduino IDE.
2. Replace the Blynk and WiFi credentials similar to the previous project.
Hardware Components
") New
Newx 1 unit(s)