 International
 Singapore
 Malaysia
 Thailand
 Vietnam
Your shopping cart is empty!
")
How to Install Ubuntu OS on Jetson Host Computer (x86)
- Asri Ruslan
- 06 Jun 2024
- Tutorial
- 495
Note: To load JetPack into NVidia Jetson Series of System on Module (SoM)'s eMMC or in some cases, the NVMe SSD, you will need NVidia SDK Manager. The NVidia SDK Manager can only be installed on a specific Ubuntu OS with X86 Architecture CPU (NOT ARM or RISC-V). At least at the time this article is written.
Installing Ubuntu on your host computer is the first step in setting up a development environment for the Nvidia Jetson series. Here’s a step-by-step guide to help you through the process:
Step 1: Prepare Your Host Computer
- Backup Important Data: Before starting, back up any important data on your host computer.
- Check System Requirements: Ensure your computer meets the minimum system requirements for NVIDIA SDK Manager (Host machine).
- x86 Architecture
- At least 128GB Storage
- 8GB RAM
- Screen resolution equal to or larger than 1440x900 (1052x411) is recommended for GUI mode.
Step 2: Download Ubuntu ISO
- Visit the Ubuntu Download Page: Go to the Ubuntu website.
- Download the ISO File: Choose the latest Long-Term Support (LTS) version for stability (e.g., Ubuntu 22.04 LTS) and download the ISO file.
Note: The Ubuntu version depends on the Jetpack version you wish to install (Refer to Figure 1).
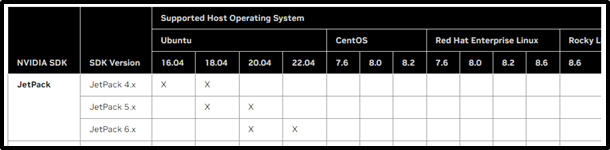
Figure 1: Compatibility Matrix
- https://docs.nvidia.com/sdk-manager/system-requirements/index.html
- https://developer.nvidia.com/embedded/jetpack-archive
Step 3: Create a Bootable USB Drive
- Get a USB Flash Drive: Ensure you have a USB flash drive with at least 8 GB of storage.
- Download Rufus or balenaEtcher to create bootable USB:
- Windows: Download Rufus.
- Linux/Mac: Download balenaEtcher.
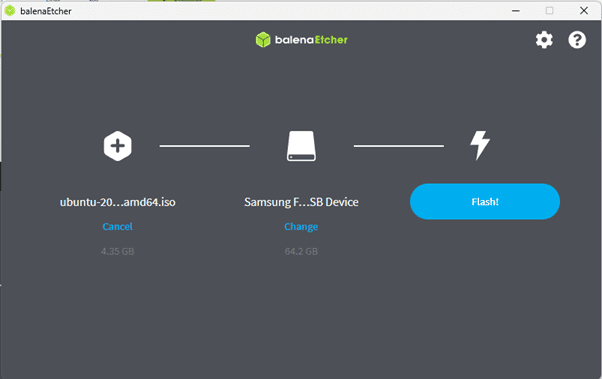
● Using balenaEtcher:
- Open balenaEtcher.
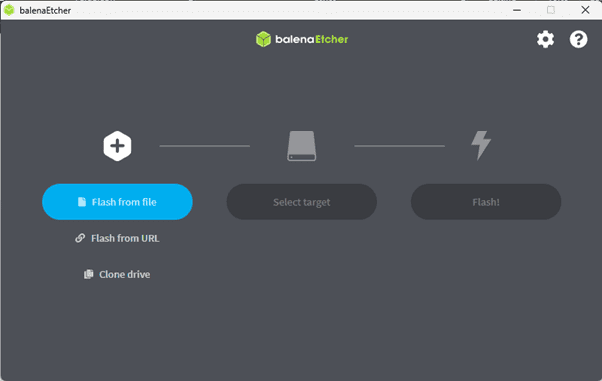
- Select the Ubuntu ISO.

- Choose the USB drive.

- Click "Flash!" and wait for the process to complete.


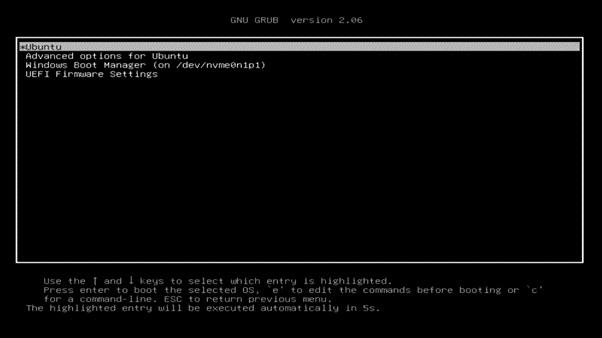
Step 4: Boot from USB Drive
- Restart Your Computer.
- Enter BIOS/UEFI: Immediately press the key to enter BIOS/UEFI settings (often F2, F10, DEL, or ESC).
Note: Depending on the Computer manufacturer, you might need to press specific keys to select USB boot. BIOS GUI may differ from images below.

- Set USB as Boot Priority: Navigate to the boot menu and set the USB drive as the first boot option.
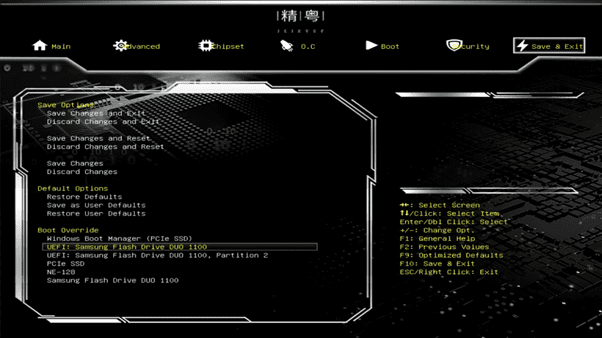
- Save and Exit: Save changes and exit BIOS/UEFI settings.
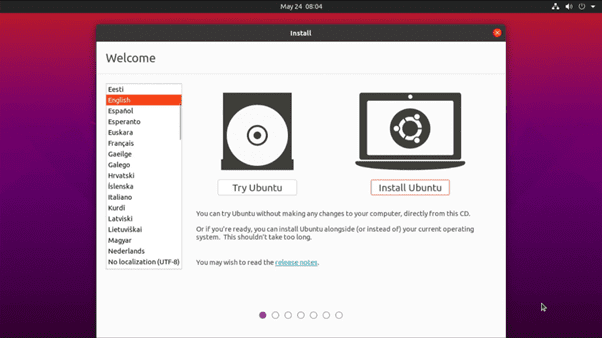
Step 5: Install Ubuntu
- Boot from USB: Your computer should now boot from the USB drive, displaying the Ubuntu installation screen.
- Start Installation:
- Select "Install Ubuntu".
- Choose your language and keyboard layout.
- Prepare Installation: Select Minimal Installation

- Installation Type:
- Choose "Erase disk and install Ubuntu" if you want to overwrite the existing OS.
- For dual boot, select "Install Ubuntu alongside [your current OS]".
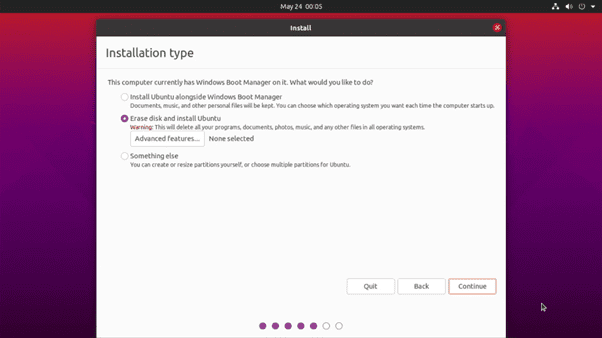
- Configure Partitions: If you need custom partitions, choose "Something else" and set them up manually.
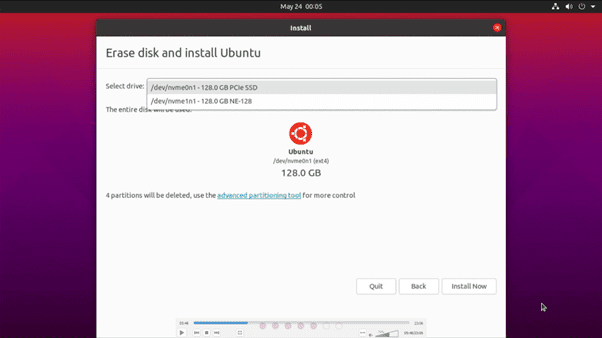
- Begin Installation: Click "Install Now" and follow the prompts. The installation process will take some time.
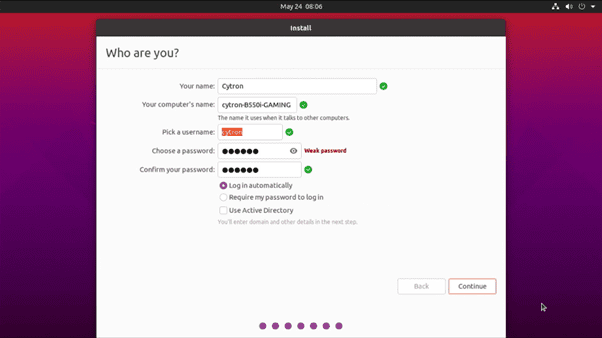
- Follow Prompts: Enter your time zone, create a user account, and set a password.
Step 6: Post-Installation Setup
- Remove USB Drive: Once installation is complete and you’re prompted to restart, remove the USB drive.

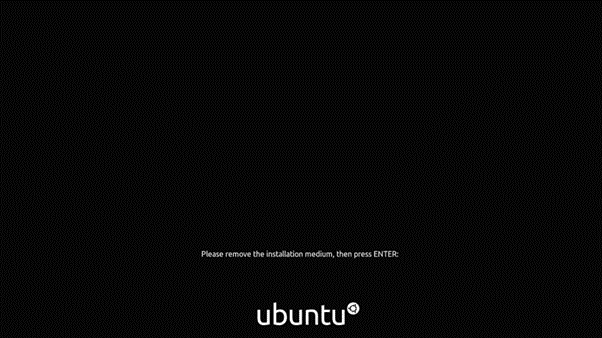
- Reboot Your Computer: Your computer will now boot into Ubuntu.

Step 7: Install Nvidia Jetson SDK
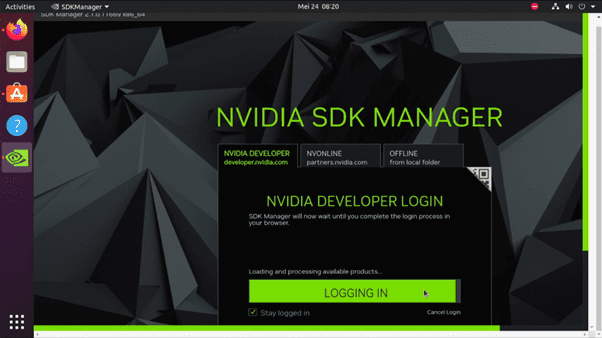
- Install SDK Manager:
Note: You will need to log in or sign up for Nvidia account to download Nvidia SDK Manager.
- Download Nvidia SDK Manager from the Nvidia Developer site.

- Follow the instructions to install the SDK Manager on your Ubuntu system.

- Launch SDK Manager:
- Open SDK Manager and log in with your Nvidia Developer account.
- Follow the prompts to install the necessary components for your Nvidia Jetson device.
You’re now ready to start developing for the Nvidia Jetson platform using your Ubuntu host computer.
Hardware Components
 Out Of Stock
Jetson Orin NX AI Development Kit - 16GB
RM5,499.00
x 1 unit(s)