 International
 Singapore
 Malaysia
 Thailand
 Vietnam
Your shopping cart is empty!

How to Create Temperature Gauge Using Pi Pico
- Abdulrahman Alhamed
- 14 Jul 2023
- Tutorial
- Beginner
- 1083
Join us in this tutorial as we create a temperature gauge using Raspberry Pi Pico and a servo motor! We'll cut a cardboard paper into a half circle, label it with temperature ranges, and attach a servo horn for the temperature indicator. With coding, we'll make the servo move the dial, displaying different temperatures interactively.
Video Tutorial
Components Required
Hardware Components
 -17%
Best Seller
-17%
Best SellerSG90 Micro Servo
RM6.50 RM7.80
x 1 unit(s)
 -11%
-11%Raspberry Pi Pico Microcontroller Board
RM17.90++ RM19.90++
x 1 unit(s)

x 1 unit(s)
SG90 Micro Servo
Not Available
x 1 unit(s)
Connection
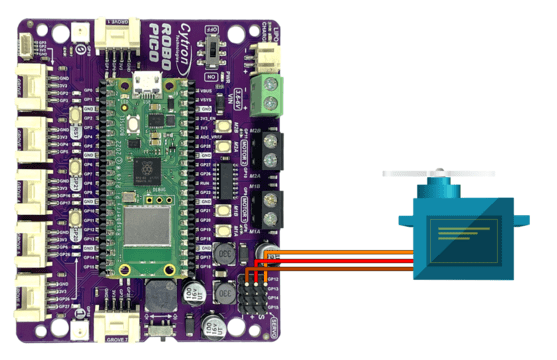
Connect servo motor to port GP12.
Get Familiar with Thonny and CircuitPython
In this tutorial, we'll use Thonny editor & CircuitPython to build the code for this project. If you're not familiar with Thonny, check out the video below to learn how to get started with it.
Code
Visit the official CircuitPython website and download the latest library bundle. Make sure to select the correct bundle for your version of CircuitPython.
Unzip the file, and locate this library:
- adafruit_motor
Copy and paste it into "lib" folder on your CIRCUITPY drive.
Project complete
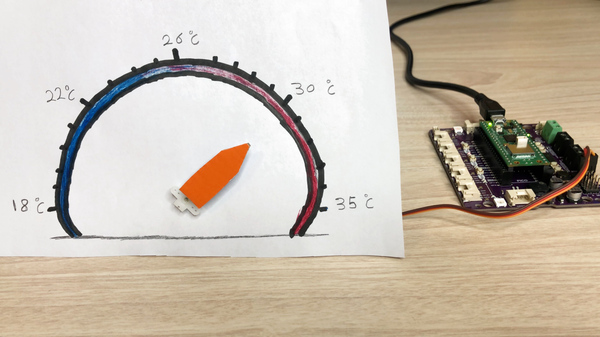
Take a piece of cardboard and cut it into a shape that looks like a half circle. You can use a compass to draw the curved line. Remember to write down the numbers on the cardboard to show the temperature range you want.
Next, make a small hole in the cardboard. This hole will be used to attach the servo horn, which will act as the temperature indicator. By moving the servo, we can show different temperatures on the gauge.