 International
 Singapore
 Malaysia
 Thailand
 Vietnam
Your shopping cart is empty!
")
How To Build A Mobile Robot (Part 2)
INTRODUCTION
As mentioned in Part 1, you shouldn’t have a problem completing your robot if you get a “ready-to-use” robot or the building kit because most of the time you will be provided with a complete building guide when you purchase the robot. So please check carefully before you buy, if the building manual is not provided, don’t buy that kit!
In this post, we will focus on option C – Building robot from scratch.
Usually, there are 6 major components in a mobile robot that we are going to explore deeper one by one.
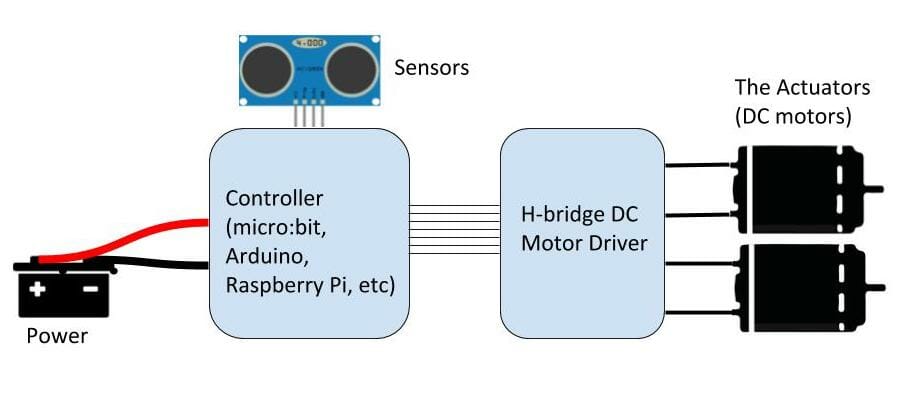
THE CONTROLLER

The controller serves as the main processing unit for your robot. Depending on the complexity of your robot, you need to decide on a suitable controller. For beginners to start learning to build a robot, I would recommend Arduino because it is low cost, easy to learn and you can easily find thousands of tutorials or guides from the internet teaching how to use it to build a robot. Of course, you are free to use other controllers such as micro:bit, Raspberry Pi, BeagleBoard and etc.
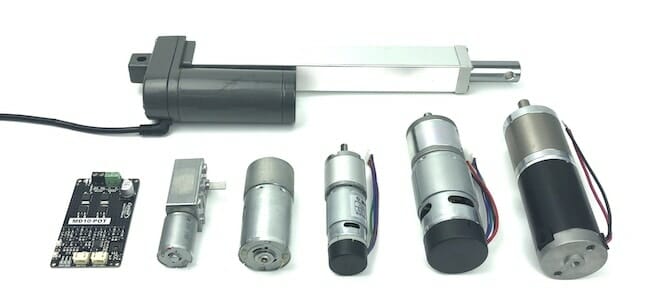
This is one of the most frequently asked questions - What DC motor should I use?
To answer this question, you need to be able to provide these 2 parameters: Torque and RPM

*mass of your robot in Kg(including the load that you want it to carry), the radius of the wheel you use on your motors in meter (m)

*Distance and radius in meters (m) and time in seconds (s).
Now you have got 2 important specs to choose your DC Motor- the torque and the speed of the motor. You can select the DC motor from this page using the filtering tool.
Note: If you want to learn more about how to choose a DC motor, you shouldn’t miss this post.
Once you have selected the suitable DC motor, you need to learn how to select the right H-bridge motor driver to drive your DC motor properly.
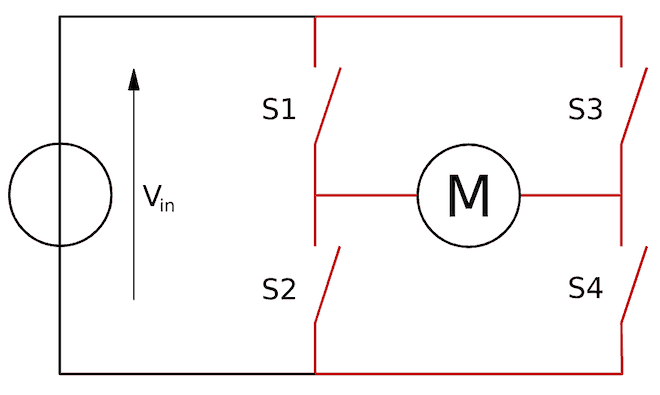
You may be asking, why do we need an H-bridge motor driver? Why can’t we connect the motor directly to our controller? This is because most of the microcontroller output only gives a very small current (in milliampere) but a DC motor requires big current to work. The bigger motor you are using, the bigger the current it consumes.
The H-bridge motor drivers usually are designed based on 3 parameters- the maximum current output, the supported motor voltage, and the supported control signal.
The Maximum Current Output
Current is measured in ampere (usually mentioned in Amp or A). We need to ensure the motor driver is able to cope with the current needed by the motor. If we check a motor’s datasheet, you will find 3 type of current specifications- no-load current, rated current and stall current. We can ignore the no-load current. Rated current means the current drawn by the motor in normal operation while the stall current is the maximum current the motor would draw when the motor is stalled.
What is motor stall? Motor stalling means the motor has more load on it than it is designed for and it can no longer supply enough torque to keep it spinning A.K.A. overloaded. This happens when the motor is stuck at a dead end or pushed by another heavy object (e.g. an opponent robot). At this point, the motor will stop spinning but the current will continue to increase. It will last for a few seconds before the motor or the motor driver die. So, we need to prevent our motors from stalling for too long.
Check out this video to learn how to measure a motor’s stall current.
Does that mean you need to ensure the peak current of the H-bridge motor driver is more than the stall current of the motor? Not really! Because you are not going to stall your motor most of the time! In normal operation, your motor is running at the rated current. Hence, checking on the motor driver’s continuous current is more rational.
In short, if you are building a sumo or combat robot where motors will stall during pushing with opponent robots, then you need to ensure,
Motor Driver’s Peak Current > Motor’s Stall Current
Otherwise, just take care of the motor driver’s continuous current will do.
Motor Driver’s Continuous Current > Motor’s Rated Current
The Supported Motor Voltage
The common DC motors run at 6V, 12V and 24V. You just need to ensure that the motor driver you selected supports the voltage required by your motor.
The Supported Control Signal
There are several common control signals that the majority of the controllers use- PWM, serial, CAN or I2C. You need to ensure that the motor driver you choose support the type of control signal you require. If you are a beginner and unsure what to choose, just stick to PWM signal. This is the most common way to control a motor driver and all controllers should support this signal.If you are building an autonomous robot, you probably need at least one sensor (or a combination of a few sensors) to navigate the robot. I only briefly some of the commonly used sensors in this post. You can explore more on the internet.
Line Sensor
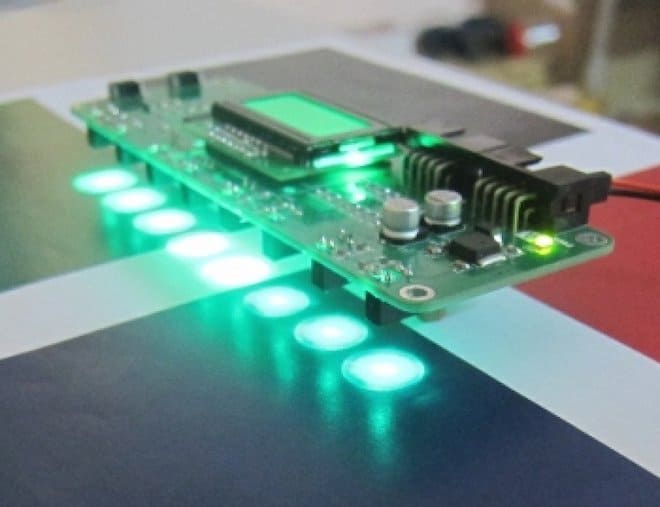
Line following is the most common and useful lesson to learn in a mobile robot. Usually, we will use IR sensors to detect the white lines and make the robot follow the lines.
You need at least 2 pairs of IR sensors to do this job. However, I would recommend using 3 pairs of IR sensors for smoother navigation. You can either get the single IR module x 3 or get the line sensor array which is much easier to calibrate and reliable.
Note: I will write another post to explain this topic in more detail.
Ultrasonic Sensor
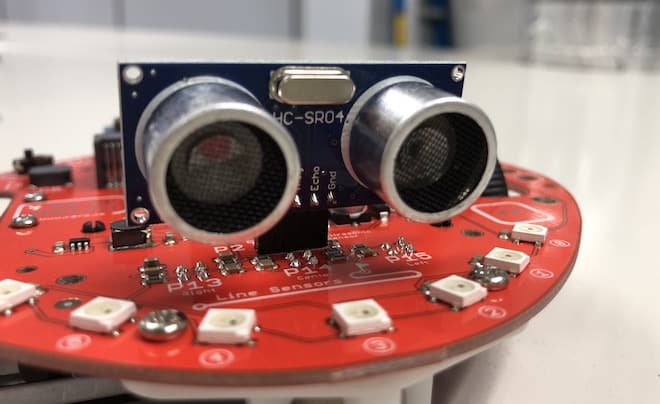
For obstacle avoidance, the most cost-effective option is to get the popular HC-SR04 ultrasonic Alternatively, you also get to use the IR sensors to detect objects or obstacles.
Rotary Encoder

The rotary encoder is typically mounted together with the wheel or the motor to measure the absolute distance transpassed by the robot. The reason to use rotary encoder is that in a certain condition, there is no white line or objects for the robot to follow.
Other Sensors
There is various type of sensor that you can explore. LiDAR, compass, IMU, camera vision and much more depending on what you want to achieve. If you are a beginner, always start with line following and obstacle avoidance using the line sensor and the ultrasonic sensor.
THE BATTERY
I would recommend using rechargeable batteries for your robot to save your money and our lovely planet in the long run because the motors usually consume a lot of power. There are 3 common rechargeable batteries used in the mobile robot- Lead Acid, Li-Po and Li-Ion.
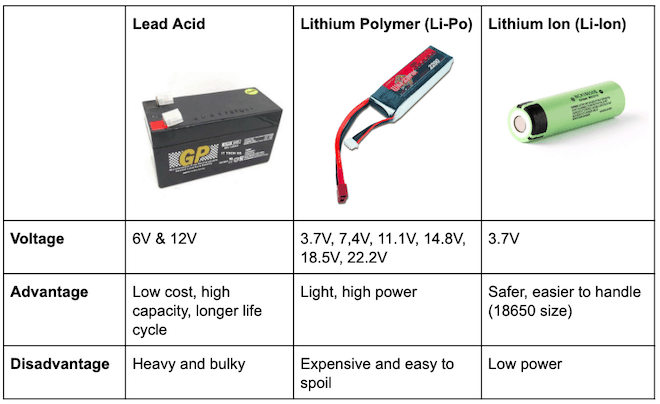
Please ensure you are getting the right battery charger to recharge these batteries. Improper charging may cause a fire.
THE CHASSIS
Depending on the robot’s task, you can design your own robot chassis and print it with a 3D printer or build it using the extruded aluminum profile.
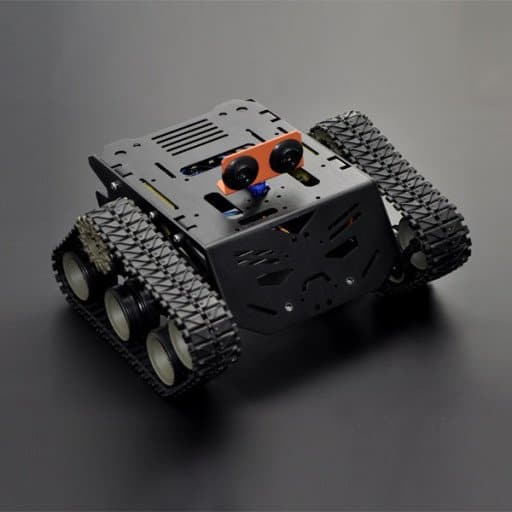
Alternatively, you can get the standard robot chassis kit available in the market.
CONCLUSION
This post intended to provide beginners the basic guides on what are the options we have and how to select the right parts to build your first robot. We will continue to share know-how in building a mobile robot in different applications. Feel free to leave a comment to share the problem you faced in building a mobile robot.