 International
 Singapore
 Malaysia
 Thailand
 Vietnam
Your shopping cart is empty!

Set up a NAS with Raspberry Pi 5
- Jia Le Chye
- 31 May 2024
- Tutorial
- Advanced
- 2488
Network Attached Storage (NAS)
Network Attached Storage (NAS) is a device that connects to your network, allowing multiple users to access and share files from one central location. It's great for storing and backing up data, and for streaming media like videos and music. Unlike traditional storage devices, which are usually connected to just one computer, NAS supports multi-user access, making data transfer and backup much easier and more efficient.
Compared to traditional storage options like USB drives or external hard drives, NAS offers significant advantages. Traditional storage devices require a physical connection to each computer for data transfer or backup, which can be time-consuming and inconvenient. In contrast, NAS allows seamless access and data management from any device on the network, eliminating the need for physical transfers and enabling automated backups. Maintenance for NAS systems is generally easier, as they can be managed remotely and often come with built-in tools for monitoring and managing storage. Traditional storage devices need physical connection, leading to wear and tear on cables, ports, and the device itself. They are also sensitive to vibration and drops. NAS, however, remains stationary and connected to the network, reducing the risk of physical damage. Furthermore, traditional storage devices are not designed for easy storage upgrades, while NAS allows for simple expansion by adding more or larger disks, offering more scalable solutions.
Raspberry Pi 5
Raspberry Pi 5 also known as RPI5 is a versatile, low-cost, single-board computer developed by the Raspberry Pi Foundation. It features improved processing power, increased memory, and enhanced connectivity options compared to its predecessors. The Raspberry Pi 5 is designed for various applications, from simple educational projects to more complex tasks like running servers, home automation systems, and custom electronics projects. Its small form factor, affordability, and robust performance make it an excellent choice for hobbyists, educators, and professionals looking to build cost-effective and efficient computing solutions.
Raspberry Pi 5 + NAS
As described above, the Raspberry Pi 5 is a versatile, low-cost, single-board computer. It is powerful enough to handle the basic functions of a NAS. Using a NAS, especially one built with a Raspberry Pi 5, offers a more affordable solution for creating a reliable and efficient storage system, suitable for both home and business use. Building a NAS with a Raspberry Pi 5 provides a cost-effective alternative to purchasing a pre-built NAS system. It allows for customization and scalability, making it an excellent choice for those looking to create a budget-friendly and efficient storage solution.
Compared to pre-built NAS systems, a Raspberry Pi 5 NAS offers significant cost savings. Pre-built systems can be expensive, while a Raspberry Pi 5 setup is much more affordable. Maintenance costs are lower due to the use of open-source software supported by the community. Additionally, a Raspberry Pi 5 NAS allows for greater customization and scalability, enabling users to select their preferred storage capacity and software. Overall, a Raspberry Pi 5 NAS is a more cost-effective, flexible, and scalable solution for personalized storage needs.
Materials and Software:
- Required Hardware:
- Required Software:
- PuTTY
- OpenMediaVault
- Web Browser
Video Tutorial:
Step 1: Install Raspberry Pi OS Lite
- Open up Raspberry Pi Imager and select the type of Raspberry Pi Device.
- Select the Operating System as Raspberry Pi OS Lite(32-bit) by navigating to Raspberry Pi OS(other) section.
- Select the SD card in the Storage section.
- Click Next and at the pop-out click EDIT SETTINGS.
- At the GENERAL Tab, set the hostname, Username and Password.
- Navigate to the Configure Wireless LAN section, check the network name (SSID) and Password for the Network
- Navigate to the SERVICES Tab and click Enable SSH.
- Click SAVE and YES to proceed.
- Click YES when the data will be erased Warning pop-out
- Once done, the flashed SD card is ready.

Step 2: Assembly and Setup
- Carefully assemble the parts and everything should fit nicely in the case.
- Insert the flashed SD card into the Pi
- Insert an Ethernet LAN cable from your router to the Pi.

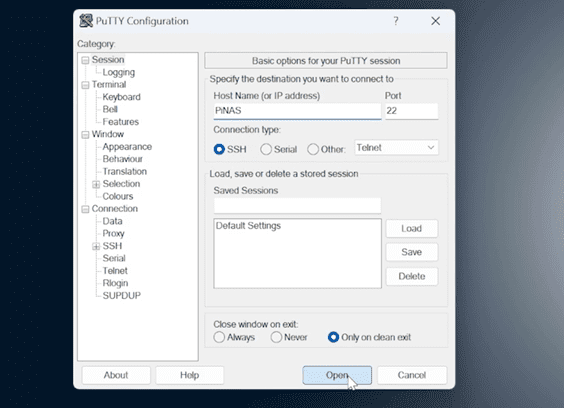
Step 3: SSH into Pi using PuTTY
- Input the hostname that we configure on the pi imager and use Port 22. Ensure the connection type is SSH as well.
Step 4: Configure the network environment.
- Configure the Network environment of Raspberry Pi by using the code:
sudo rm -f /etc/systemd/network/99-default.link
- Then,
sudo reboot
Step 5: Installing OpenMediaVault
- SSH into the Pi again by repeating step 3
- Run the code
sudo wget -O - https://github.com/OpenMediaVault-Plugin-Developers/installScript/raw/master/install | sudo bash - The code above is used to install the OpenMediaVault to Pi via SSH terminal
- The process of installation will take a few minutes.
Step 6: Setting up OpenMediaVault
- Open up a browser of your choice and type in your Pi’s IP address in the address bar.
- Alternatively, you can type in your Pi’s hostname as well (According to the setting at step 1)
- For example:
- http://hostname or http://IP address/
- Login to OpenMediaVault using the default user credential.
Username: admin
Password: openmediavault
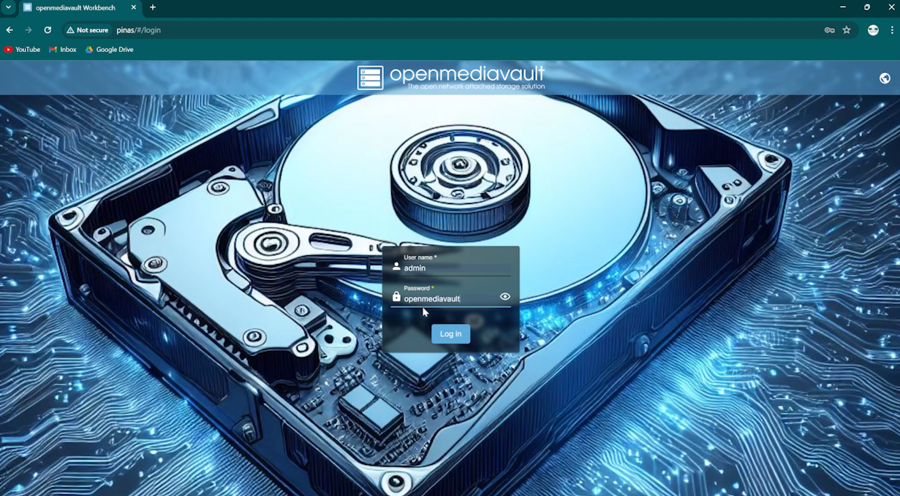
* Change the default password after login to protect your privacy.
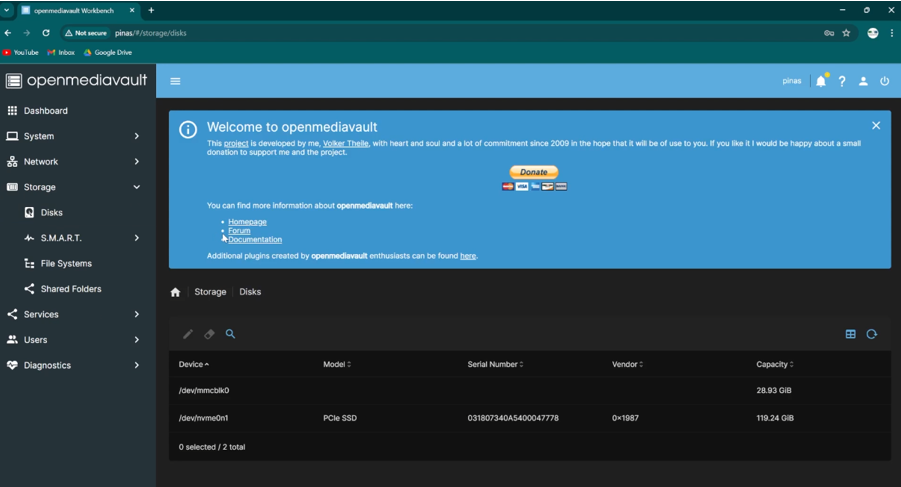
- Select Storage and choose Disks
- All your attached storage, including the SD card, will appear
* If not, double-check if the storage device is plugged in correctly and reboot the system
.
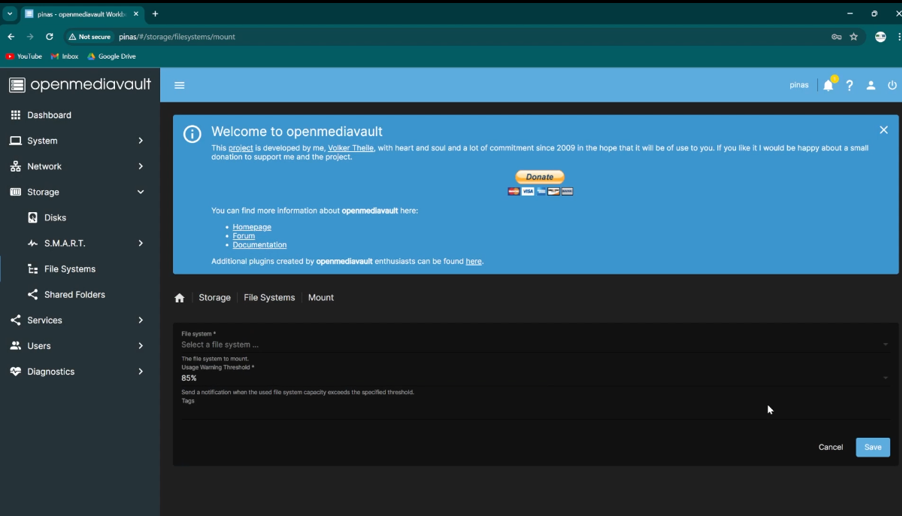
- Next, in the Storage category choose File Systems.
- Click on Create and select your storage device.
- Select Ext4 for the drive format. Then click Save.

Mount the file system you just created and click Save to apply configuration changes (A yellow banner will show up).
- To create a shared folder.
- Navigate to Storage > Shared Folders and select Create.
- Name the folder, and select which drive it should save on.
- Grant permissions to users.
- By default, the permissions should be correct, but you can tweak them if you prefer a different option for your network preferences.
- Save and apply configuration changes

- Lastly, make sure computers on your network can find the folder.
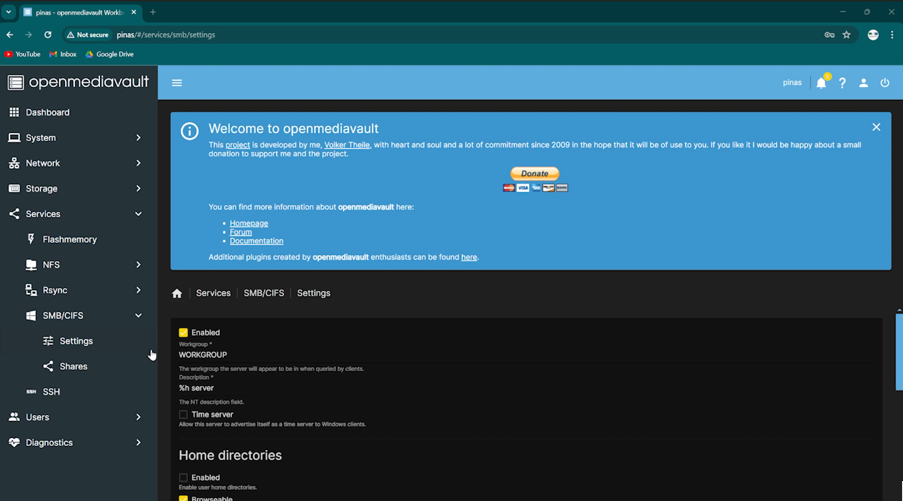
- Navigate to Services and select SMB/CIFS.
- Under Settings, check the Enabled box and save.
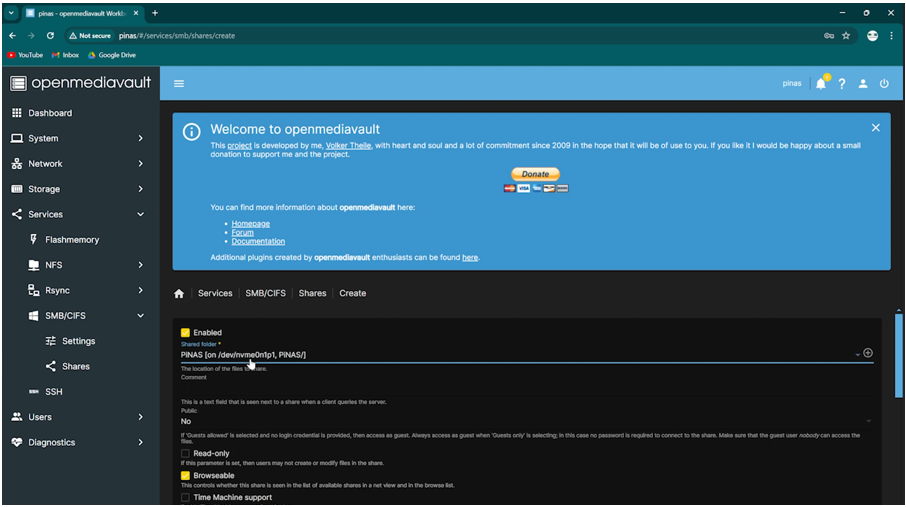
- Under Shares, select Create, and add your shared folder.
- Save and apply configuration changes.
- Your Pi NAS system is now ready to use!
Step 7: Accessing your NAS
- For Windows Users:
Open Windows Explorer.
In the path bar, write \\XXX.XXX.X.XXX (using the IP address of your Raspberry Pi NAS).
That should create a new entry under Network in the left navigation bar and show its contents.
Double-click on the share you want and enter the username and password that you created in Raspberry Pi Imager when prompted.
For macOS Users:
From your desktop, press Command+K.
Type smb://XXX.XXX.X.XXX (replace with the IP address of your Raspberry Pi NAS ).
Enter your username and password that was created in Raspberry Pi Imager.
Your shared folder will now show in a finder window.
Hardware Components

x 1 unit(s)
 Best Seller
x 1 unit(s)
 Best Seller
Raspberry Pi 5 Single Board Computer
RM259.00++
x 1 unit(s)
")
x 1 unit(s)

x 1 unit(s)

x 1 unit(s)