 International
 Singapore
 Malaysia
 Thailand
 Vietnam
Your shopping cart is empty!

Removing Supports from 3D Prints: Best Practices and Tips
- Abdulrahman Alhamed
- 24 May 2023
- Tutorial
- Beginner
- 642
Support structures play a crucial role in 3D printing, allowing the creation of complex and intricate designs that would otherwise be impossible to fabricate. These structures provide stability and prevent deformations during the printing process. However, once the printing is complete, the supports need to be removed to achieve the desired final result.
Proper support removal is essential for achieving a clean, smooth, and professional finish on your 3D prints. It requires careful attention and the use of appropriate techniques to avoid damaging the printed object. In this article, we will explore the various methods and best practices for removing hard supports from 3D prints.
Manual Support Removal Methods
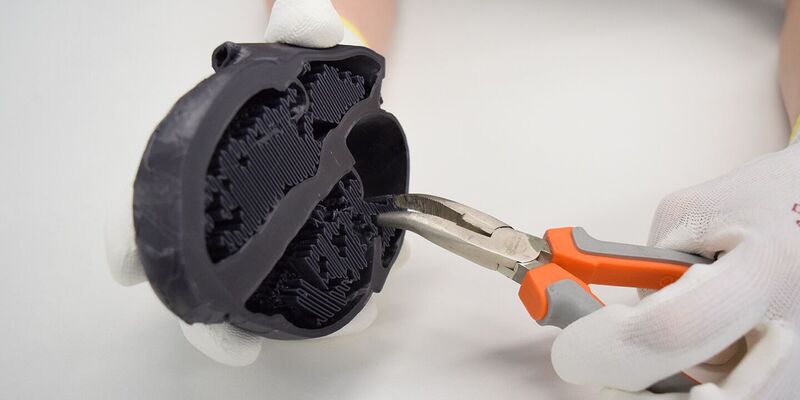
Source: tractus3d.com
When it comes to removing supports from 3D prints manually, there are a couple of common techniques that can be employed.
1. Using Pliers or Tweezers: One straightforward method is to utilize pliers or tweezers to grip and gently remove the supports. This technique works well for larger supports that are easily accessible. Care should be taken to grasp the support close to its base to minimize the risk of damaging the print. Slow, controlled movements should be employed to prevent any sudden jerks that could cause unintended damage.
2. Snapping Supports Off by Hand: For smaller or more delicate supports, snapping them off by hand can be an effective method. This technique is particularly useful for thin and easily breakable supports. By carefully applying pressure at the base of the support, it can be snapped off cleanly. It is important to exercise caution and monitor the force applied to avoid damaging the print or causing any unintended fractures.
Both of these manual support removal methods require a careful touch and an understanding of the structural integrity of the supports and the print. By proceeding slowly and being mindful of the amount of force applied, you can successfully remove supports while minimizing the risk of damaging the 3D print.
Mechanical Support Removal Methods
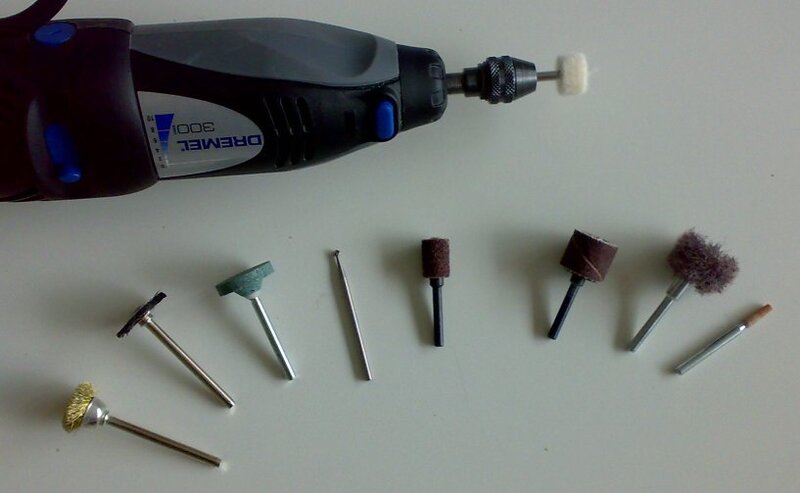
Source: Edutechwiki
Using mechanical tools is best suited for large, simple models where you don’t have to worry about accidentally cutting off some detail. There are a few options you can use, but keep in mind that smaller tools provide more control over support removal. Let’s look at the possible options.
1. Mini Rotary Tool: These compact handheld rotary tools come with a range of attachments that make support removal effortless. Utilize saw-like attachments to detach supports along the model's surface in one smooth motion. For supports located too close to the surface for easy removal, the sanding heads can be used to delicately etch them away. Take your time, work methodically, and consider removing supports in layers if feasible.
2. Soldering Iron: The soldering iron can be employed to heat the blade of an X-acto knife, allowing it to glide through the plastic with ease. However, be cautious not to touch the model's surface directly with the soldering iron to avoid leaving undesirable marks.
When using mechanical tools for support removal, take your time and be careful. Start with less important parts of the print to get familiar with the tools and how they affect the model. Keep in mind that these methods may leave marks or require additional work to achieve the desired finish.
Chemical Support Removal Method
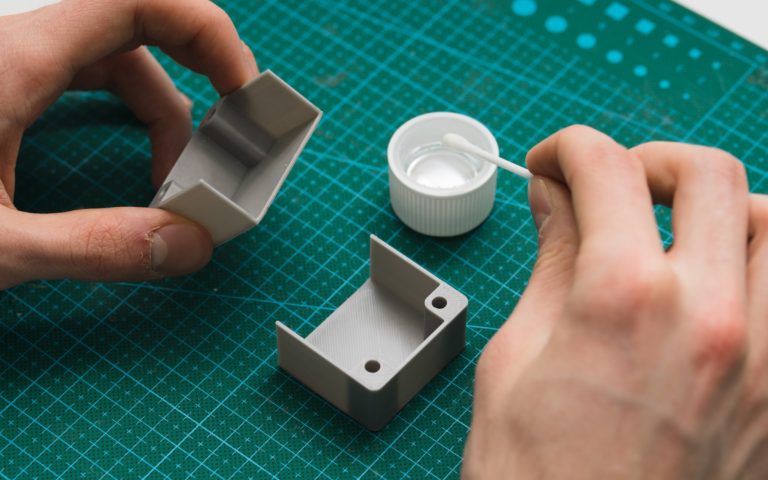
Source: blog.gotopac.com
If you find yourself in a situation where you're eager to remove supports from an FDM print, one approach is to soften the supports using a solvent to facilitate their removal. Solvents like acetone or isopropyl alcohol are typically effective in softening supports, making them easier to cut away. However, it's important to exercise caution when using solvents, as they can potentially cause damage if they come into contact with the model itself. Additionally, ensure that you work in a well-ventilated area when working with chemical solvents.
To apply the solvent, consider using a paintbrush to target areas of the support structure that are close to the surface. After applying the solvent, employ a suitable tool like a small metal scalpel to wedge between the supports and the model. It's crucial to exercise patience throughout the process, as removing supports may require time and care.
It is advisable to test this method on disposable or less important materials before attempting it on your main print. This will help you familiarize yourself with the process and minimize the risk of damaging valuable prints.
Tips for Effective Support Removal
Start with easily accessible supports: Begin by identifying and removing supports that are easily reachable and less likely to cause damage to the main print. This allows you to gain confidence and develop a technique before tackling more intricate or challenging areas.
Work in small sections: Instead of trying to remove all supports at once, focus on working in small sections. This approach helps maintain control and minimizes the risk of accidentally damaging the print. Gradually remove supports section by section until the entire print is free from supports.
Use the right tools for the job: Selecting appropriate tools is crucial for efficient support removal. Pliers, tweezers, or needle-nose pliers can be handy for gripping and gently pulling off supports. For supports that require cutting, use a hobby knife or small wire cutters. Make sure to choose tools that are suitable for the material and size of the supports, as well as the delicacy of the print.
Clean up residual support marks: After removing the supports, there might be some residual marks or remnants left on the print. To clean up these marks, you can use sandpaper, files, or abrasive sponges to gently smooth out any rough edges or visible traces of the supports. Be careful not to overdo it and inadvertently damage the print's surface.
Remember, patience and careful handling are key when removing supports from 3D prints. Take your time, work methodically, and practice on less important prints before applying these techniques to critical projects. By following these tips, you can achieve successful support removal while preserving the quality and integrity of your 3D prints.
Conclusion
Practice and experimentation are crucial when it comes to support removal from 3D prints. It may take time to develop the right technique and become proficient in removing supports effectively. Each print and material may require different approaches, so it's important to experiment with various methods and tools to find what works best for your specific prints.